이 버전에는 잘못된 편집 사항이 있을 수 있습니다. 최신 확인된 스냅샷으로 전환하십시오.
필요한 것
-
이 단계는 번역되지 않았습니다. 번역을 도와주십시오
-
To aid in visualization, the two clips boxed in red are located closest to the headphone jack.
-
-
-
이 단계는 번역되지 않았습니다. 번역을 도와주십시오
-
Insert the large iPod opening tool into the seam between the front case and rear panel of the iPod, above the dock connector. The tool's edge should point toward the rear panel to prevent any accidental scratching of the anodized aluminum front case.
-
-
이 단계는 번역되지 않았습니다. 번역을 도와주십시오
-
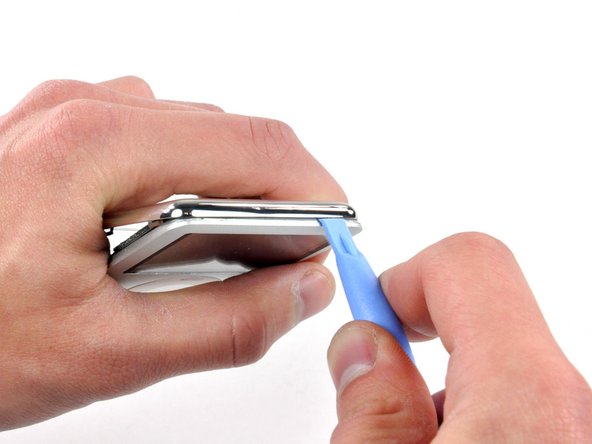
Insert a small iPod opening tool into the seam on the headphone jack side of the Nano, with the edge of the tool pointing toward the rear panel.
-
Gently enlarge the existing gap by pressing/wiggling the small iPod opening tool into the gap near each of the the two tabs attached to the rear case, pushing the clips toward the center of the Nano until both have been freed.
-
-
이 단계는 번역되지 않았습니다. 번역을 도와주십시오
-
Repeat the same procedure listed in the previous step to free the three clips along the hold switch side of the Nano.
-
-
이 단계는 번역되지 않았습니다. 번역을 도와주십시오
-
Insert an iPod opening tool into the gap near the top left corner of the Nano and work to free the three clips along the top edge of the rear panel.
-
After ensuring all tabs are free, separate the two halves of the iPod.
-
The rear panel is now free from the iPod.
-


다른 36명이 해당 안내서를 완성하였습니다.

댓글 2개
but what about the model no.
its just a third-gen ipod nano they all have the same design