소개
Replacing the battery requires a fine-tipped soldering iron.
필요한 것
-
-
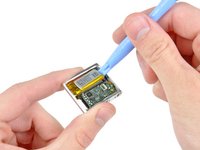
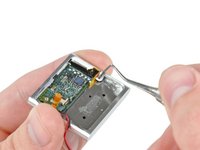
Remove the single 2.1 mm Phillips screw securing the logic board to the front case.
-
-
-
-
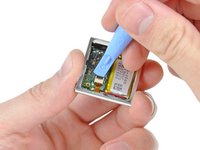
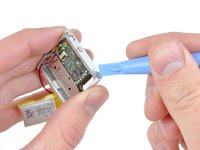
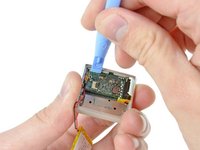
Use a tip of a sharp metal probe to scrape off the glue covering the battery terminals near the control button ZIF socket.
-
-
이 단계에 사용된 도구:FixHub | Power Series Smart Soldering Iron$79.95
-
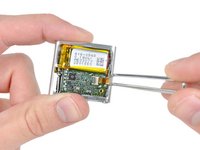
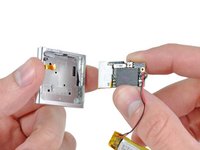
Use a fine-tipped soldering iron to heat up the battery connections boxed in red one at a time while you pull the corresponding lead away from the other side of the logic board.
-


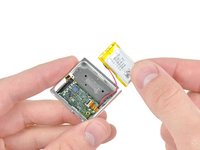


To reassemble your device, follow these instructions in reverse order.
다른 55명이 해당 안내서를 완성하였습니다.

24가이드 댓글
I have a question. Why can't the leads to the old battery be cut without pulling the board, then just solder new battery leads to the old. Seems it might even be possible to add snap in connectors at this point to facilitate future changes.
i have the same q.
imhockey -
Sure that’s a good plan also. Just make sure not to short the wires in any way and detach the negative wire first on disconnect & negative last on connecting again.
For a connector you’ll really need a very small connection then cause the space is very limited inside.
Ha ns -
I'm gonna try to remove the back cover with minimal prying to reduce cosmetic defects. The plan is to somehow remove the spring loaded clip by pushing out the lever pin, then drilling holes along the edge of the over wherre the 3 little hooks are (In this image, where the right thumb is touching. https://d3nevzfk7ii3be.cloudfront.net/ig...).
It would be great if someone could provide a closer look at where exactly the hooks are so I can position my 1.5mm drill bit better. Also, if you can to figure out how to remove the spring loaded clip mechanism without going through the 4 screws, that'd be awesome! I suspect the pin is held in place by just adhesive, but don't want to risk pushing too hard and causing defects. :(
Sam Waiban - 답글
Check my comment in the article on that specific step. You don’t have to drill out anything. You can use the clip on the shuffle itself to slightly force the back plate to bend giving enough room for the clips to snap off.
Ha ns -