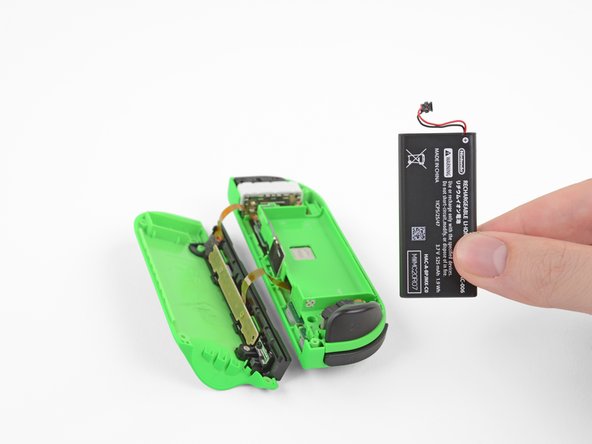
주요 콘텐츠로 건너뛰기

Sostituzione Joy-Con joystick destro

영어
이탈리아어
5 단계
Right Joy-Con Joystick Replacement, Remove the battery: 0 단계, 이미지 3개 중 1개 Right Joy-Con Joystick Replacement, Remove the battery: 0 단계, 이미지 3개 중 2개 Right Joy-Con Joystick Replacement, Remove the battery: 0 단계, 이미지 3개 중 3개
Remove the battery
  • The following two steps show the removal of the battery and the coaxial antenna cable from the midframe. These two steps make for a less cluttered repair, but are not essential. If you want, you can leave the battery and the grey coax cable in place here and proceed to step 7.

  • Insert an opening pick between the battery and the Joy-Con housing. Gently pry out the battery, which is lightly taped in place.

  • Be careful not to deform or puncture the battery—it can catch fire or explode if damaged.

I prossimi due passi ti mostreranno come rimuovere la batteria e il cavo coassiale dell'antenna dal corpo del Joy-Con. Questi due passi servono ad avere meno ostacoli di mezzo durante la riparazione, ma non sono essenziali. Se vuoi, puoi lasciare la batteria e il cavo coassiale attaccati e procedere al passo 7.

Inserisci lo strumento di apertura tra la batteria e l'allogiamento del Joy-Con. Con delicatezza rimuovi la batteria, che è tenuta ferma da un adesivo poco tenace.

Fai molta attenzione a non deformare o bucare la batteria: può esplodere o prendere fuoco.

귀하의 기여는 오픈 소스 Createive Commons 라이선스 하에 허가되었습니다.