주요 콘텐츠로 건너뛰기

Nintendo 3DS Teardown

18 단계
Nintendo 3DS Teardown: 0 단계, 이미지 3개 중 1개 Nintendo 3DS Teardown: 0 단계, 이미지 3개 중 2개 Nintendo 3DS Teardown: 0 단계, 이미지 3개 중 3개
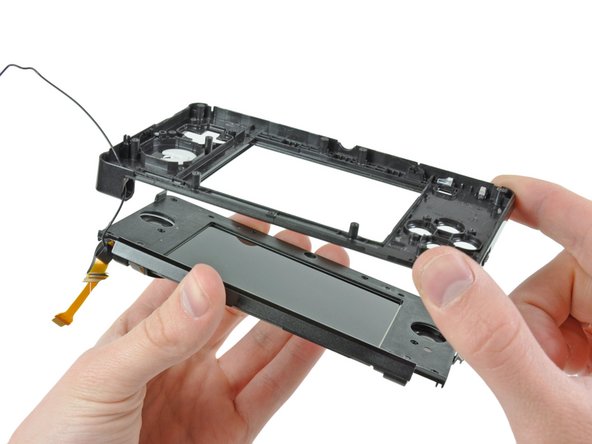
  • The rear bezel lifts off the display after removing six Phillips screws to reveal the speakers, Wi-Fi antenna, and upper LCD.

  • To continue the disassembly, we have to separate the hinges and do a bunch of cringe-inducing threading of ribbon cables through the hollow hinges.

  • Threading the upper display and camera cables through the tiny hinge tube is something that Nintendo undoubtedly accomplishes by the use of robotic machinery.

Nach dem Lösen von sechs Kreuzschlitzschrauben lässt sich der hintere Rahmen vom Display abnehmen, um die Lautsprecher, die Wi-Fi-Antenne und das obere LCD freizulegen.

Um mit der Demontage fortzufahren, müssen wir die Scharniere abtrennen und ein paar Flachbandkabel durch die hohlen Scharniere fädeln.

Das Einfädeln der oberen Display- und Kamerakabel durch das winzige Scharnierrohr ist etwas, das Nintendo zweifellos mit Hilfe von Robotern bewerkstelligt.

귀하의 기여는 오픈 소스 Createive Commons 라이선스 하에 허가되었습니다.