소개
Although not released in the United States until the 27th of March, Nintendo's 3DS was released in Japan on the 26th of February. We pulled some strings to acquire this Japanese model, and cannot wait to see what makes the 3DS tick. Join us today as we tear down Nintendo's newest and most radical handheld device yet.
필요한 것
-
-
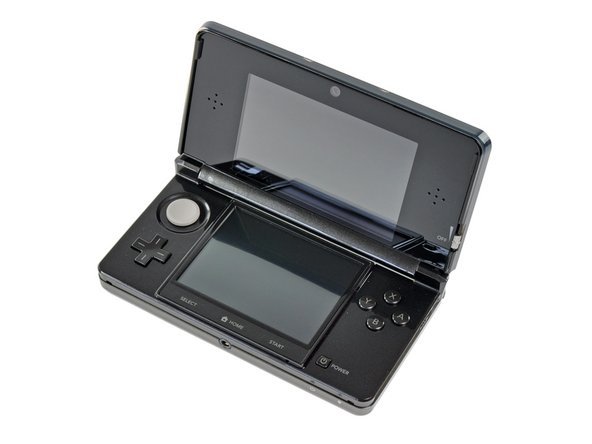
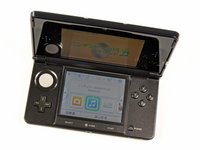
Fresh from the Land of the Rising Sun comes the long-awaited Nintendo 3DS! It's a great little device, and it feels high-quality when you get your hands on it.
-
New additions to the exterior of the latest unit in the DS line include:
-
3D top screen (duh)
-
Dual cameras for 3D pictures/gaming
-
"Circle Pad" joystick
-
IR port
-
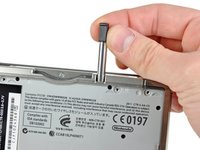
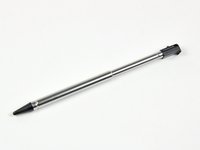
Metal stylus
-
Revised Start/Select buttons and a new Home button
-
-
-
Here's how it stacks up to the Nintendo DSi XL. Note that it trades a smaller footprint for a bit of a thicker casing.
-
Nintendo has changed up the layout on the top side of the 3DS when compared to the DSi XL.
-
The charging port has been moved to the right side and contacts have been added presumably for the charging cradle, the stylus hole is now next to the game cartridge slot, an IR sensor window has been added, and holes for a strap have been moved to the bottom.
-
-
-
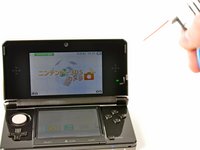
The 3D-adjustometer. You can select how deep of a 3D field of view you'd like by adjusting this slider up or down.
-
The top display of the 3DS reportedly produces 3D images through the use of parallax. A layer in the top LCD responds to adjustments in the 3D slider and changes the image slightly between each of your two eyes. When it is viewed from the recommended distance, the image appears to be 3D.
-
Nintendo is no stranger to 3D gaming, considering its past experience with the ridiculously cool and underrated Virtual Boy that uses slightly different means to achieve a similar 3D effect.
-
-
-
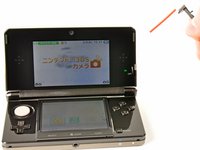
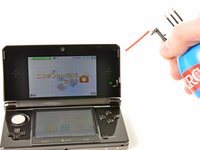
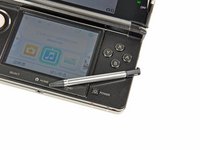
It turns out 3D doesn't show up very well when you try to take a picture of it. You can still get a good view of the touch-sensitive lower screen and the newly designed metal stylus, though.
-
Since none of us in the office are fluent in Japanese, we'll have to wait until later this month to get a 3DS that we can fully enjoy.
-
-
-
A couple of Phillips screws are all that stand in the way of us and the precious.
-
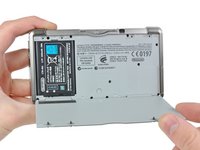
Unlike previous DS consoles, the entire back cover of the 3DS comes off as one piece rather than having a small door to access the battery. This makes for a cleaner look, but also means that replacing the battery will take a little longer.
-
-
-
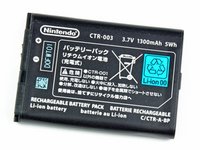
The 3.7V 1300mAh 5Wh Li-Ion battery provides a measly 3-5 hours of battery life. The sweet 3D action comes at a price. Even when playing original DS games, the 3DS lasts only 5-8 hours on a single charge.
-
The battery life is most likely diminished by the reported faster processor, dual LCD elements in the top display (to control the parallax effect), and more hardware intensive programs.
-
With the short battery life in mind, Nintendo ships the 3DS with a charging cradle for convenient charging. According to them, a full charge takes 3.5 hours.
-
-
-
-
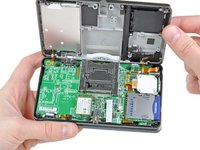
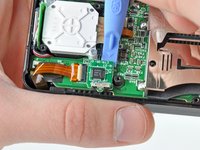
A few Phillips screws are removed with our trusty 54-piece bit kit, and the lower case lifts right off.
-
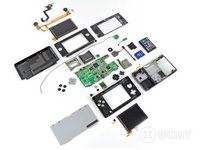
With the lower case off, we get a good look at the motherboard and its many attached components. Having items like the joystick and SD card reader on separate boards makes their replacement less costly if they are to break in the future.
-
-
-
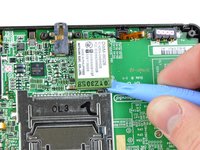
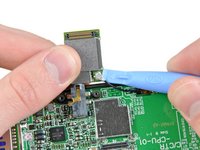
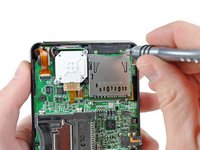
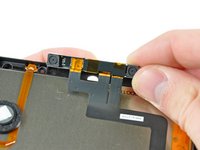
Moving on, the miniscule IR board can be pried off the board next.
-
Nobody is really certain what the infrared port on the 3DS will do just yet, but we're thinking it's for some 3DS to 3DS line-of-sight communication.
-
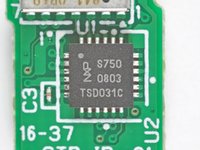
The IR controller IC is manufactured by NXP and has the markings:
-
S750 0803 TSD031C
-
-
-
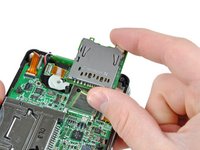
The bottom of the Circle Pad and SD card slot sit side-by-side and come out with little effort.
-
This is the first time a Nintendo handheld console has had directional buttons other than the D-pad, whereas the Sony PSP has featured an analog joystick since its debut in late 2004.
-
A 2 GB SD card comes standard with the 3DS, and can easily be upgraded to a larger capacity SD or SDHC card, an important option if you plan on snapping lots of 3D photos and purchasing games from the Nintendo eShop.
-
-
-
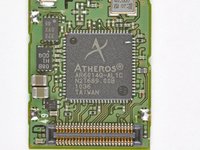
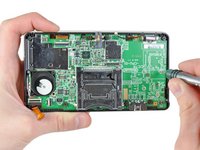
Chips we've found inside the 3DS motherboard (click here for high-res version):
-
Nintendo 1048 0H ARM CPU
-
Fujitsu MB82M8080-07L 128MB FC-RAM
-
Toshiba THGBM2G3P1FBAI8 2 GB NAND Flash
-
Texas Instruments PAIC3010B 0AA37DW
-
UC CTR 041KM73 KG10
-
Invensense ITG-3270 MEMS Gyroscope
-
ST Micro 2048 33DH X1MAQ Accelerometer Model LIS331DH
-
-
-
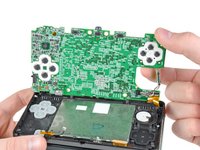
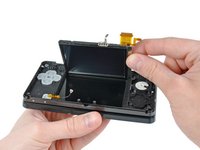
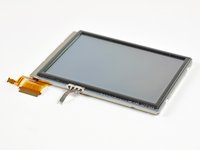
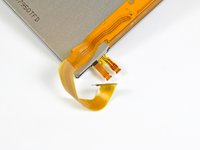
The lower LCD assembly lifts out without any trouble.
-
The 2.42" x 1.81" LCD with 320 x 240 pixel resolution is capable of displaying 16.77 million colors.
-
The digitizer on the bottom display is much thicker than those found on most cellphones, most likely due to the fact that the touch display is used with a stylus, rather than a fingertip.
-
Also, the lower microphone can be pulled out of the case at this point.
-
-
이 단계에 사용된 도구:Heat Gun$24.99
-
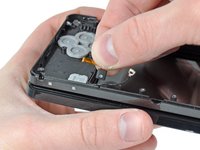
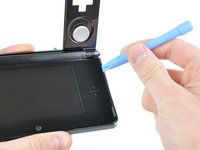
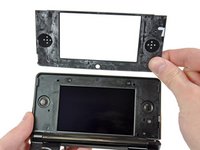
Whereas older versions of the DS had four rubber screw covers on the front display bezel, Nintendo opted for a sleeker approach for their new system by adhering a front panel to the bezel to hide the screws.
-
A little bit of help from a heat gun and a plastic opening tool gives us fairly easy access to the upper display.
-
-
-
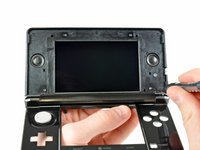
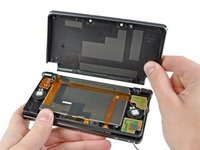
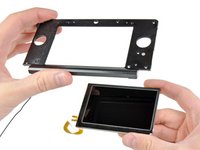
The rear bezel lifts off the display after removing six Phillips screws to reveal the speakers, Wi-Fi antenna, and upper LCD.
-
To continue the disassembly, we have to separate the hinges and do a bunch of cringe-inducing threading of ribbon cables through the hollow hinges.
-
Threading the upper display and camera cables through the tiny hinge tube is something that Nintendo undoubtedly accomplishes by the use of robotic machinery.
-
-
-
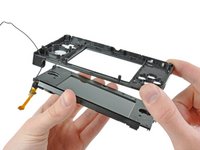
The stereo speaker assembly provides the
tight bass and crisp highsadequate, tinny sounds people have come to expect from portable devices. -
These speakers play more than just game sounds; the Nintendo 3DS is compatible with both MP3 and AAC files, but we doubt it will be replacing anyone's iPod in the foreseeable future.
-
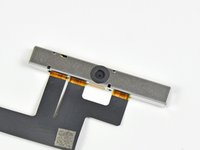
The speaker assembly ribbon cable also contains the 3D field of view adjustment slider and the dual camera status LED.
-
-
-
After removing the speakers, the top LCD module comes right out.
-
There's three cable connectors for this LCD -- to display the image, as well as for the parallax barrier that gives the "3D" effect in the 3DS' games.
-
Our friends over at Nikkei Electronics' Tech-On disassembled the LCD panel a little bit further than we did, finding six discrete optical elements.
-
-
-
Nintendo 3DS Repairability Score: 5 out of 10 (10 is easiest to repair)
-
The battery is easily swappable by removing the back cover.
-
No proprietary Tri-Wing screws were used, just Phillips #00.
-
The top display's cables are routed in such a way that it makes them quite frustrating to remove without ripping them off, and just as difficult to re-seat properly during device reassembly.
-
There's tons of little components inside the 3DS, which may potentially cause problems if you happen to lose one while performing a repair.
-
The majority of connectors are ZIF, and it's difficult to ensure each one is connected properly without reassembling the whole thing and starting up the device.
-
The headphone jack and charging connector are soldered to the motherboard, meaning you need to take out your soldering iron if you accidentally break them.
-


댓글 18개
Lack of details : "Removing the remaining pesky screws securing the motherboard to the lower case." (where and how many?)
********Note: If your top or bottom screen was working before disassembly and doesn't work after reassembly, then it's likely that the connector is loose or dirty or damaged or not clipped or PLACED UPSIDE-DOWN. I had this issue with my Super3DS XL(2015 New3DS XL) and it turns out that the reason why my top screen wasn't working after put together, was because I had the top LCD connector upside-down. After I correctly put the connector in, It worked again! :) ********
Thanks for great guide - I could'nt find the access to the screws on the top screen until I read your guide.
Only problem I had was that I rounded out 2 of the screws in Step 9 and had to carefully drill the heads off and remove the shanks later. So I strongly recommend using the correct and good quality screwdriver as these are very tight
********Note: If your top or bottom screen was working before disassembly and doesn't work after reassembly, then it's likely that the connector is loose or dirty or damaged or not clipped or PLACED UPSIDE-DOWN. I had this issue with my Super3DS XL(2015 New3DS XL) and it turns out that the reason why my top screen wasn't working after put together, was because I had the top LCD connector upside-down. After I correctly put the connector in, It worked again! :) *********
Where does that black plastic piece directly above the blue SD card go? I can't seem to find a picture of it in place