필요한 것
-
-
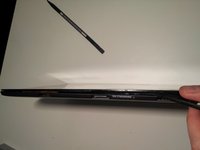
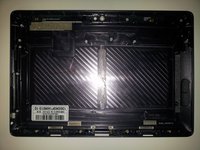
This Transformer Pad Infinity has crossed the wrong desk and is about to be torn asunder. Let the Games Begin!
-
First, turn the power off :)
-
-
-
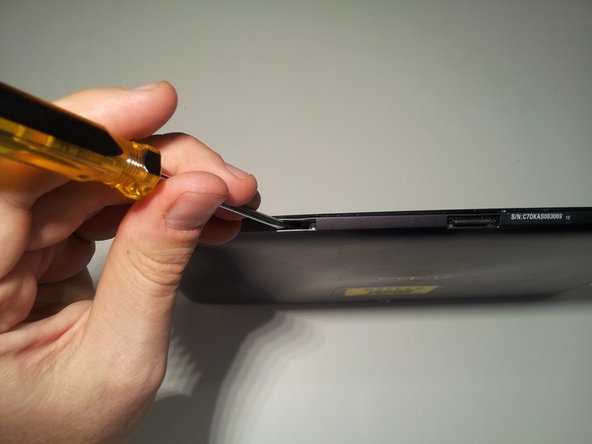
Insert a small flat head screwdriver into the 2 docking station guide ports on the bottom of the tablet.
-
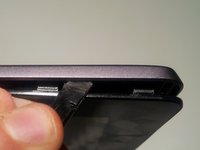
There is a small tab inside the bottom of the port. Use your screwdriver to push the tab to the right until it clicks. This unlocks the bottom tabs that hold the screen to the casing.
-
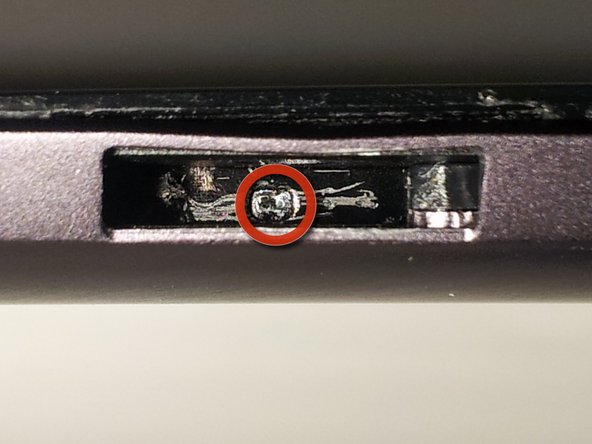
If you have successfully unlocked it, you should see a small arrow in the bottom of the port that points to the left. This indicates which way to push the tab to relock the tabs during re-assembly.
-
Be sure to unlock the tabs in both docking station guide ports.
Put the head of your small screwdriver into the small, almost circular hole in the tab, and push hard to the right.
-
-
-
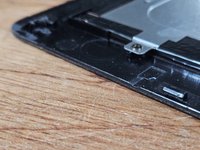
Here is a look at the locking assembly that you disengaged during Step 2.
-
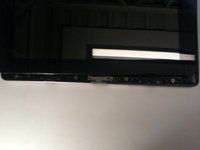
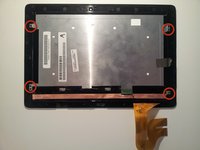
Next, use your spudger or other opening tool to push upward (towards the screen) on the small plastic tabs that are located on the top of the docking station guide ports. This should push the screen away from the frame and provide you enough room to insert the flat side of another spudger to start freeing the bottom of the screen from the case.
-
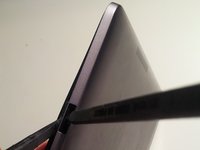
Work the flat end of your spudger along the bottom edge of the tablet to disengage the plastic tabs from the locking mechanism inside.
Great write up.
On step 3.2 - I found a credit card to work effectively without damaging the locking tabs. Starting from the bottom near docking ports, slide card under screen and work your way around. No scratches, no damages tabs
Great recommendation! I would like to add that you should angle your credit card (or used-up gift card) to be as normal to the screen (90 degrees) as possible when sliding the card around the sides. You are trying to push the aluminum case away from the screen edge for a smooth release.
Skroob -
Hardly, but i found one
-
-
-
Next, use your spudger to pop open the plastic tabs located on either side of the tablet. There are 4 tabs on each side located in the same position on each side.
-
BE CAREFUL! These tabs are fairly fragile. I managed to break just about every one of them on my tablet :(
-
I think the safest way to open them is to apply light pressure to the case and pry it away from the screen until the tab pops free (not just rip it open like I did.)
-
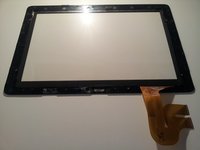
You should now be able to hinge the screen open along the top edge then disengage it completely from the body.
Thank you for the great guide. I was able to preserve all 8 tabs. My recommendation : start with the bottom part starting from the keyboard ports (as indicated in the guide). Then go FIRST TO THE RIGHT SIDE of the screen (no ports there means it's easer to insert the spudgers), starting from the bottom obviously. Then finish with the left side.
The glass is impressively resistant, so you can apply preassure to the case, you won't damage any of the two.
-
-
-
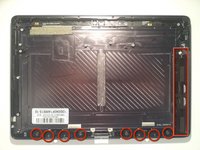
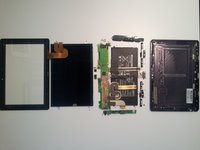
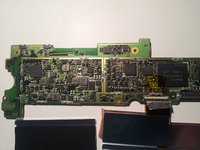
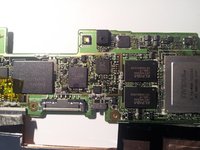
Now that the hard part is done, lets see some guts.
-
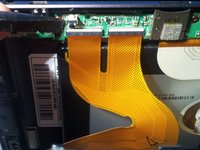
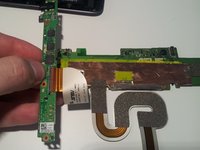
Use your spudger to release the 2 digitizer ribbon cables from the mainboard. They are located on the left side of the tablet between the micro-HDMI and the microSD slot.
-
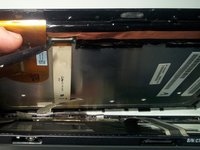
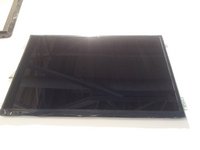
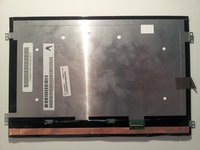
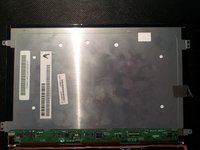
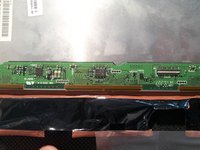
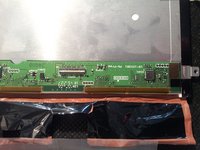
Use your spudger to release the LCD cable from the back of the LCD.
-
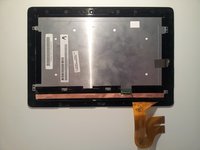
You should now be able to separate the screen assembly from the body of the tablet. Set it aside for later disection.
-
-
-
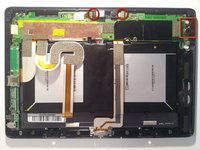
The inside of your tablet will more than likely look less battle scarred than mine at this point. I decided to take my photos during the re-assembly stage - thus all the scars.
-
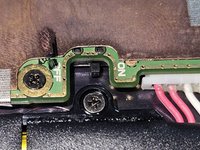
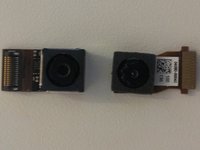
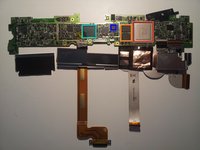
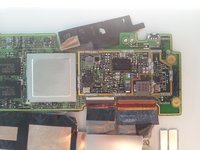
To remove the front facing camera (right,) use your spudger to unlock the ribbon cable and slide the camera out.
-
To remove the rear facing camera (left,) unplug it from it's socket by applying light lifting pressure to the back of the cable.
-
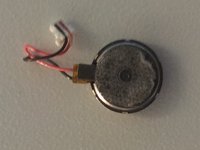
Remove the backup battery on the right side by unplugging the cable from the motherboard with your spudger and then prying it out. It is glued down lightly with adhesive.
This thing is not a backup battery, it is the vibration motor / crystal, my TF700 was "vibrating" for long periods of time, I teared it down, removed it, turned it on again and the all the vibration was gone (even those that were ok, like moving from sound to vibration).
Emerson Jr - 답글
-
-
-
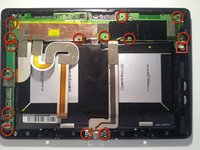
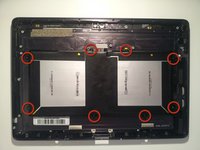
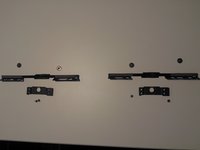
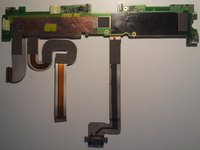
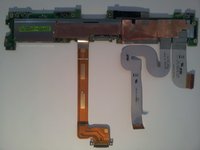
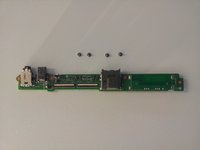
We can now remove the motherboard, daughterboard, and dock connector by removing 14 screws.
-
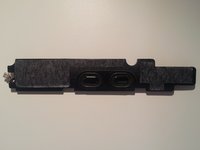
Be sure to unplug the speaker plug from the motherboard before removing it.
-
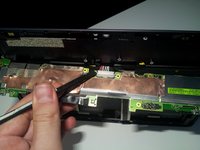
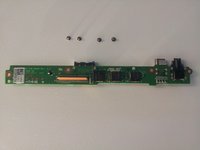
Flip The motherboard from the top edge of the tablet down (towards the battery) to reveal the battery connector. Unplug it with light pressure from your spudger.
-
Then disconnect the motherboard from the daughterboard by unlocking the ribbon cable on the back side of the daughterboard.
-


댓글 33개
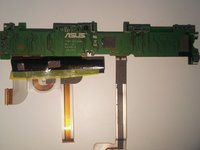
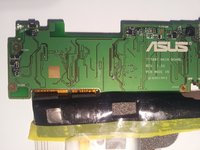
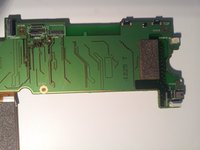
Does anyone know what the internal on/off switch does on the motherboard? Right next to the battery connector. How can you see that in a tear down and not mention it?
It is a master on/off switch. When the switch is flipped to the off position, the tablet will not operate. You can see the switch labels on the second picture of Step 13.
Matt -
Ya its for when your doing work inside the tablet your supposed to flick that off so you dont accidentally short anything. Like the on/off switch on your power supply on the back of your desktop
Thanks for this teardown! Could the "mushy" power / volume buttons be due to poor placement of the buttons / board? Could slight nudging of the board in one direction or the other help the "mushy" buttons?
Jon Pileot - 답글
Thanks so much for answering that. I did see that it was labelled "on/off" but wasn't sure what it switched. The best guess I could come up with was to completely override the cameras, like a factory set feature for corporate/gov purchases. Your answer makes much more sense.
There were severel TF 700 sold which show a not completely fixed display. In one ore more positions of the display you can press it slighty inwards and it "creaaks"
After seeing the broken tabs in step 4 I think that these tabs could also break during assembling in the factory. That would explain the creaking display. I wonder how they do it for repair at ASUS service if the tabs were that fragile (provided they have a service ;) )
Does anyone where the motor for the haptic feedback and why it might make a clicking sound? I am thinking about tearing down my tf700 if it's just a matter or reseating the motor.
Hi, in the Step 5, exactly, how to do to release the 2 digitizer ribbon?
Should I lift the piece of black color by the front or back?
or Should I slide the piece of black color?
You very gently lift the black tab from the ribbion side. If the black tab doesn't lift very easily, examine it very closely for about an hour. After careful consideration of how the piece may have been engineered, you could try to gently slide it towards the ribbion. If the black bar did manage to slide you should lift it gently up off of the ribbion. As you slide ribbion out take note of which way the contacts are facing if you plan on reassembling your device later.
mark -
Actually you lift ever so gently on the white half- to the rear of where the cables insert. Those things are so easy to break, & impossible to replace
Like Wayne I have been searching long & hard for a replacement battery. I even got ripped off by an eBay seller who listed a "NEW OEM" battery that looked like it had been run over by a truck! Does anyone know of a reasonably priced source for these batteries? Thanks! I
danpobrien - 답글
I have seen many post about the TF700T wont lock into the dock any more, while you had it open could you see what might be the problem. Thanks and Thanks for a great guide.
Just replaced my battery (now available on eBay for around $25), and I only had to go to step 3, wiggle the old battery out, the new one in, and reverse, way easier than expected, thanks for the awesome write up! In order to avoid breaking tabs (I didn't break one, yay), using a good metal spudger (high quality, worth every penny, way thinner and stronger, and I haven't had an issue with scratching yet), and when you are separating the display from the case, pry the aluminum case outwards with one spudger while lifting the display glass up with the other. Comes out in about a minute easily. Thanks again for blazing the trail, especially the warning about the tabs, I may have given up and sold the thing as broken otherwise.
Mike Craft - 답글
I have a TF700t which has broken the charging/data connection between the tablet and docking station. I had been unable to lock the docking station in place for some time which led to the screen getting cracked when the unit was closed and in a bad but came loose. This has also led tho the charging connection breaking. The tablet was connected to the docking station and closed but was knocked off a desk. The fall broke both connectors in the tablet and the docking station.
Can anyone suggest how I might find replacement parts?
Hi Guys. I used this to help me replace a digitizer. the first time, I didn't realise the machine was on and shorted out my LCD screen (which had been undamaged!! After getting a new screen and cable, I have connected it all, but now find that the backlight works on the LCD but not the image!!! Is this an issue with the cable or the screen? Thanks, Nick
Hi Nick, I'm having this same issue. Did you ever find what the problem was?
Steve -
i cant turn it on, only vibrating after 10-15 sec, when i plugged the charger tle light were green but nothing happens, i cant turn it on . help
HI. I ve had a problem since the first 40 days with my TF700. The screeen would blank out randomly. It looks like a bad connection because when i press the screen close to the bottom of the unit the image would come back. I dont loose light, just the image. Even when blanked out , you could see that the screen was lit. I didnt sent it to repairs because i bought it when i was in Canada and found out (SURPRISINGLY) that ASUS is not covering worldwide warranty (Lost some major points on my future buys). So recently (ive been able to use it for 14 months that way, not so troublesome), i sent it to a local repair store. After 25 days the guy called me back to get the tablet saying he was not able to make it work. The bad thing is it doesnt work at all now.
I oppend it up very easily using the tutorial and found out the 2 side ribbons were disconnected and the one close to the bottom (the LCD ribbon cable) had no docking unit anymore and it was linked up wire by wire with welding wires. Two of them were acctualy broke. So, i relocated the side ribbons (digitizer ?) and i cant do the wire welding myself. Its not working as i imagined- i can feel the vibrattion when it turns on , but no image at all. So the question, can the locking case for the ribbon be replaced ? if not, can it work with the proper wire weldings ?
Hi, thank you for this write up. I have a Asus vivotab smart and I'm considering to try upgrade the internal storage. On yours, were you able simply pry off the storage chip, or was it soldered on? One more question you might know, will the new micro sdxc 128gb or 256gb work in the vivotab smart? Thanks
Ray F, 15-12-2014
I have a brick 700, I was tool to replace logic board. Would that be the motherboard?
Also can you upgrade memory from 16 to 32gb ?
Thank you very much for this writeup. TF700t had gone into a very deep sleep and would not power on although I did notice amber light when it was discharged after a month long out of country visit and a green followed by a full charge. It needed the first 3 steps here and little internal power switch helped resolve issue (discharge and power on)
My TF700 turns on, but I cannot launch apps, then after several seconds, it turns off and recycles into the start process. Once it gets into that loop, it will not turn off, until battery dies. Is there a fix? If not, how can I get my photo's etc?
Jesus Cruz - 답글
There are 2 small rectangular rubber spacers. Do you know where they go? Could not tell by the pics. Thanks. Great teardown.
As I was jiggling the battery loose from the adhesive I accidentally disconnected the charging cable from the Motherboard, and can not figure out how to reconnect it. It appears to be connected on the underside, but I can't see a socket or locking mechanism to hold it secure.
Joe Lombardo 207-2017
Previous comment I was able to remove Mother Board assembly and reconnect docking/charging cable, and actually get it back together, with the exception of a small rectangular rubber bumper which fell out from somewhere? But on the plus side new battery charged fully and I was amazed, LOL downside is the touch screen will not respond now. Tried the cold start and reopened case and checked digitizer cables and also LED cable but all were connected solidly. Any suggestions? for getting touch screen to respond. Before teardown and battery replacement all was working well, just old battery was not holding charge for long? Thanks for any help
Joe Lombardo