필요한 것
-
-
The following step can be challenging and time consuming. Be sure to go slowly and have patience to prevent damaging your iPod.
-
Use an Exacto knife to separate the glue holding the USB port on the iPod. Run the knife along the seam between the two sections of the iPod until the glue is separated. Expect to run the knife along this edge 20-30 times before the glue will be entirely freed.
I'm curious if anyone has ever tried soaking this send of the shuffle in 99% isopropyl alcohol to disolve the adhesive and allow the USB to pop off more easily. Might give it a try, but I'm guessing the lettering might also come off from that.
-
-
-
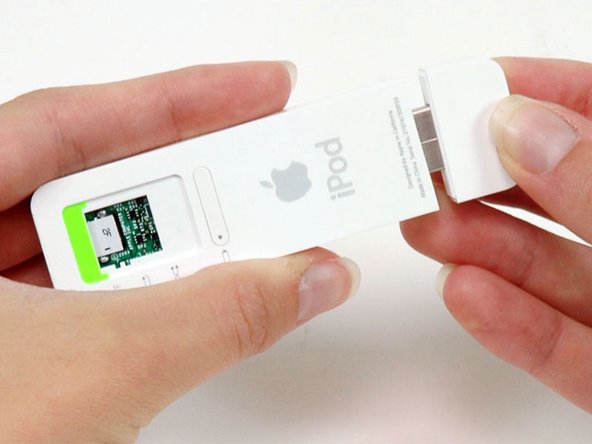
Use a spudger to push on the headphone jack and slide the USB port out of its housing.
-
-
-
-
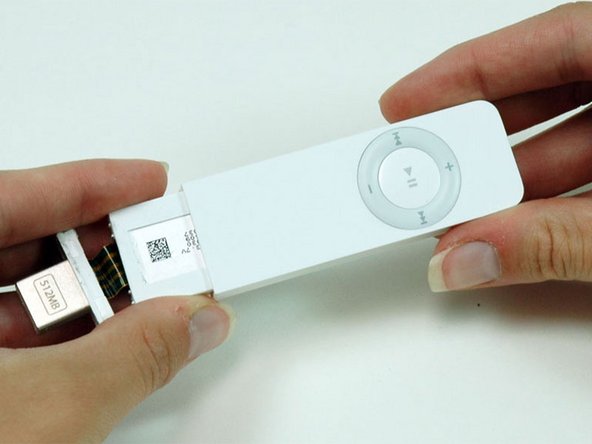
Continue to slide the iPod out of its casing by using a spudger to push on the logic board near the headphone jack.
You can place a piece of tape over the battery indicator in this step to prevent it from falling out in Step 9. :)
-
-
-
Use a spudger to flip up the black plastic tab holding the USB port ribbon in place. The black tab will rotate up 90 degrees, releasing the ribbon cable.
-
-
-
Carefully peel the yellow USB ribbon up from the battery.
Start by lifting from the port end of the ribbon; the tape is strongest and easiest to pull up from there. I pulled up from the corner shown in the picture and ended up ripping the tape. :'(
-
-
-
Slide the USB ribbon out of its connector.
-
Lift the USB port and detached ribbon cable out of the iPod.
If you are only replacing the battery there is no need to remove the memory board. Cut the wires from the old battery as close to the battery as you can. Then cut the black wire from the new battery so that it is about 1/2 inch long. Strip the ends about 1/8 inch and solder. Slip a piece of 3/32 heat shrink tubing over the joint. Now cut the red wire so that it is about 1/2 inch long and strip as above, solder and cover with heat shrink tubing. It works!
If replacing the battery in the first generation , what are the spec's on the battery in order to locat one for replacement. Thanks.
-
-
-
Gently pull back the white plastic framework to free the left edge of the logic board. Pull up on the logic board slightly to prevent the logic board from falling back into place.
-
-
-
Turn the iPod over and use your finger to push the battery through the hole in the casing. The battery is attached to the plastic framework with a mild adhesive.
-
Lift the battery and logic board out of the iPod.
Yeah, how is the battery connected to the logic board? — is it soldered, or what?
I completed everything and re-soldered in a new battery and verified everything worked. Sadly, pushing it back into the case, one of the tiny SMT parts broke off and that was the end of that. Upon re-disassembly I also discovered that the tiny flex cable had cracked where it makes a turn, severing the USB connections.
The guide was fine (although it should have included the critical actual battery replacement part), but the device really isn’t designed for service and it’s high risk to take it apart.
After reading these instructions, I have decided to send it some place for repair. do you have any idea who could replace the battery?
-
-
-
Peel up the translucent tape securing the memory board to the edge of the white plastic framework. It is only necessary to peel up the tape on one side, as the other side will be freed while removing the memory board.
-


팀

댓글 3개
Great step-by-step instructions! I’ll probably never teardown my iPod, but it’s good to have the instructions!!
Andy Cheng - 답글
the markings on my battery are:
502030
492528
+500092
'502030' is the battery size you want to get.
To take apart my iPod Shuffle, I didn't need a knife, but used isopropyl alcohol in between the seams, then wiggled it for a while. a few small 'cracks' were heard, and then it was loose. your mileage may vary.