주요 콘텐츠로 건너뛰기

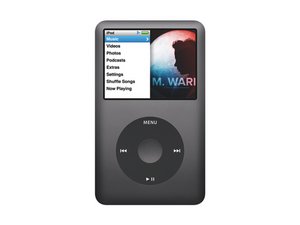
모델 번호 A1238 / 80, 120, 또는160GB 하드 드라이브 / 검정색 또는 은색 금속 외형

900 질문 전체 보기

How to solder battery connector fact to logic board?

Damaging the battery conector on the logic board seems to be a common error people make when taking apart a iPod classic for the first time.

Has anyone successfully reattached this to the logic board? can it be done? If so how? Where can I find someone to solder it for me?

I know I can buy a new one but I'd like to save some money.

답변되었습니다! 답변 보기 저도 같은 문제를 겪고 있습니다

좋은 질문 입니까?

점수 4
댓글 달기

답변 5개

선택된 답변

It is a tricky repair since the connector is an SMD part. It is soldered on top of the board. This requires some special skills, but it is doable. Check this video for more insight. You can get the part from places like this. If you are not sure about your skills of getting it done, you might just want to try a TV repair shop and see if they can do it for you. If you have the part and the board out of your ipod, it should be straight forward and not to expensive. Make sure that the cost for the part and the repair do not exceed that cost for a new logic board, so I would think no more than $50 together. Hope this helps, good luck.

해당 답변은 도움이 되었습니까?

점수 3

댓글 3개:

I took it to a pro and he said that part of the board pulled up with the connector. He said it could be repaired but since iPods are so tightly put together the repair would probably be damaged during reassembly. I ordered another board on eBay. Hopefully it works after investing in a new board.

jmorgan76, thank you for accepting my answer. I do know that this happens very frequently, have had a lot of boards with the same thing in my collection. Anyhow, I am convinced that with a new board your iPod will be working just as it should. Good Luck to you.

I actually ended up using a little fine-tipped USB soldering iron, plenty of flux, and some leaded solder to reconnect mine to the board after it came loose. Had to be very careful to not melt the connector housing itself, and didn't feed solder in normally - instead I tinned the pads, connector pins, and then my iron, which I just gently dabbed onto the correctly positioned pins once they were on the board. Used a bit of epoxy to hold it in place after testing the connection. Hopefully it holds out!

댓글 달기

Do not attempt it with a solder iron. If you have the gsm version I guarantee your going to dislodge one of the parralelle resistors that are placed directly in front of the center pins. A heat gun will also melt the plastic on the connector preventing the male end of your battery from properly fitting. Here is a painfully simple trick I didn't discover until I destroyed a logic board that's almost impossible to screw up. Pick up a circuit writer conductive pin from radio shack or online. Get some 91% isopropyln. Your also going to need a pair of tweezers and some cotton tips.

If the connector is already removed you'll need to make sure each copper trace for each pin is exposed. Hopefully you still have all 4 pins in tact and undamaged.

Throw the connector in a little cup of iso while you clean the area where the battery connects. Be generous on the iso. If you touch anything metal with your fingers it must be 're cleaned with iso and a q tip.

Get a little practice with the conductive pin so you understand how it flows.

Grab the battery connector with a pair of tweezers once the iso has dried and apply conductive paste to each pin individually.

Like wise also apply conductive paste to each pin on the motherboard side.

The great thing is that if you mess up, the conductive paste can be completely removed and reapplied as this stuff takes 24 hours to dry.

Once you have tinned both sides with paste gently place the connector onto The board aligning each pin separately.

If you are happy with the alignment make sure there is no remaining

paste shorting any pins together. Carefully inspect the sourrounding areas of the connector ensuring no other chips ar eshorted together with paste you may have dropped. Let the conductive paste dry for 24 hours.

Once dried I like to use some epoxy on both plastic sides of the connector. As the paste is not as strong as solder.

At the same time I also apply additional paste to each pin a second time after cleaning
해당 답변은 도움이 되었습니까?

점수 3
댓글 달기

For the iPod Classic battery connection FPC connection, they are sold, are repairable, and are not difficult to do with a solder iron, thin tip will get it done. The part is easy to remove, easy to solder on for someone with experience. Take it to a professional to get it done. There are times when some of the solder pads are lifted but even then, they can be repaired, just some re-routing of the connections using thin wire. Avoid the epoxy and use solder, repair as it was meant to be repaired, don't rig it up. You will just waste time. A professional can get it done with solder, using an iron. https://www.facebook.com/Zfixit/photos/p...

해당 답변은 도움이 되었습니까?

점수 2
댓글 달기

2019 battery socket available here https://www.ebay.com.au/i/323651290234?c...

and a good video here https://www.youtube.com/watch?v=zYKKxK_P...

해당 답변은 도움이 되었습니까?

점수 0

댓글 1개:

update 28 Apr 2022 - Battery socket link is dead and if this one goes dead too just search iPod classic battery connector on Ebay https://www.ebay.com.au/sch/i.html?_from...

댓글 달기

Hi

It’s actually easier done than said!

What I did was I tinned the pads with a little more solder than what I usually would on the 1st and last pins on the side with 3pins then flowed solder onto the rest

Hopefully this answers your questions

If you need any help with it or have any more questions please ask

Thanks:)

해당 답변은 도움이 되었습니까?

점수 0
댓글 달기

귀하의 답변을 추가하세요

Justin 님은 대단히 고마워 할 것입니다.
조회 통계:

24 시간 전: 0

7일 전: 13

30일 전: 63

전체 시간: 14,589