주요 콘텐츠로 건너뛰기

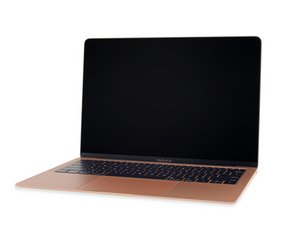
오랫동안 기다려온 인기 MacBook Air의 참신한 업데이트는 Intel Core i5 프로세서, Retina 화면 업데이트, 그리고 기타 수 많은 변경 및 업데이트를 포함합니다. 2018년 11월 7일에 출시되었습니다.

149 질문 전체 보기

Can I reuse my Broken MacBook and put my Raspberry pi inside of it

Hi Guys, I have completely broken my MacBook Air Retina 13.3-inch (2018) - Core i5 (I killed the logic board with water), and Apple and I say they don't want to fix it. But I do have a Raspberry Pi 4, so would I be able to put my Raspberry Pi into my MacBook and use my MacBook as a shell for the Raspberry Pi?

답변되었습니다! 답변 보기 저도 같은 문제를 겪고 있습니다

좋은 질문 입니까?

점수 1
댓글 달기

답변 2개

선택된 답변

Hi Elias,

Sounds like a fun project! I don't really have any help to offer you, but the concerns I have would be with figuring out how to interface to the existing hardware. Speakers shouldn't be a problem, but that's about it for easy connections.

With regard to power, I assume it would be easiest to just run a power jack to the side of the of the case, but if you have provisions for battery power that would have to be fit inside the case in place of the existing battery.

Other than those items, the biggies are the display, keyboard and trackpad. It's going to be interesting to hear how the keyboard and trackpad connect up, because I'm guessing Apple most likely uses proprietary interfaces, although they may be connected via something like an I2C or possibly a USB interface. Alisha (@flannelist) may know more about it; they're our local Apple expert, having worked as an Apple technician.

In my mind the biggest challenge is going to be the display. It's hard to say whether you're going to be able to find any kind of interface between it and your Raspberry Pi. On one hand it's entirely possible they used a somewhat standard interface, but it's just as likely that it's specific to Apple and will only work with some sort of Apple controller. @oldturkey03 might know more about that.

Anyway, those are the major issues I can think of; of course the camera could be a bit of a puzzle; not sure how that connects up. I'd love to have you update this as you work and let us know what you find out and how the connection goes.
해당 답변은 도움이 되었습니까?

점수 2

댓글 7개:

@eliassamuel Sorry my friend, but I'm not conversant with the touch bar so I can't help. There are a lot of really smart people on here and hopefully one of them knows the answer to your question.

@eliassamuel just for my own understanding here. You are considering of using the Touch Bar in its original function on a Raspberry Pi? What is your plan in its totality?

hi @oldturkey03, forget about what i mentioned about the touch bar, i just realized it would be a bit to difficult and pointless

@eliassamuel right! :-) So you'd be looking at basics like display, keyboard and trackpad. Did you make headway yet?

@oldturkey03, yeah, it would also try to connect the battery, which would be a pain, and no id, don't think I have made the headway yet (I don't know what that is)

댓글 2개 더보기

댓글 달기

One you have accessed and saved the information, we'll convert it back to a comment since this is not an answer.

Block Image

Block Image

Block Image

Block Image

and Eliassamuel Circuit

해당 답변은 도움이 되었습니까?

점수 1

댓글 1개:

Thank you. How would I make space for the pi and lodge it somewhere in the metal casing?

댓글 달기

귀하의 답변을 추가하세요

Elias Samuel 님은 대단히 고마워 할 것입니다.
조회 통계:

24 시간 전: 3

7일 전: 42

30일 전: 77

전체 시간: 77