소개
Here I'll go through the assembly instructions for the BLV Ender 3 V2 kit.
Note
I have added parts that are not part of the kit so things like the hot end assembly might be fairly vague.
필요한 것
-
-
Here you can see all the parts that should be included in the upgrade kit.
-
The green bed plate will not be used in this build however it can be used if you decided you wish to use the original Ender 3 v2 bed instead of the provided Prusa MK3S bed.
 FixBot에 문의하기
-
-
-
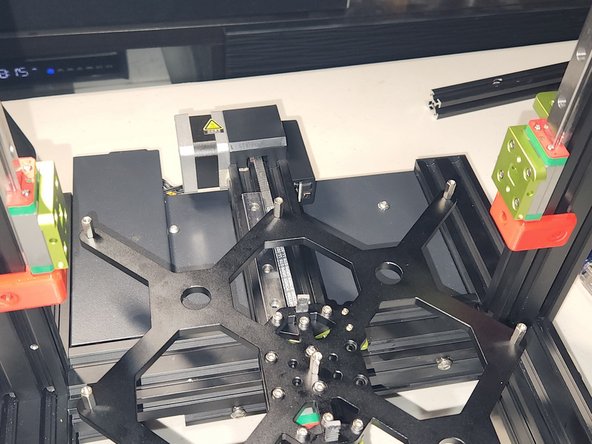
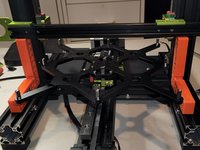
I figured this out after the first assembly but it's easier if you remove the Y 4040 extrusion off the frame and install the motherboard enclosure into the frame.
-
It is a very tight fit especially with the bed still on the printer.
-
6x M3x8 countersunk screws and 6x T-nuts secure it to the inside of the frame.
-
Secure the motherboard enclosure into the frame with 4x M5x10 button head screws on the front where you tapped the threads
-
2x M3x8 socket head screws and 2x T nuts secure it to the underside of the Y 4040
-
-
-
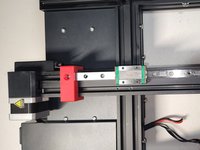
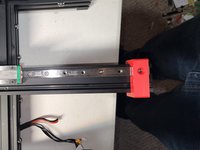
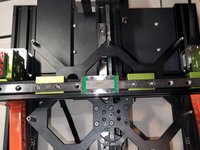
Using 2x 2040 jigs, 6x M3x6 socket head screws and 6x M3 T-nuts mount the linear rail to the Y 4040.
-
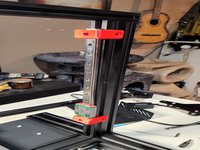
Using 2x 2020 jigs, 6x M3x6 socket head screws and 6x M3 T-nuts, mount the linear rail to the Z 2040 extrusions. The gap at the top should be 15mm.
-
Do this for both sides.
-
-
-
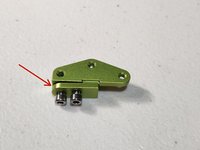
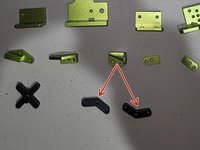
Take 2x Y-Axis Belt Lockers and Belt Locker caps. Using 4x M3x10 socket head cap screws partially attach the caps to the lockers.
-
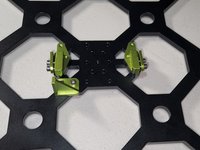
Secure the Belt Locker Assembly and 2x black spacers to the bed plate using 6x M3x14 socket head cap screws.
-
Note the position of the belt lockers and endstop bump stop. The side with the bump stop will go towards the rear of the printer.
-
-
-
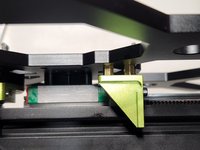
Thread in 2x M3x6 brass standoffs into the bed plate.
-
Secure the end stop bump stop to the brass standoffs with 2x M3x6 Socket head screws
-
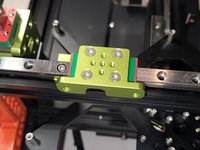
Take your bed spacer and secure the bed frame and bed spacer to the Y MGN sled with 4x M3x14 socket head screws.
-
Note the position of the bed frame. The MGN carriage screws are on the left and the belt lockers are on the right of the MGN rail.
-
If you removed it during disassembly reinstall the Y stepper motor and Y belt tensioner.
-
Reinstall the Y belt
-
Thread in 9x M3x10 standoffs into the bed frame and tighten them down.
-
-
-
-
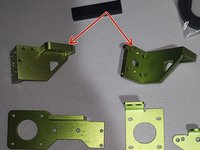
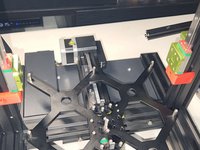
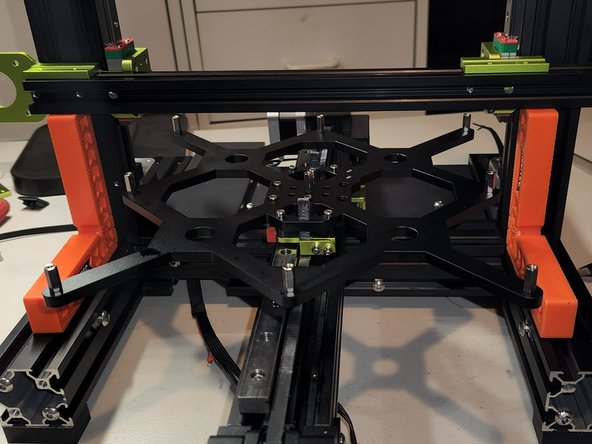
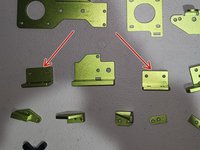
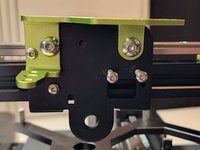
Secure the Z stepper motors to the 2 new metal brackets with 4x M3x12 countersunk screws.
-
Secure the Z stepper metal brackets to the frame with 4x M4x12 socket head cap screws and 4x M4 T nuts. The Z steppers can sit flush on the top of the Y 4040.
-
Check the alignment. Make sure the stepper motor is straight in the mount.
-
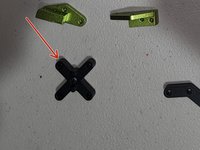
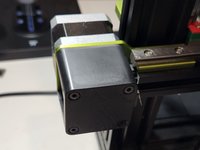
Mount the 2x spider couplers to the stepper motors.
-
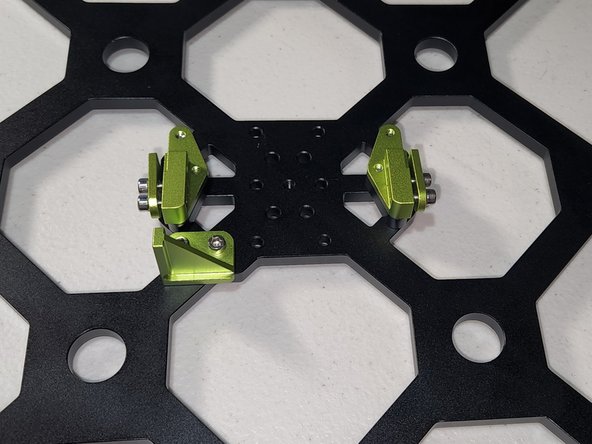
Take your Left and Right Z MGN brackets and thread them into their MGN carriages with 8x M3x6 socket head cap screws. We will tighten them during another step.
-
-
-
Attach the POM leadscrew nut to the X axis mounts with 4x M3x14 socket head cap screws or button head screws, 8x M3 washers, 4x M3 lock washers and 4x M3 nyloc nuts. Do not screw them completely tight. You'll need to make some minor adjustments so you want to be able to move them back and forth.
-
Thread in your 8mm lead screws through the POM nut into the spider coupler. Do not tighten any screws yet.
-
-
-
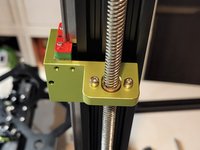
Insert the bearing into the bottom side of the bearing block and tighten the small set screw to secure the bearing.
-
Mount the bearing blocks to the frame with 4x M4x20 socket head screws and 4x M4 T nuts.
-
Again most of the screws will be loose or just snug, they will not be completely tight yet.
-
-
-
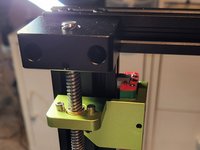
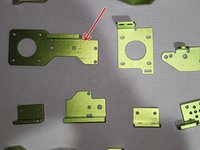
Take the right 2020 mount and attach it to the right Z stepper mount with a M3x10 button head screw and M3 lock washer, On the other side a M3x40 socket head cap screw into a T nut and a M5x8 button head screw into a M5 T nut.
-
Picture has a M3 socket head screw but I figured out after the fact there could be clearance issues
-
-
-
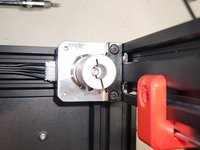
Attach X stepper mount to the X 2020 with 2x M4x16 button head screws and M4 lock washer into the original outside mounting holes. Make sure it is flush and straight.
-
Like the right side attach the X stepper mount to the left Z stepper mount with a M3x10 button head screw and M3 lock washer, On the other side a M3x40 socket head cap screw into a T nut and a M5x8 button head screw into a M5 T nut.
-
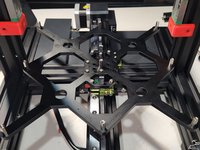
This step is crucial. The X axis needs to be parallel to prevent the Z steppers from getting out of sync causing the 2020 to become crooked. I used 2x 90 degree clamping squares.
-
-
-
Start by tightening the 8x M3x6 socket head screws for the Z MGN sleds making sure they are straight.
-
Tighten the 2x M3x40 socket head cap screws and the M5x8 button head screw into the 2020 extrusion.
-
Snug the 4x M3 button head screws for the lead screw nuts.
-
Spin the lead screws together making sure the X 2020 can travel the full Z length without binding. If everything moves smoothly snug down all the screws.
-
-
-
Using 4x M3x8 socket head screws mount the MGN9 spacer to the MGN9 rail at the 5th and 6th hole from each edge.
-
Using 4x M3x8 socket head cap screws mount the MGN9 rail to the X 2020 extrusion and 4x M5x8 button head screws and 4x M5 T nuts on the backside.
-
Using 4x M3x8 countersunk screws secure the MGN9 block to the MGN9 carriage.
-
-
-
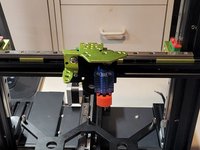
Using the original X mounting plate and the Orbiter mount in the kit secure it to the MGN9 adapter with 2x M5x10 button head screws.
-
Mount the X stepper to it's mount with the original M3x40 countersunk screws and the stepper cover.
-
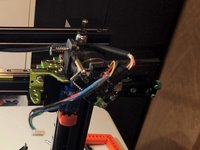
It'd be wise to feed the X belt into the top of the 2020 channel under the MGN adapter blocks.
-
Install the belt tensioner. Mine isn't part of the kit so you should install it in the reverse order from disassembly if using the stock one or according to the instructions from the manufacture.
-
Secure the belt to the bottom of the X carriage plate.
-
-
-
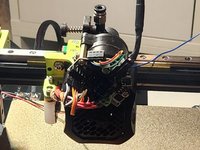
Mount your hotend of choice. Originally I went with a Dragonfly.
-
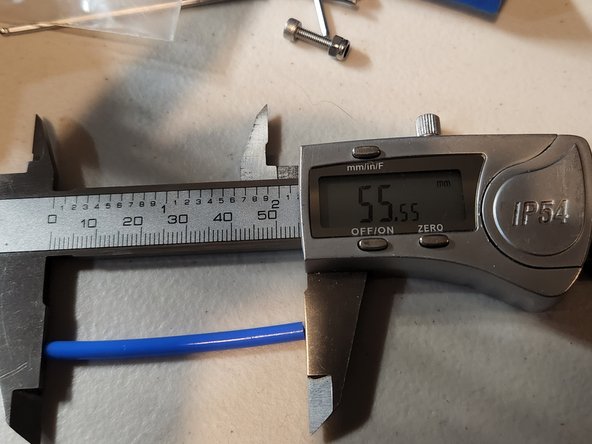
You'll need a piece of PTFE tube. For the Dragonfly and Orbiter v1.5 was 55.5mm.
-
Insert the PTFE tube into the Dragonfly and mount the Orbiter to the top plate with 2x M3x8 button head screws.
-
-
-
Install the BLTouch with 2x M3x8 socket head cap screws and 2x M3 nyloc nuts.
-
Install the original fan cover.
-
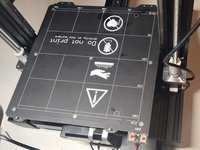
Install the heatbed to the standoffs with 9x M3x8 countersunk screws
-


다른 한 분이 해당 안내서를 완성하였습니다.