
5 LED 6 Mode Rear Bike Light LED Replacement
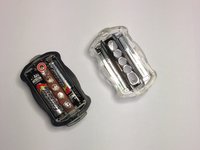
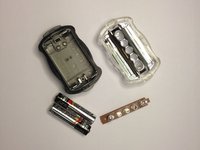
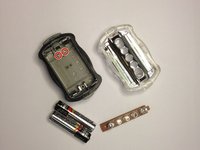
The bike light in this guide is sold under various brand names, but in fact is a no-name brand and comes with no distinct markings on the packaging. Some uses for this guide are replacing broken LEDs and customizing the LED colors. This specific guide customizes the LED colors, but the process for replacing them is identical.
Note the type found here does not have a brand name on the device and are sold under various fake brand names.
필요한 것
부품
도구


더보기...
-
-
이 단계에 사용된 도구:Desoldering Pump$3.99
-
Warm up the soldering iron
-
Tin the tip of the soldering iron
-
Apply a small amount of solder to the tip
-
Wipe on a damp sponge
-
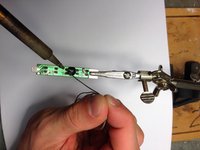
Touch the tip of the soldering iron to the led solder to liquify it
-
Apply solder wick to absorb solder
-
-
-
Place the new LED through the open holes
-
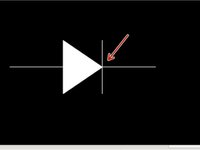
The LED should cover the schematic symbol on the circuit board and the flat edge of the LED should line up with the tip of the diode symbol shown by the arrow
-
If the LED does not stay, you can tape it in place on the opposite side of the board
-
Warm up the trace on the circuit board and the LED lead with the soldering iron
-
Apply solder to the lead until the hole completely fills with solder
-


To reassemble your device, follow these instructions in reverse order.
To reassemble your device, follow these instructions in reverse order.
팀

Cal Poly, Team 14-8, Forte Fall 2013 Cal Poly, Team 14-8, Forte Fall 2013 회원
CPSU-FORTE-F13S14G8
4 회원들
안내서 8개를 작성함