소개
Over time and excessive use, the internal phone jack of the ATT CL2940 may become damaged. This can cause poor connection between the phone and the handset. Replacing the damaged internal phone jack will solve this problem.
Before beginning this project, it is always important to make sure you have the correct tools for the job. The tools that are needed are the pro tech tool kit, precision tweezers set and the metal spudger set. Once all these are acquired just follow the directions for an easy fix.
필요한 것
-
-
Remove five 9.5 mm Phillips #1 screws from the back panel of the phone.
 FixBot에 문의하기
-
-
-
Slide the metal spudger into the crack and continue around to the front panel of the phone.
-
-
-
이 단계에 사용된 도구:Tweezers$4.99
-
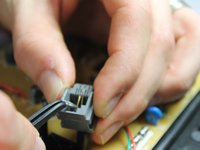
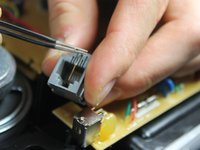
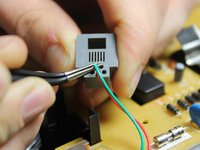
Using the precision tweezers, bend the golden tips of the green and red wires upward.
-
Bend the wires slowly and gently to avoid breaking them.
-
-
-
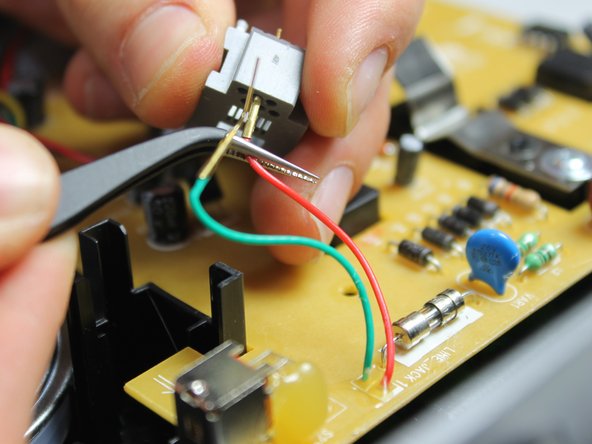
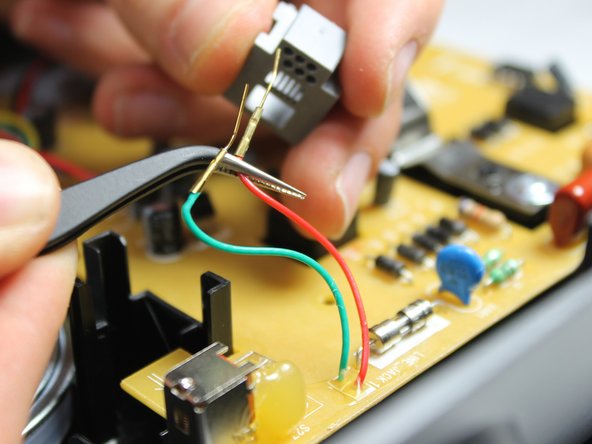
After bending the golden wire tips, pull the wires out from the back side of the phone jack.
-


To reassemble your device, follow these instructions in reverse order.
다른 한 분이 해당 안내서를 완성하였습니다.
팀

IUPUI, Team 1-1, Harley Spring 2016 IUPUI, Team 1-1, Harley Spring 2016 회원
IUPUI-HARLEY-S16S1G1
4 회원들
안내서 20개를 작성함