주요 콘텐츠로 건너뛰기

Acer Aspire One 722 Screen Replacement

필요한 것

  1. Acer Aspire One 722 Screen Replacement, Battery: 1 단계, 이미지 1/1
    • Power down the netbook by pressing the power button on the top left corner.

  2. Acer Aspire One 722 Screen Replacement: 2 단계, 이미지 1/1
    • Close the netbook and flip it over so that the back is facing up.

  3. Acer Aspire One 722 Screen Replacement: 3 단계, 이미지 1/1
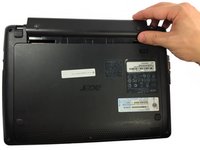
    • Slide the button below the battery to the right while simultaneously pulling the battery out.

  4. Acer Aspire One 722 Screen Replacement: 4 단계, 이미지 1/2 Acer Aspire One 722 Screen Replacement: 4 단계, 이미지 2/2
    • If necessary, remove the old battery and replace it with a new one.

  5. Acer Aspire One 722 Screen Replacement: 5 단계, 이미지 1/1
    • Check the thin grooves on the side of the battery entry and line the replacement battery up to the grooves.

  6. Acer Aspire One 722 Screen Replacement, Screen: 6 단계, 이미지 1/2 Acer Aspire One 722 Screen Replacement, Screen: 6 단계, 이미지 2/2
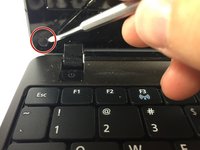
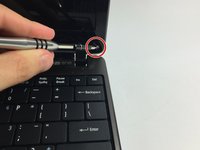
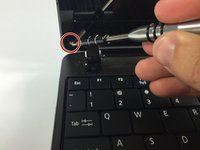
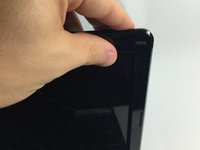
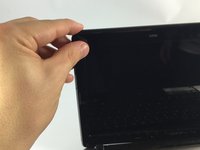
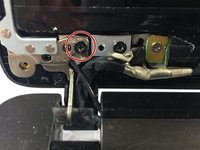
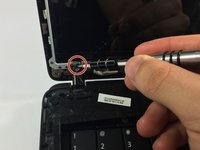
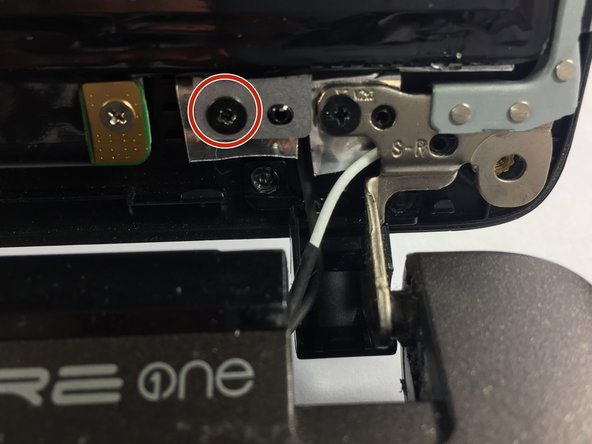
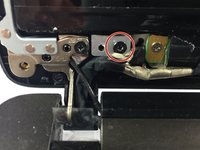
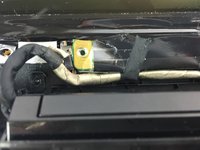
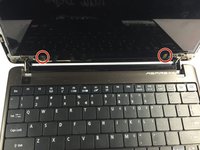
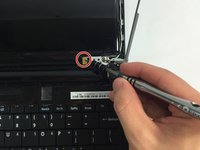
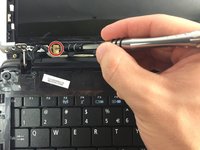
    • Remove the black rubber clips from the bottom right and left of the netbook screen.

  7. Acer Aspire One 722 Screen Replacement: 7 단계, 이미지 1/2 Acer Aspire One 722 Screen Replacement: 7 단계, 이미지 2/2
    • Remove the screws under the black caps.

  8. Acer Aspire One 722 Screen Replacement: 8 단계, 이미지 1/3 Acer Aspire One 722 Screen Replacement: 8 단계, 이미지 2/3 Acer Aspire One 722 Screen Replacement: 8 단계, 이미지 3/3
    • Slowly separate the screen casing from the screen.

    • Potential for device damage: Be careful when detaching the screen casing from the screen. If not done slowly, it can break.

  9. Acer Aspire One 722 Screen Replacement: 9 단계, 이미지 1/3 Acer Aspire One 722 Screen Replacement: 9 단계, 이미지 2/3 Acer Aspire One 722 Screen Replacement: 9 단계, 이미지 3/3
    • Remove the screws located on the four corners of the screen.

  10. Acer Aspire One 722 Screen Replacement: 10 단계, 이미지 1/3 Acer Aspire One 722 Screen Replacement: 10 단계, 이미지 2/3 Acer Aspire One 722 Screen Replacement: 10 단계, 이미지 3/3
    • Remove the two bottom screws.

    • Taking out these screws will allow you to remove the screen from its attachment.

  11. Acer Aspire One 722 Screen Replacement: 11 단계, 이미지 1/3 Acer Aspire One 722 Screen Replacement: 11 단계, 이미지 2/3 Acer Aspire One 722 Screen Replacement: 11 단계, 이미지 3/3
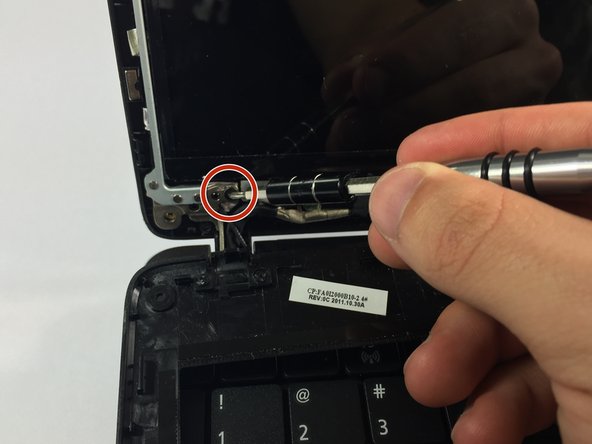
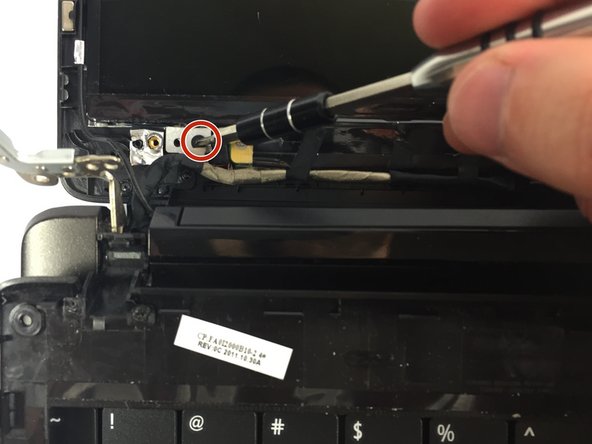
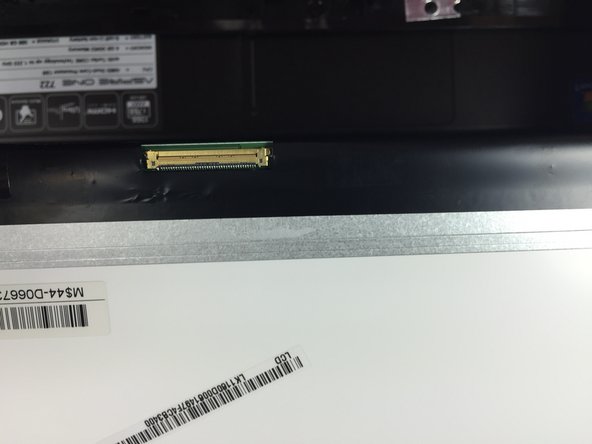
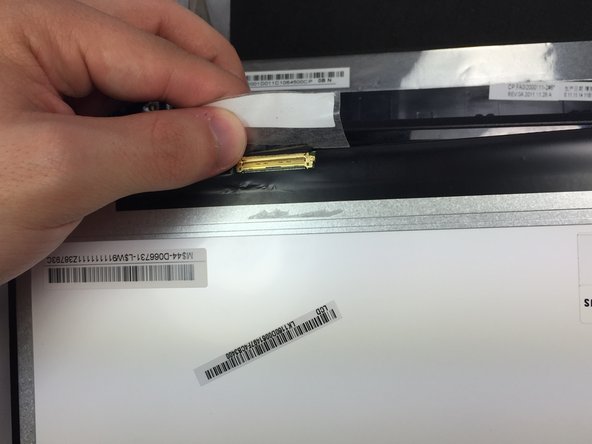
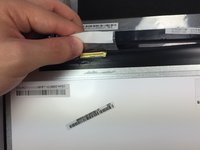
    • On the bottom left of the screen there is a cord attached. Remove the tape that is attached to the screen.

  12. Acer Aspire One 722 Screen Replacement: 12 단계, 이미지 1/3 Acer Aspire One 722 Screen Replacement: 12 단계, 이미지 2/3 Acer Aspire One 722 Screen Replacement: 12 단계, 이미지 3/3
    • On the green board, remove the two screws.

    • Remove the board.

결론

To reassemble your device, follow these instructions in reverse order.

다른 4명이 해당 안내서를 완성하였습니다.

Christian Barboza

회원 가입일: 10/25/15

818 평판

안내서 5개 작성하였습니다

UMass Dartmouth, Team 5-6, Gulbrandsen Fall 2015 UMass Dartmouth, Team 5-6, Gulbrandsen Fall 2015 회원

UMASSD-GULBRANDSEN-F15S5G6

3 회원들

안내서 10개 작성하였습니다

댓글 0개

댓글 쓰기

조회 통계:

24 시간 전: 0

7일 전: 3

30일 전: 8

전체 시간: 3,290