주요 콘텐츠로 건너뛰기

Alienware M11x Memory Module Replacement

필요한 것

  1. Alienware M11x Memory Module Replacement, Introduction: 1 단계, 이미지 1/1
    • WARNING: Before working inside your computer, read the safety information that shipped with your computer.

    • CAUTION: To avoid electrostatic discharge, ground yourself by using a wrist grounding strap or by periodically touching an unpainted metal surface (such as a connector on your computer).

  2. Alienware M11x Memory Module Replacement, Removing the Memory Module: 2 단계, 이미지 1/1
    • CAUTION: To prevent damage to the memory module connector, do not use tools to spread the memory module securing clips.

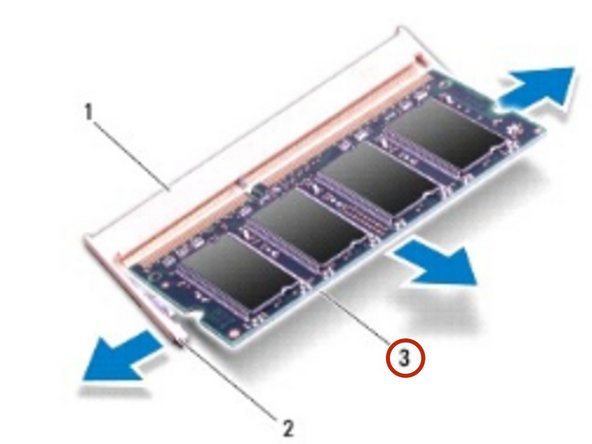
    • Use your fingertips to carefully spread apart the securing clips on each end of the memory module connector until the memory module pops up.

  3. Alienware M11x Memory Module Replacement, Removing the Memory Module: 3 단계, 이미지 1/2 Alienware M11x Memory Module Replacement, Removing the Memory Module: 3 단계, 이미지 2/2
    • Remove the memory module from the memory module connector.

  4. Alienware M11x Memory Module Replacement, Replacing the Memory Module: 4 단계, 이미지 1/1
    • NOTE: If you need to install memory modules in two connectors, install a memory module in the lower connector before you install a module in the upper connector

    • Align the notch in the NEW memory module with the tab in the memory module connector.

  5. Alienware M11x Memory Module Replacement, Installing the Memory Module: 5 단계, 이미지 1/1
    • Slide the memory module firmly into the slot at a 45-degree angle, and press the memory module down until it clicks into place. If you do not hear the click, remove the memory module and reinstall it.

    • NOTE: If the memory module is not installed properly, the computer may not boot.

결승점

다른 2명이 해당 안내서를 완성하였습니다.

darrius

회원 가입일: 03/26/18

5,213 평판

안내서 30개 작성하였습니다

RampUP America, Inc. RampUP America, Inc. 회원

Community

42 회원들

안내서 1,985개 작성하였습니다

댓글 0개

댓글 쓰기

조회 통계:

24 시간 전: 0

7일 전: 0

30일 전: 1

전체 시간: 216