소개
The Alienware X51 R1, R2, and R3 shut down randomly when a computer's RAM starts to fail. This can be problematic with wear but is easy to fix with basic tooling. Before beginning the repair, a user must have a Phillips-head screwdriver and two eight-gigabyte RAM memory cards for a total of sixteen gigabytes.
NOTE: use an anti-static wrist strap when working to prevent circuitry damage.
필요한 것
-
-
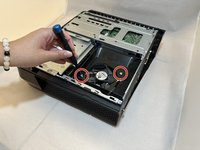
Place the PC so the name "Alienware" is on top and facing you.
-
Slide the front panel towards you and lift up.
 FixBot에 문의하기
-
-
-
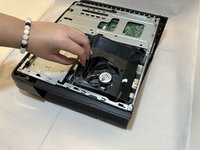
Fully disconnect the panel by unplugging the lighting cord going into the PC's internal system.
-
Remove the front panel from the rest of the device.
-
-
-
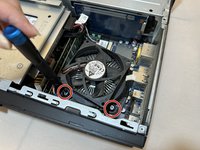
Remove the two 2.0 mm screws holding the fan protector in place using a Phillips #1 screwdriver.
-
Remove the protector holding the fan in.
-
-
-
-
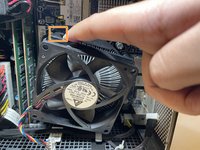
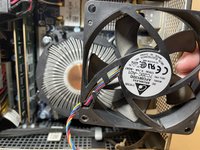
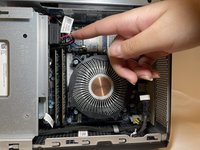
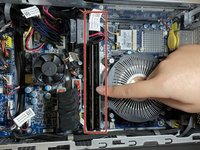
Use a Phillips #1 screwdriver to loosen the four spring screws around the fan until you hear a click.
-
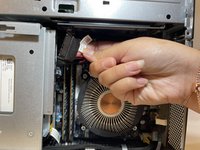
Gently pull back the clips and remove the fan by pulling it out.
-
-
-
Remove the one 1.0 mm screw using a Phillips #1 screwdriver.
-
Remove the disc drive from the PC.
-
-
-
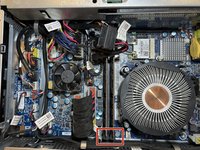
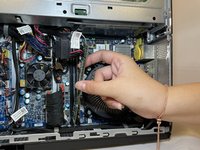
Pull apart the clips that hold the RAM sticks in place.
-
Remove the RAM sticks.
-


To reassemble your device, follow these instructions in reverse order.

팀

Eastern Washington University, Team 1-2, Carnegie Fall 2023 Eastern Washington University, Team 1-2, Carnegie Fall 2023 회원
EWU-CARNEGIE-F23S1G2
4 회원들
안내서 7개를 작성함