주요 콘텐츠로 건너뛰기
수리 커뮤니티 가입 - 계정 만들기

Altec Lansing Mini Lifejacket 2 Motherboard Replacement

필요한 것

    1. Altec Lansing Mini Lifejacket 2 Motherboard Replacement, Back Panel: 1 단계, 이미지 3개 중 1개 Altec Lansing Mini Lifejacket 2 Motherboard Replacement, Back Panel: 1 단계, 이미지 3개 중 2개 Altec Lansing Mini Lifejacket 2 Motherboard Replacement, Back Panel: 1 단계, 이미지 3개 중 3개
      • Use the spudger to remove the eight black pins from the front and back of the wire screens.

      댓글 쓰기

    2. Altec Lansing Mini Lifejacket 2 Motherboard Replacement: 2 단계, 이미지 3개 중 1개 Altec Lansing Mini Lifejacket 2 Motherboard Replacement: 2 단계, 이미지 3개 중 2개 Altec Lansing Mini Lifejacket 2 Motherboard Replacement: 2 단계, 이미지 3개 중 3개
      • Detach the eight secondary pins from the front and back of the wire mesh plates with a spudger.

      • Removing the secondary pins from the rubber casing is optional.

      댓글 쓰기

    3. Altec Lansing Mini Lifejacket 2 Motherboard Replacement: 3 단계, 이미지 2개 중 1개 Altec Lansing Mini Lifejacket 2 Motherboard Replacement: 3 단계, 이미지 2개 중 2개
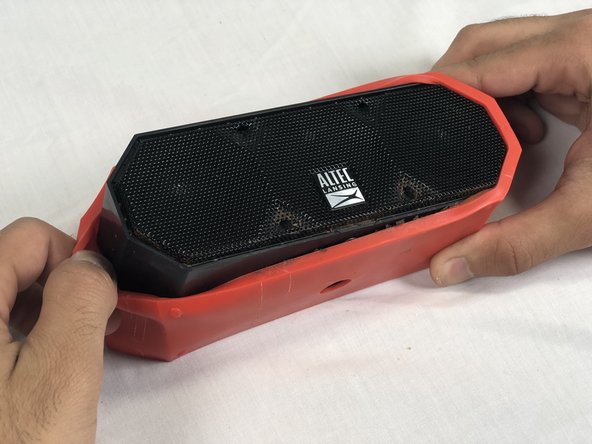
      • Remove both black and orange layers from the speaker body.

      댓글 쓰기

    4. Altec Lansing Mini Lifejacket 2 Motherboard Replacement: 4 단계, 이미지 3개 중 1개 Altec Lansing Mini Lifejacket 2 Motherboard Replacement: 4 단계, 이미지 3개 중 2개 Altec Lansing Mini Lifejacket 2 Motherboard Replacement: 4 단계, 이미지 3개 중 3개
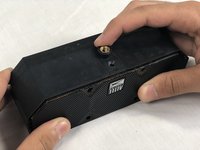
      • Remove the single 7.8mm Phillips #2 screw from the mounting plate located under the device.

      • Slide the mounting plate out to remove it.

      댓글 쓰기

    5. Altec Lansing Mini Lifejacket 2 Motherboard Replacement: 5 단계, 이미지 2개 중 1개 Altec Lansing Mini Lifejacket 2 Motherboard Replacement: 5 단계, 이미지 2개 중 2개
      • Pry off the wire mesh on both sides using a metal spudger.

      • Be gentle to avoid bending the mesh.

      댓글 쓰기

    6. Altec Lansing Mini Lifejacket 2 Motherboard Replacement: 6 단계, 이미지 2개 중 1개 Altec Lansing Mini Lifejacket 2 Motherboard Replacement: 6 단계, 이미지 2개 중 2개
      이 단계에 사용된 도구:
      Tweezers
      $4.99
      • Using tweezers, remove the four rubber stoppers in each corner of the rear panel.

      댓글 쓰기

    7. Altec Lansing Mini Lifejacket 2 Motherboard Replacement: 7 단계, 이미지 1개 중 1개
      • Remove the four 13.7mm Phillips #1 screws located underneath the rubber stoppers.

      댓글 쓰기

    8. Altec Lansing Mini Lifejacket 2 Motherboard Replacement: 8 단계, 이미지 1개 중 1개
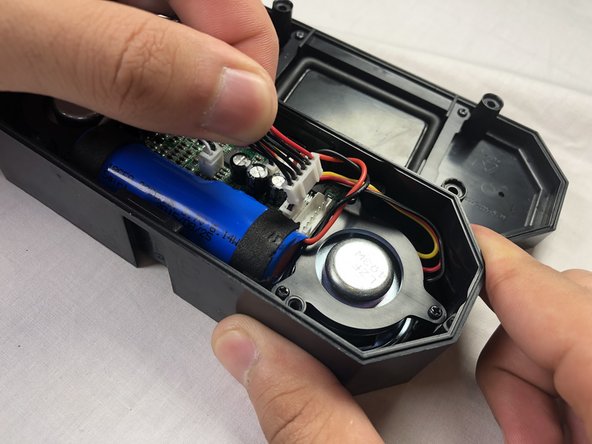
      • Pull the case apart to access the interior components.

      댓글 쓰기

    9. Altec Lansing Mini Lifejacket 2 Motherboard Replacement: 9 단계, 이미지 3개 중 1개 Altec Lansing Mini Lifejacket 2 Motherboard Replacement: 9 단계, 이미지 3개 중 2개 Altec Lansing Mini Lifejacket 2 Motherboard Replacement: 9 단계, 이미지 3개 중 3개
      • To remove the back panel, gently pull out its wire harness.

      댓글 쓰기

    1. Altec Lansing Mini Lifejacket 2 Motherboard Replacement, Battery: 10 단계, 이미지 3개 중 1개 Altec Lansing Mini Lifejacket 2 Motherboard Replacement, Battery: 10 단계, 이미지 3개 중 2개 Altec Lansing Mini Lifejacket 2 Motherboard Replacement, Battery: 10 단계, 이미지 3개 중 3개
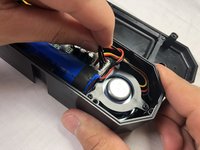
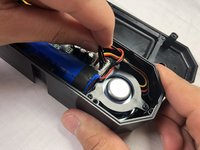
      • Disconnect the battery from the motherboard.

      • The battery is not secured within the case and can be removed after detaching its wiring from the circuit board.

      댓글 쓰기

    1. Altec Lansing Mini Lifejacket 2 Motherboard Replacement, Motherboard: 11 단계, 이미지 3개 중 1개 Altec Lansing Mini Lifejacket 2 Motherboard Replacement, Motherboard: 11 단계, 이미지 3개 중 2개 Altec Lansing Mini Lifejacket 2 Motherboard Replacement, Motherboard: 11 단계, 이미지 3개 중 3개
      • Unplug the remaining four wire harnesses attached to the circuit board

      댓글 쓰기

    2. Altec Lansing Mini Lifejacket 2 Motherboard Replacement: 12 단계, 이미지 2개 중 1개 Altec Lansing Mini Lifejacket 2 Motherboard Replacement: 12 단계, 이미지 2개 중 2개
      • Remove the three 9.1mm Phillips #1 screws located on the circuit board.

      댓글 쓰기

    3. Altec Lansing Mini Lifejacket 2 Motherboard Replacement: 13 단계, 이미지 3개 중 1개 Altec Lansing Mini Lifejacket 2 Motherboard Replacement: 13 단계, 이미지 3개 중 2개 Altec Lansing Mini Lifejacket 2 Motherboard Replacement: 13 단계, 이미지 3개 중 3개
      • Remove the motherboard.

      댓글 쓰기

결론

To reassemble your device, follow these instructions in reverse order.

취소: 해당 안내서를 완성하지 않았습니다.

다른 2명이 해당 안내서를 완성하였습니다.

작성자

3다른 기여자 명과 함께

Stephen Albrecht

회원 가입일: 02/14/18

1,053 평판

안내서 4개를 작성함

USF Tampa, Team S3-G2, Nance Spring 2018 USF Tampa, Team S3-G2, Nance Spring 2018 회원

USFT-NANCE-S18S3G2

4 회원들

안내서 8개를 작성함

6가이드 댓글

I own the IMW778-BLU-TA model. Where can I find a replacement motherboard for it??

Nick Cote - 답글 공유
same for me, anyone knows where can I find a replacement of the motherboard? thx

Travis - 답글 공유

need back panel replacement

rahul pande - 답글 공유

Same here! Loved the product. Can not afford to buy something else.

Mr Shopper - 답글 공유

I need 2 the board for charging,usb,aux cord that plugs into motherboard.

John Proffit - 답글 공유

댓글 쓰기

조회 통계:

지난 24시간: 2

지난 7일: 7

지난 30일: 43

전체 시간: 6,375