소개
This guide will show you how to dissemble and replace the power connector on your Apple TV 4K.
필요한 것
-
-
Use a spudger to pry the bottom panel off from the body. It is held on with clips on the inside, so you will need to make sure those are undone while opening.
 FixBot에 문의하기
-
-
-
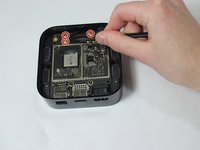
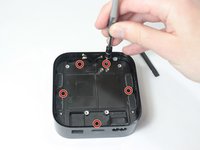
Remove the following screws using a T6 Torx screwdriver holding the heat sink assembly in.
-
Four 10 mm screws
-
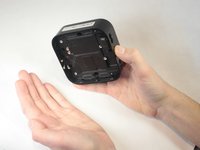
Lift and remove the heat sink assembly from the device.
-
-
-
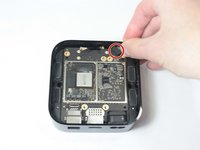
Use plastic spudger to pull up on all three antenna connectors to remove them.
-
Remove rubber piece from front side of device.
-
-
-
-
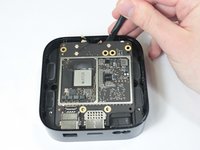
Unscrew the following screws holding the logic board in place using the T7 Torx:
-
Two black 3 mm screws
-
Two silver 4 mm screws
-
-
-
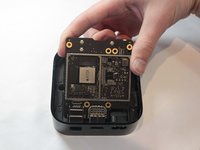
Use a spudger to pry up logic board. Try lifting it up from the front side.
-
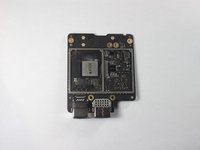
Remove logic board and set aside.
-
-
-
Use a T7 Torx to remove the screws:
-
Five 5mm screws
-
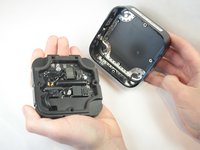
Carefully flip the device upside down to remove the logic board/power supply mount.
-
-
-
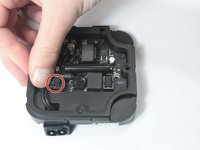
Disconnect the latch connecting the power connector to the power supply.
-
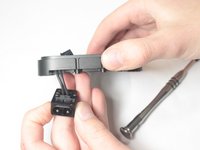
Feed the wire though the logic board/power supply mount. After this, remove the power connector from the device.
-


To reassemble your device, follow these instructions in reverse order.
팀

UW Stout, Team S6-G3, Ogden Fall 2018 UW Stout, Team S6-G3, Ogden Fall 2018 회원
UWSTOUT-OGDEN-F18S6G3
4 회원들
안내서 15개를 작성함