주요 콘텐츠로 건너뛰기

Archos 5 Screen Replacement

필요한 것

  1. Archos 5 Screen Replacement, Screen: 1 단계, 이미지 1/1
    • Please be sure that your device is powered off before attempting any repairs.

    • Please be aware that any further steps could possibly void the warranty of your Archos 5.

  2. Archos 5 Screen Replacement: 2 단계, 이미지 1/2 Archos 5 Screen Replacement: 2 단계, 이미지 2/2
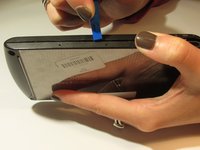
    • Use the plastic opening tool to take off 3 black sticky pads that cover the screws.

    • Use the screwdriver(PH000) to remove the screws located under the pads.

    • Lift the stand in order to get to the fourth screw.

  3. Archos 5 Screen Replacement: 3 단계, 이미지 1/2 Archos 5 Screen Replacement: 3 단계, 이미지 2/2
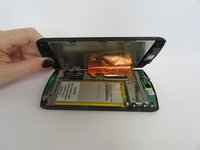
    • Carefully pry open all 4 sides of the Archos 5 using the plastic opening tool.

    • Once all sides of the device are pried open, gently open the device .

    • Be careful not to tear the foil which connects the LCD screen to the motherboard!

  4. Archos 5 Screen Replacement: 4 단계, 이미지 1/2 Archos 5 Screen Replacement: 4 단계, 이미지 2/2
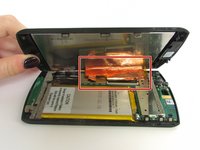
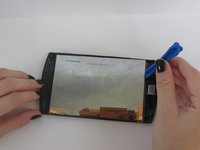
    • Once you have opened your device, fold the screen away from the battery.

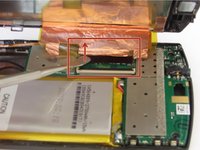
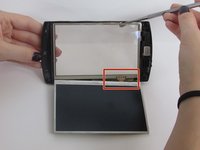
    • Unplug the touch pad from the motherboard. Do this by applying pressure on the thin black piece(attached at the bottom of the metallic foil) Press the plastic spudger against the thin black piece and release it.

    • Use a plastic spudger instead of a metal spudger!

  5. Archos 5 Screen Replacement: 5 단계, 이미지 1/2 Archos 5 Screen Replacement: 5 단계, 이미지 2/2
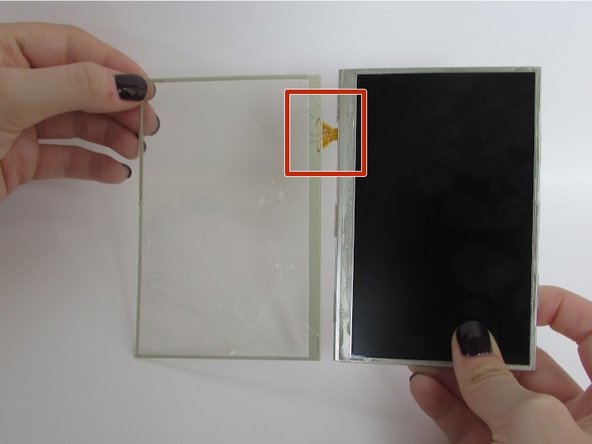
    • Using the plastic opening tool, lift the touch pad away from the cracked screen

    • Be careful not to pull or tear the small film/wires as shown in the picture. These are vital to connecting the glass screen and the LCD screen.

  6. Archos 5 Screen Replacement: 6 단계, 이미지 1/2 Archos 5 Screen Replacement: 6 단계, 이미지 2/2
    • Lift the cracked screen off of your Archos 5 using the regular plastic spudger.

    • Be careful not to rip or tear the film connecting the glass screen and the LCD screen.

  7. Archos 5 Screen Replacement: 7 단계, 이미지 1/1
    • Peel the plastic screen away from your shattered glass screen, and replace with your new glass screen.

    • The film connecting the glass screen and the LCD screen is attached the plastic and will peel away with it. Be careful not to rip or tear it.

결론

To reassemble your device, follow these instructions in reverse order.

다른 한 분이 해당 안내서를 완성하였습니다.

Ally Hummel

회원 가입일: 09/22/15

378 평판

안내서 3개 작성하였습니다

University of Alabama, Team 1-5, Sydow campbell Fall 2015 University of Alabama, Team 1-5, Sydow campbell Fall 2015 회원

UA-SYDOW CAMPBELL-F15S1G5

4 회원들

안내서 6개 작성하였습니다

댓글 0개

댓글 쓰기

조회 통계:

24 시간 전: 0

7일 전: 3

30일 전: 15

전체 시간: 2,000