소개
Use this guide to remove control buttons for cleaning or replacement.
필요한 것
-
-
Grip the dial tightly and pull straight off the device.
-
Repeat for the second dial
 FixBot에 문의하기
-
-
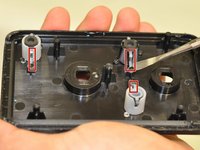
이 단계에 사용된 도구:Tweezers$4.99
-
Using tweezers, remove the spacer nuts and washers from each dial post.
-
-
-
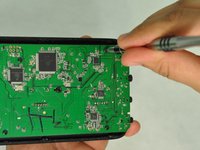
Insert a plastic opening tool into the seam between the rubber foot and plastic casing.
-
Pull the rubber foot free of the plastic casing.
-
-
-
-
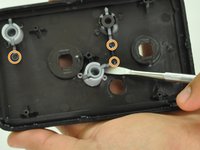
Gently insert a metal spudger under a control button housing.
-
Rotate the control button around the marked pin.
-


결론
To reassemble your device, follow these instructions in reverse order.
다른 2명이 해당 안내서를 완성하였습니다.
