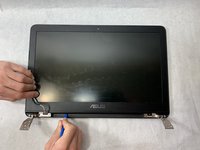
주요 콘텐츠로 건너뛰기

Asus GL551JW-AH71 Display Assembly Replacement

필요한 것

  1. Asus GL551JW-AH71 Display Assembly Replacement, Battery: 1 단계, 이미지 1/1
    • Close the device and lay it upside down.

    • Unplug the device and make sure the device is powered off before removing the battery.

  2. Asus GL551JW-AH71 Display Assembly Replacement: 2 단계, 이미지 1/2 Asus GL551JW-AH71 Display Assembly Replacement: 2 단계, 이미지 2/2
    • Move the battery eject button to the right. The battery will be ejected.

  3. Asus GL551JW-AH71 Display Assembly Replacement: 3 단계, 이미지 1/2 Asus GL551JW-AH71 Display Assembly Replacement: 3 단계, 이미지 2/2
    • Grab the battery and remove it from the device.

  4. Asus GL551JW-AH71 Display Assembly Replacement, Optical Drive: 4 단계, 이미지 1/2 Asus GL551JW-AH71 Display Assembly Replacement, Optical Drive: 4 단계, 이미지 2/2
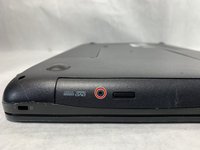
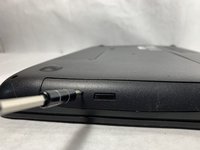
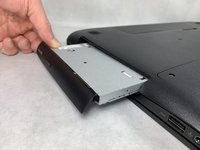
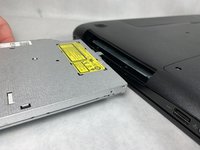
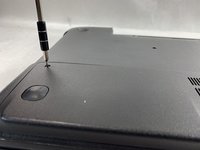
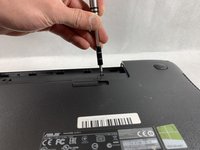
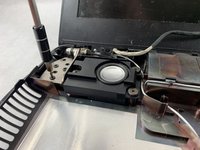
    • Use a Phillips #000 screwdriver to remove the single 10mm optical drive screw.

  5. Asus GL551JW-AH71 Display Assembly Replacement: 5 단계, 이미지 1/3 Asus GL551JW-AH71 Display Assembly Replacement: 5 단계, 이미지 2/3 Asus GL551JW-AH71 Display Assembly Replacement: 5 단계, 이미지 3/3
    • Insert a probe or paperclip gently into the eject pin hole to eject the optical drive tray.

  6. Asus GL551JW-AH71 Display Assembly Replacement: 6 단계, 이미지 1/2 Asus GL551JW-AH71 Display Assembly Replacement: 6 단계, 이미지 2/2
    • Gently grasp the optical drive assembly and slide it out of the laptop body.

  7. Asus GL551JW-AH71 Display Assembly Replacement, Upper Assembly: 7 단계, 이미지 1/2 Asus GL551JW-AH71 Display Assembly Replacement, Upper Assembly: 7 단계, 이미지 2/2
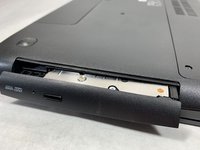
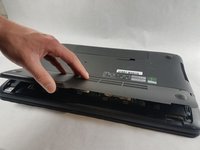
    • Using a Phillips #000 screwdriver, remove the two 11mm screws that hold the access panel in place.

  8. Asus GL551JW-AH71 Display Assembly Replacement: 8 단계, 이미지 1/2 Asus GL551JW-AH71 Display Assembly Replacement: 8 단계, 이미지 2/2
    • Carefully remove the access panel.

  9. Asus GL551JW-AH71 Display Assembly Replacement: 9 단계, 이미지 1/2 Asus GL551JW-AH71 Display Assembly Replacement: 9 단계, 이미지 2/2
    • Using a Phillips #000 screwdriver, remove the seven 11mm screws holding lower case to the laptop.

  10. Asus GL551JW-AH71 Display Assembly Replacement: 10 단계, 이미지 1/1
    • Turn the laptop over and open the screen.

  11. Asus GL551JW-AH71 Display Assembly Replacement: 11 단계, 이미지 1/3 Asus GL551JW-AH71 Display Assembly Replacement: 11 단계, 이미지 2/3 Asus GL551JW-AH71 Display Assembly Replacement: 11 단계, 이미지 3/3
    • Gently pry open the case with an iFixit opening tool.

    • The upper and lower assembly are connected with a display cable that will be removed in the next step. Do not pull the parts apart more than a few inches.

  12. Asus GL551JW-AH71 Display Assembly Replacement: 12 단계, 이미지 1/3 Asus GL551JW-AH71 Display Assembly Replacement: 12 단계, 이미지 2/3 Asus GL551JW-AH71 Display Assembly Replacement: 12 단계, 이미지 3/3
    • Flip the laptop on the right side while still holding the upper and lower assemblies close together.

    • Unplug the display connector from the motherboard.

    • Remove the upper assembly.

  13. Asus GL551JW-AH71 Display Assembly Replacement, Display Assembly: 13 단계, 이미지 1/2 Asus GL551JW-AH71 Display Assembly Replacement, Display Assembly: 13 단계, 이미지 2/2
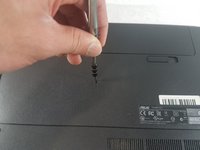
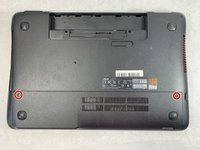
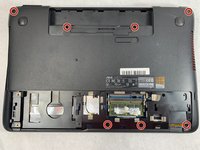
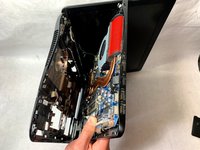
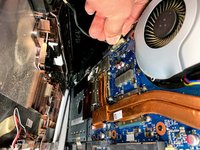
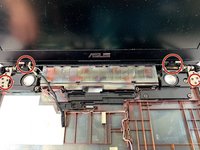
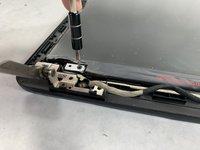
    • Remove the three 5mm screws located in each circle with a Phillips #000 screwdriver.

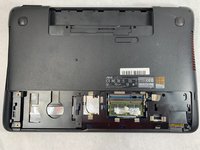
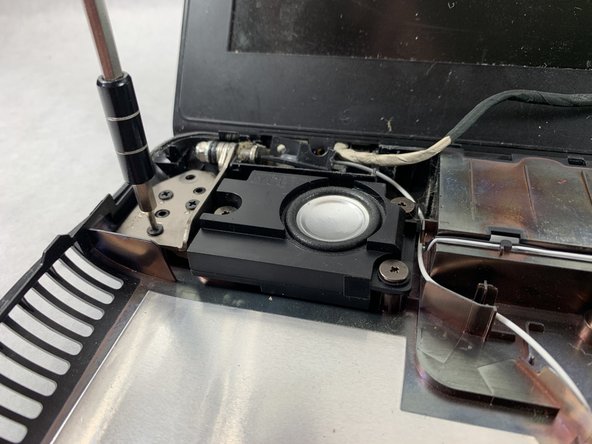
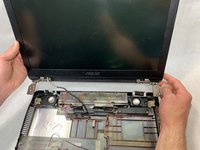
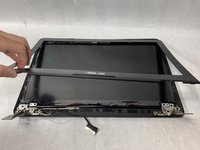
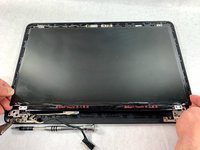
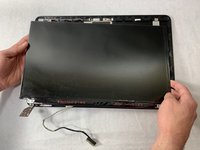
    • A total of twelve 5mm screw should be removed in order to free the display assembly from the base.

  14. Asus GL551JW-AH71 Display Assembly Replacement: 14 단계, 이미지 1/2 Asus GL551JW-AH71 Display Assembly Replacement: 14 단계, 이미지 2/2
    • Lift the display assembly up, separating it from the base of the device.

  15. Asus GL551JW-AH71 Display Assembly Replacement: 15 단계, 이미지 1/3 Asus GL551JW-AH71 Display Assembly Replacement: 15 단계, 이미지 2/3 Asus GL551JW-AH71 Display Assembly Replacement: 15 단계, 이미지 3/3
    • Using a plastic opening tool, separate the bezel from the screen.

    • Insert the tool and slide it right to left to release the bezel from the screen.

  16. Asus GL551JW-AH71 Display Assembly Replacement: 16 단계, 이미지 1/2 Asus GL551JW-AH71 Display Assembly Replacement: 16 단계, 이미지 2/2
    • Remove the four screws using a Phillips #0 screwdriver.

  17. Asus GL551JW-AH71 Display Assembly Replacement: 17 단계, 이미지 1/2 Asus GL551JW-AH71 Display Assembly Replacement: 17 단계, 이미지 2/2
    • Grab the screen in the corners and lift up to remove it.

결론

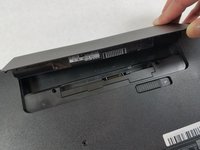
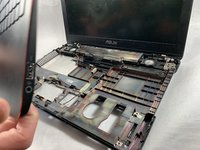
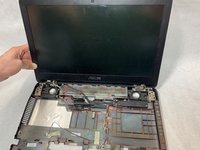
To reassemble your device, follow these instructions in reverse order.

다른 3명이 해당 안내서를 완성하였습니다.

Alec Pimentel

회원 가입일: 03/21/19

258 평판

안내서 1개 작성함

UMass Dartmouth, Team S8-G3, Bailey Spring 2019 UMass Dartmouth, Team S8-G3, Bailey Spring 2019 회원

UMASSD-BAILEY-S19S8G3

4 회원들

안내서 16개 작성하였습니다

댓글 0개

댓글 쓰기

조회 통계:

24 시간 전: 1

7일 전: 2

30일 전: 4

전체 시간: 808