주요 콘텐츠로 건너뛰기

Asus Padfone 2 Camera Replacement

필요한 것

  1. Asus Padfone 2 Camera  Replacement, Power Down Device: 1 단계, 이미지 1개 중 1개
    • Hold down the power button.

  2. Asus Padfone 2 Camera  Replacement, Remove Back Plate: 2 단계, 이미지 3개 중 1개 Asus Padfone 2 Camera  Replacement, Remove Back Plate: 2 단계, 이미지 3개 중 2개 Asus Padfone 2 Camera  Replacement, Remove Back Plate: 2 단계, 이미지 3개 중 3개
    • Use plastic opening tool to pry off the back cover of the phone.

  3. Asus Padfone 2 Camera  Replacement, Battery Removal: 3 단계, 이미지 3개 중 1개 Asus Padfone 2 Camera  Replacement, Battery Removal: 3 단계, 이미지 3개 중 2개 Asus Padfone 2 Camera  Replacement, Battery Removal: 3 단계, 이미지 3개 중 3개
    이 단계에 사용된 도구:
    Tweezers
    $4.99
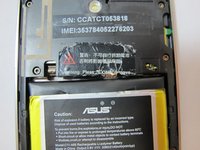
    • Remove the warning sticker that covers the battery plug and connecting cord.

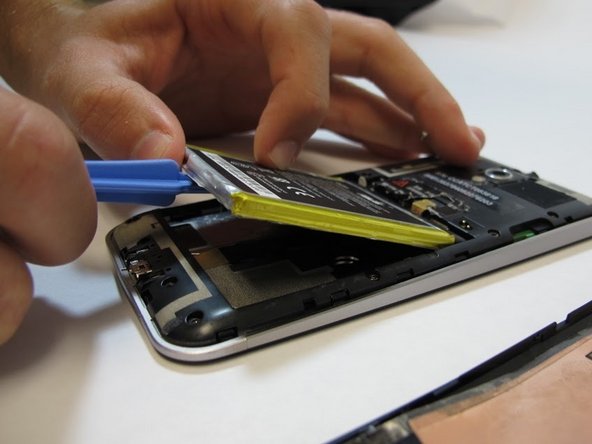
    • Look for the widest gap on either side of the battery. Using the plastic opening tool carefully lift battery out.

    • The battery is held down with adhesive. Be careful not to damage battery or connecting cord.

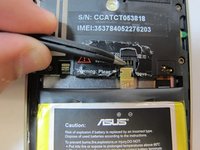
    • Disconnect battery connecting cord using tweezers.

  4. Asus Padfone 2 Camera  Replacement, Remove Internal Back Plate: 4 단계, 이미지 3개 중 1개 Asus Padfone 2 Camera  Replacement, Remove Internal Back Plate: 4 단계, 이미지 3개 중 2개 Asus Padfone 2 Camera  Replacement, Remove Internal Back Plate: 4 단계, 이미지 3개 중 3개
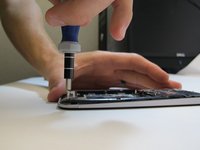
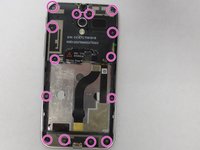
    • Use T5 Torx screwdriver to remove 14 screws from internal back plate.

    • Use of magnetic pad will help with keeping track of screws.

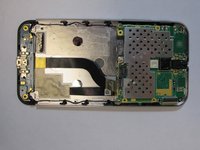
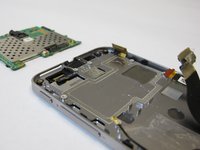
    • Once screws are out, remove the plate.

  5. Asus Padfone 2 Camera  Replacement, Disconnect Motherboard: 5 단계, 이미지 3개 중 1개 Asus Padfone 2 Camera  Replacement, Disconnect Motherboard: 5 단계, 이미지 3개 중 2개 Asus Padfone 2 Camera  Replacement, Disconnect Motherboard: 5 단계, 이미지 3개 중 3개
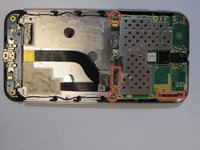
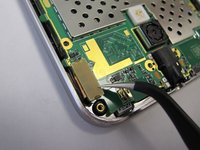
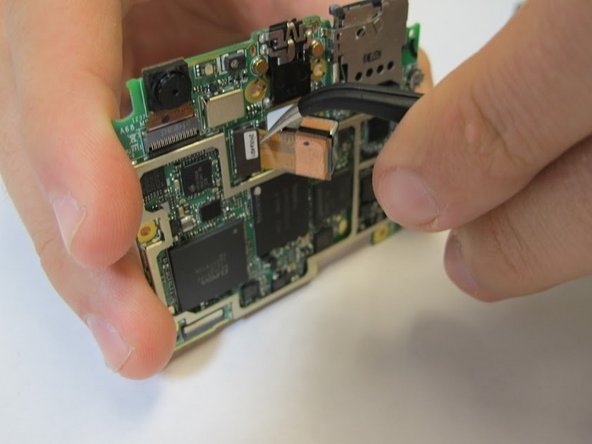
    • Disconnect four plugs to the motherboard using tweezers.

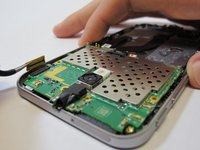
    • Lift up green motherboard.

  6. Asus Padfone 2 Camera  Replacement, Removing Camera: 6 단계, 이미지 2개 중 1개 Asus Padfone 2 Camera  Replacement, Removing Camera: 6 단계, 이미지 2개 중 2개
    • Remove camera from back of the motherboard with tweezers.

결론

To reassemble your device, follow these instructions in reverse order.

다른 3명이 해당 안내서를 완성하였습니다.

작성자

3다른 기여자 명과 함께

Erica

회원 가입일: 09/25/14

473 평판

안내서 2개를 작성함

USF Tampa, Team 5-4, Mcgee Fall 2014 USF Tampa, Team 5-4, Mcgee Fall 2014 회원

USFT-MCGEE-F14S5G4

4 회원들

안내서 7개를 작성함

0가이드 댓글

댓글 쓰기

조회 통계:

지난 24시간: 0

지난 7일: 3

지난 30일: 7

전체 시간: 2,096