소개
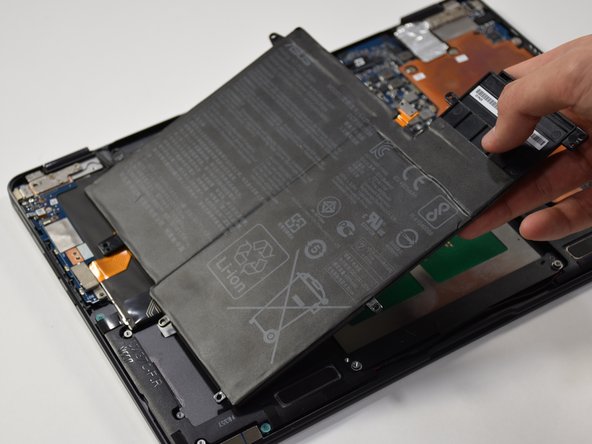
This guide will take you through the steps needed to replace the battery in your Asus Q325U.
필요한 것
-
-
-
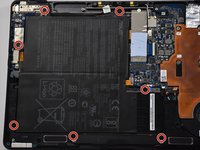
Remove the seven 5mm screws around the battery using a Phillips #00 screwdriver.
-
-
-
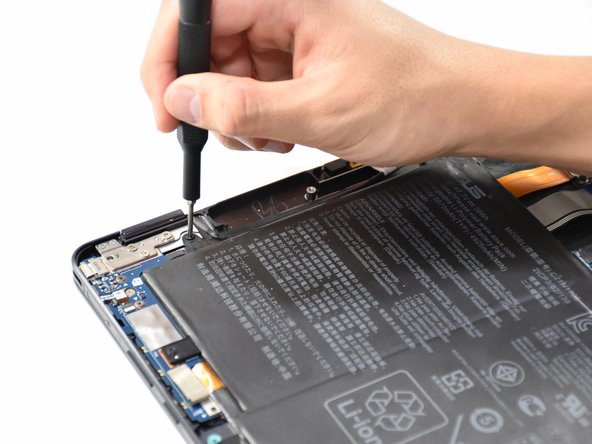
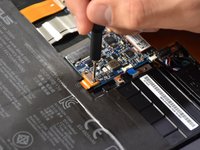
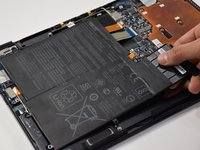
Using a Phillips #000 screwdriver, remove the two 3mm screws on top of the orange battery connector.
-


To reassemble your device, follow these instructions in reverse order.
다른 4명이 해당 안내서를 완성하였습니다.
팀

Cal Poly, Team S19-G1, White Winter 2019 Cal Poly, Team S19-G1, White Winter 2019 회원
CPSU-WHITE-W19S19G1
3 회원들
안내서 6개를 작성함
7가이드 댓글
Hello,
Can you point me to a place to purchase a replacement battery? Thanks,
Dan Goldman, daniel.goldman@physics.gatech.edu
Dan Goldman - 답글 공유
Would recommend the screw size be ad to the guide please.
John Walshaw - 답글 공유
Like Dan, I need to get a replacement battery. Any idea where it can be purchased (safely)?
Thanks :D
Michelle N - 답글 공유
not able to get beyond step 4. Any ideas how to open the small screws. I tried PH#000, and many others, but no luck
Steve Kumar - 답글 공유
the battery shown here is not the same for the Q325U, different battery connectors.