주요 콘텐츠로 건너뛰기
수리 커뮤니티 가입 - 계정 만들기

Asus ROG GL551J Hard Drive Replacement

필요한 것

  1. Asus ROG GL551J Hard Drive Replacement, Battery: 1 단계, 이미지 1개 중 1개
    • Lay the device on a flat surface with the battery facing up.

    • Be sure to wear ESD or Rubber gloves to protect the computer components.

    댓글 쓰기

  2. Asus ROG GL551J Hard Drive Replacement: 2 단계, 이미지 1개 중 1개
    • Push the latch found below the battery to the unlock position.

    댓글 쓰기

  3. Asus ROG GL551J Hard Drive Replacement: 3 단계, 이미지 1개 중 1개
    • Pull the battery out.

    댓글 쓰기

  4. Asus ROG GL551J Hard Drive Replacement, Hard Drive: 4 단계, 이미지 2개 중 1개 Asus ROG GL551J Hard Drive Replacement, Hard Drive: 4 단계, 이미지 2개 중 2개
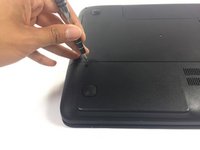
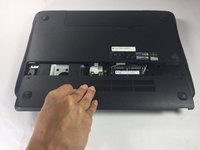
    • With laptop upside-down, locate and unscrew the two screws on the panel with the vents.

    • Slide the panel out and lift up to remove.

    댓글 쓰기

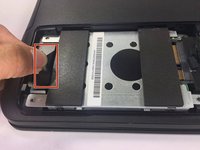
  5. Asus ROG GL551J Hard Drive Replacement: 5 단계, 이미지 2개 중 1개 Asus ROG GL551J Hard Drive Replacement: 5 단계, 이미지 2개 중 2개
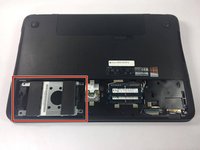
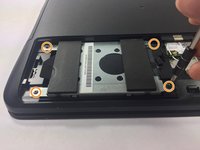
    • The hard drive is the metal rectangle with the two soft padding bars attached to it.

    • Locate and remove the 4 screws holding the hard drive down at each corner using a PH000 Philips head.

    댓글 쓰기

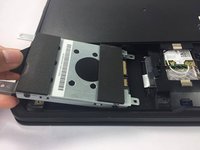
  6. Asus ROG GL551J Hard Drive Replacement: 6 단계, 이미지 2개 중 1개 Asus ROG GL551J Hard Drive Replacement: 6 단계, 이미지 2개 중 2개
    • Locate the black plastic tab attached to the bottom of the hard drive and pull it straight outwards.

    • Failure to correctly disconnect the hard drive before pulling it up and out can damage the connectors.

    • Once the hard drive detaches from the connector, lift the hard drive up and out.

    댓글 쓰기

결론

To reassemble your device, follow these instructions in reverse order.

취소: 해당 안내서를 완성하지 않았습니다.

다른 7명이 해당 안내서를 완성하였습니다.

작성자

2다른 기여자 명과 함께

Thien Vu

회원 가입일: 02/15/17

412 평판

안내서 2개를 작성함

USF Tampa, Team 5-4, Lacy Spring 2017 USF Tampa, Team 5-4, Lacy Spring 2017 회원

USFT-LACY-S17S5G4

4 회원들

안내서 5개를 작성함

0가이드 댓글

댓글 쓰기

조회 통계:

지난 24시간: 1

지난 7일: 7

지난 30일: 41

전체 시간: 5,132