주요 콘텐츠로 건너뛰기

Automatic Tommy 20 Trigger Spring Replacement

필요한 것

  1. Automatic Tommy 20 Trigger Spring Replacement, Splitting the Gun into Two Halves: 1 단계, 이미지 1/2 Automatic Tommy 20 Trigger Spring Replacement, Splitting the Gun into Two Halves: 1 단계, 이미지 2/2
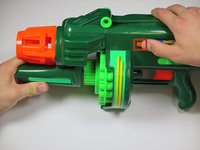
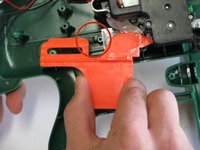
    • Locate the orange slider on the front side of the gun.

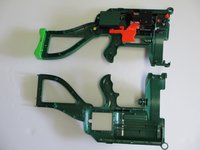
    • Pull the orange slider towards the back of the gun while lifting up on the nose the gun.

  2. Automatic Tommy 20 Trigger Spring Replacement: 2 단계, 이미지 1/3 Automatic Tommy 20 Trigger Spring Replacement: 2 단계, 이미지 2/3 Automatic Tommy 20 Trigger Spring Replacement: 2 단계, 이미지 3/3
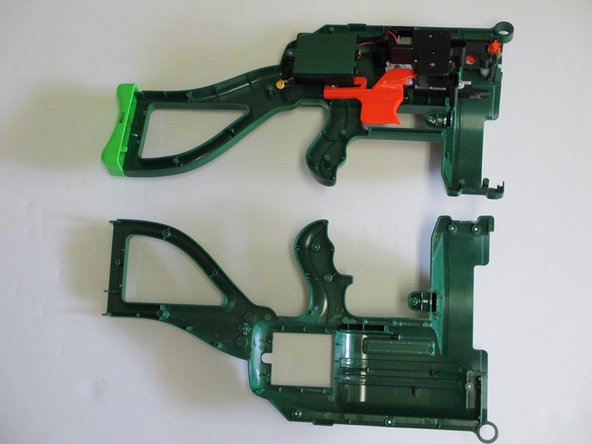
    • Remove the single 1/8 in. screw at the junction of the body and the nose using a Philips #00 Screwdriver.

    • Remove all parts within the chamber to be able to completely detach the nose of the gun.

    • Be careful to keep track of all the components for reassembly.

  3. Automatic Tommy 20 Trigger Spring Replacement, Ammo Drum: 3 단계, 이미지 1/3 Automatic Tommy 20 Trigger Spring Replacement, Ammo Drum: 3 단계, 이미지 2/3 Automatic Tommy 20 Trigger Spring Replacement, Ammo Drum: 3 단계, 이미지 3/3
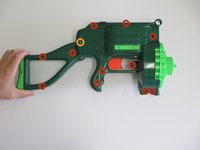
    • Remove the 1/16 in. screws using a Phillips #00 Screwdriver as indicated in the photo on the left.

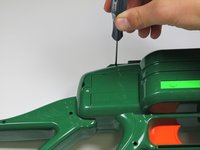
    • Remove the 1 mm screw on the battery lid using a Philips #1 Screwdriver as indicated in the photo on the left.

  4. Automatic Tommy 20 Trigger Spring Replacement: 4 단계, 이미지 1/1
    • Carefully spread apart the two halves of the gun, and lift out the ammo drum.

  5. Automatic Tommy 20 Trigger Spring Replacement, Split the Gun into Two Halves: 5 단계, 이미지 1/2 Automatic Tommy 20 Trigger Spring Replacement, Split the Gun into Two Halves: 5 단계, 이미지 2/2
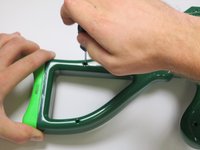
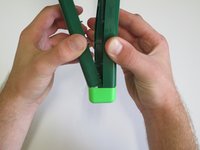
    • Grab both sides of the gun and pull forcefully in an upward and outward motion to remove from the light green stock.

    • If this is your first time disassembling your gun, the stock will be glued to each half of the gun's body. To break off the stock from the frame of the gun, you will need to careful wiggle the two halves so that the glue will break apart. The plastic on the gun may break or warp slightly.

  6. Automatic Tommy 20 Trigger Spring Replacement, Removing the Battery Box: 6 단계, 이미지 1/2 Automatic Tommy 20 Trigger Spring Replacement, Removing the Battery Box: 6 단계, 이미지 2/2
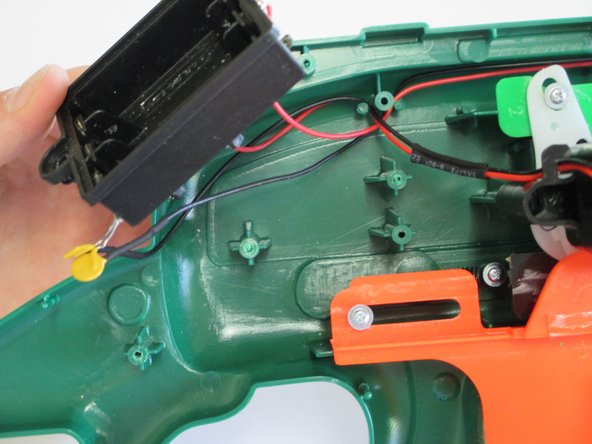
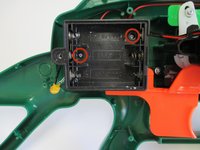
    • Remove the two 1/16 in. screws attaching the battery box to the frame of the gun using a Phillips #00 Screwdriver.

    • Lift the battery box off the frame of the gun to give yourself access to the trigger mechanism.

  7. Automatic Tommy 20 Trigger Spring Replacement, Removing the Screws from the Trigger Mechanism: 7 단계, 이미지 1/1
    • Remove the two 1/6 in. screws connecting the trigger and trigger spring to the frame of the gun using a Phillips #00 Screwdriver.

  8. Automatic Tommy 20 Trigger Spring Replacement: 8 단계, 이미지 1/2 Automatic Tommy 20 Trigger Spring Replacement: 8 단계, 이미지 2/2
    • Lift the plastic trigger away from the gun along with the attached spring.

    • Make sure you do not lift the trigger without the spring or the spring may stretch and no longer function properly.

결론

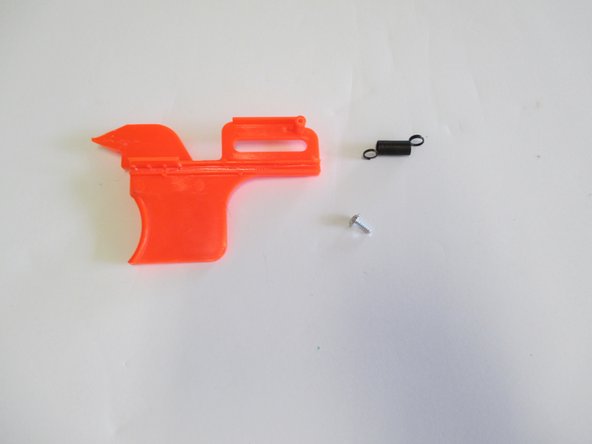
To reassemble your device, follow these instructions in reverse order.

다른 2명이 해당 안내서를 완성하였습니다.

Moira Foster

회원 가입일: 10/09/14

419 평판

안내서 3개 작성하였습니다

Cal Poly, Team 6-22, Maness Fall 2014 Cal Poly, Team 6-22, Maness Fall 2014 회원

CPSU-MANESS-F14S6G22

4 회원들

안내서 6개 작성하였습니다

댓글 0개

댓글 쓰기

조회 통계:

24 시간 전: 0

7일 전: 1

30일 전: 4

전체 시간: 822