주요 콘텐츠로 건너뛰기
수리 커뮤니티 가입 - 계정 만들기

Blackberry Curve 8330 Keyboard Replacement

필요한 것

  1. Blackberry Curve 8330 Keyboard Replacement, Remove Back Cover: 1 단계, 이미지 1개 중 1개
    • We did not have an actual back cover or battery for the phone we were given. Therefore, the first couple of steps will be without pictures.

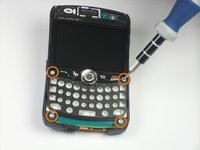
    • Hold the phone with the back side facing you.

    • Press down on the silver tab towards the bottom end of the phone.

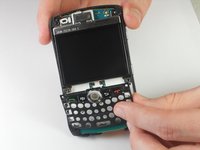
    • Carefully lift up the back casing to reveal the battery.

  2. Blackberry Curve 8330 Keyboard Replacement, Remove Battery: 2 단계, 이미지 1개 중 1개
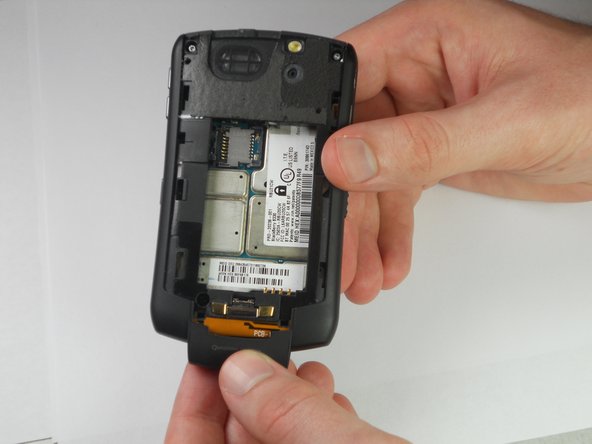
    • Put your finger on the top left corner of the battery and lift the battery up and out of its housing.

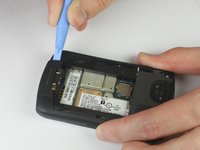
    • The phone should now look like this.

  3. Blackberry Curve 8330 Keyboard Replacement, Keyboard: 3 단계, 이미지 1개 중 1개
    • Remove the two top screws using a T5 Torx screwdriver.

  4. Blackberry Curve 8330 Keyboard Replacement: 4 단계, 이미지 2개 중 1개 Blackberry Curve 8330 Keyboard Replacement: 4 단계, 이미지 2개 중 2개
    • Use a plastic opening tool to pry the edges of the bottom cover until it snaps loose.

    • The cover will now pull off easily.

  5. Blackberry Curve 8330 Keyboard Replacement: 5 단계, 이미지 2개 중 1개 Blackberry Curve 8330 Keyboard Replacement: 5 단계, 이미지 2개 중 2개
    • Use a plastic opening tool to pry between the front and back cover.

    • Start prying from wherever it is easiest to separate the silver and black plastic of the covers.

    • There are 5 securing clips on the front panel to disconnect.

    • Pry gently to prevent breaking the plastic clips when removing the front panel.

    • Once all the clips have been freed, the front cover will lift away from the phone.

  6. Blackberry Curve 8330 Keyboard Replacement: 6 단계, 이미지 1개 중 1개
    • Lift the flexible keypad away from the device. It should come off easily.

  7. Blackberry Curve 8330 Keyboard Replacement: 7 단계, 이미지 2개 중 1개 Blackberry Curve 8330 Keyboard Replacement: 7 단계, 이미지 2개 중 2개
    • Use a T6 Torx Screwdriver to remove the four corner screws on the keyboard's housing.

    • Lift the keyboard frame away from the device.

    • There may be a small amount of adhesive at the bottom of the frame that needs to be pulled away.

결론

To reassemble your device, follow these instructions in reverse order.

다른 한 분이 해당 안내서를 완성하였습니다.

작성자

4다른 기여자 명과 함께

Nolan Reker

회원 가입일: 04/04/12

30 평판

안내서 1개를 작성함

Cal Poly, Team 14-11, Forte Spring 2012 Cal Poly, Team 14-11, Forte Spring 2012 회원

CPSU-FORTE-S12S14G11

5 회원들

안내서 5개를 작성함

0가이드 댓글

댓글 쓰기

조회 통계:

지난 24시간: 3

지난 7일: 12

지난 30일: 46

전체 시간: 2,077