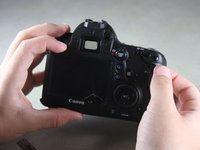
소개
Use this guide to replace the rear body panel of your EOS 6D or to access damaged internal components.
필요한 것
-
-
Remove the viewfinder cover by pinching the sides and sliding it upward.
 FixBot에 문의하기
-
-
-
Open the battery door on the bottom of the camera.
-
Use your thumb to slide the small black tab on the inside of the battery door up and pull the door off the camera.
-
-
-
Slide your fingernail or the flat end of the spudger underneath the rubber covering and gently peel it off all sides of the camera.
-
-
-
-
Open the covers to the HDMI/AV/MIC ports on the side of the camera by gently pulling outward on the bottom of the covers.
-
Rotate the covers to the side so that you can see the connection ports inside.
-
Remove the following screws:
-
Two silver 5mm Phillips #00
-
One black 6mm Phillips #00
-
-
-
Remove the cover to the HDMI/AV/MIC ports by gently lifting the tab on the bottom edge of the camera.
-
-
-
Rotate your camera so the bottom side is facing you.
-
Remove the following screws:
-
One 6mm Phillips #00
-
Two 3mm Phillips #00
-
-
-
Rotate your camera so the back is facing you.
-
Remove the following screws:
-
Three silver 5mm Phillips #00
-
Two black 6mm Phillips #00
-
One black 4mm Phillips #00
-
-
-
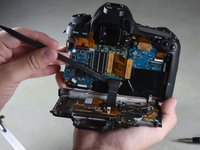
Carefully use your fingers to tilt the back panel downward to about a 90 degree angle.
-
Use the flat end of the spudger to gently pry off the ribbon wire from the inside of the camera.
-


To reassemble your device, follow these instructions in reverse order.
다른 12명이 해당 안내서를 완성하였습니다.
팀

Cal Poly, Team 11-48, Amido Spring 2014 Cal Poly, Team 11-48, Amido Spring 2014 회원
CPSU-AMIDO-S14S11G48
4 회원들
안내서 20개를 작성함
2가이드 댓글
Thanks alot, very helpful
Thanks alot, very helpful fixed an issue