소개
The main motherboard controls all functions of the camera.
필요한 것
-
-
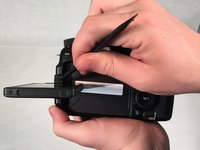
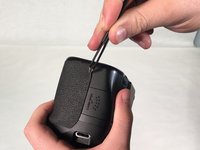
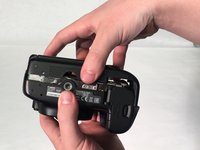
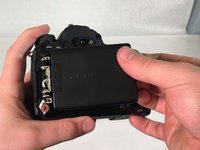
Hold the camera with the lens pointing down. Press the highlighted button with your finger to release the cover.
-
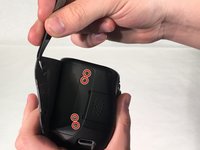
Pull cover over to expose the battery.
 FixBot에 문의하기
-
-
-
Press the white button with your finger to release the battery.
-
Once released, the battery will eject out about two inches
-
-
-
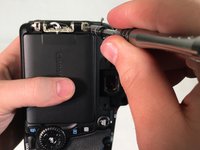
Pull Touchscreen out and rotate 90 degrees. Remove the four 3 mm Phillips #000 head screws that are now exposed at the hinge.
-
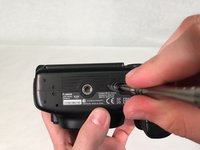
Remove the two 5 mm Phillips #000 head screws that near the viewfinder.
-
Use a spudger and pry apart the two plastic hinge-covers surrounding the screen hinge.
-
Rotate the screen forward 90 degrees and push it back into its housing against the camera.
-
-
-
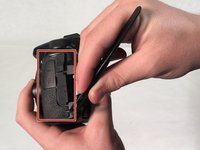
Use a spudger to peel rubber matting on left hand side to expose camera backplate mounting screws.
-
Remove three 4 mm Phillip #000 head screws that mount the backplate to the left side of camera.
-
-
-
이 단계에 사용된 도구:Tweezers$4.99
-
Use tweezers to pry rubber matting on right hand side to expose backplate mounting screws.
-
Remove four 4 mm Phillips #000 head screws that mount the backplate to the right side of camera.
-
-
-
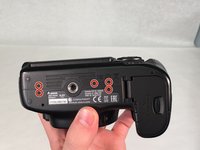
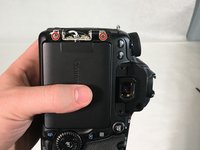
Turn camera upside down. Remove five 5 mm Phillips #000 head screws securing the backplate to the bottom of the camera.
-
Grab the backplate and gently pull away from camera.
-
-
-
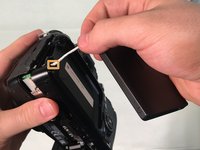
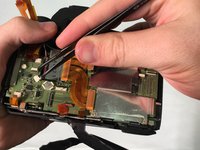
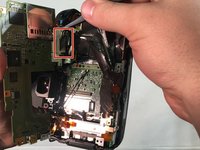
Carefully pry open backplate from camera to expose LCD connector (white wire). LCD connector is attached with a metal bar to the motherboard.
-
Use tweezers to gently pry metal bar connector from camera motherboard.
-
-
-
Remove two 4 mm Phillips #000 head screws that mount the LCD touchscreen to the hinge on the camera.
-
-
-
Grip the screen with your hand and gently pull white connecting wire through hole in backplate.
-
Once the connector reaches the hole, twist the connector and pull completely through hole.
-
-
-
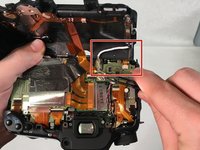
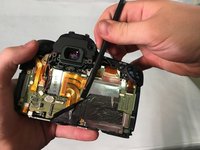
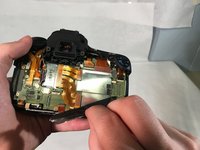
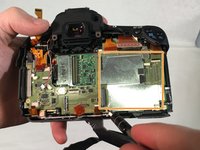
Use spudger to lift edge of black heat tape.
-
Slowly peel back black heat tape.
-
-
이 단계에 사용된 도구:Tweezers$4.99
-
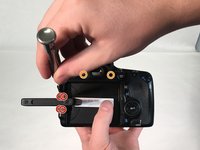
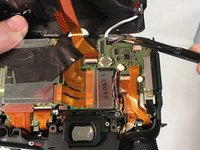
Very carefully, use spudger to remove nine orangish ribbon cables.
-
Using tweezers remove the two wire cables shown.
-
-
-
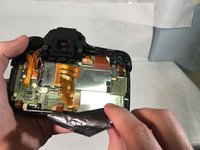
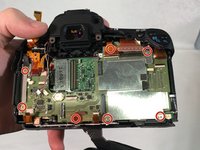
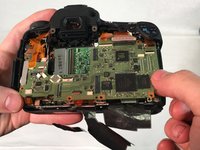
Remove seven 5 mm Phillips #000 head screws around motherboard.
-
Once the five screws are removed, remove the metal chip covered by hand.
-
-
-
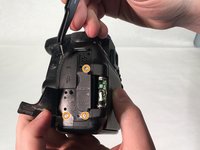
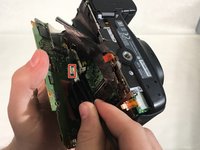
Slowly lift motherboard to expose the two cable wires underneath.
-
Using tweezers, unattach the two wire cables holding the motherboard in.
-


To reassemble your device, follow these instructions in reverse order.
다른 17명이 해당 안내서를 완성하였습니다.
팀

University of Memphis, Team S2-G5, Kim Spring 2018 University of Memphis, Team S2-G5, Kim Spring 2018 회원
UM-KIM-S18S2G5
3 회원들
안내서 15개를 작성함
5가이드 댓글
Great write up and illustrations. I'm in the process of repairing a 70D and this will be a great help.
Thank you and keep up the good work!
Hi, do you know if after replacing the main board it is necessary to configure the camera with some software ? (I heard of spt software)
Stephen Lay - 답글 공유
Hi Tyler my Canon Camera eos 70D isn’t working anymore is it possible to replace the motherboard?
Je suis à recherche de la carte mère de mon canon 70D. Puis je avoir de l’aide s’il vous plaît. Merci
Je suis à la recherche d'une carte mère Pour canon EOS 70d. Aidez-moi svp