소개
This guide will instruct you how to remove the back panel of your camera.
필요한 것
-
-
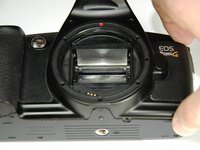
Using a #00 Phillips screw driver, remove three 4.4 mm Phillips screws as indicated by the red circles.
 FixBot에 문의하기
-
-
-
Using your finger, peel back the textured grip so the components are separated.
-
-
-
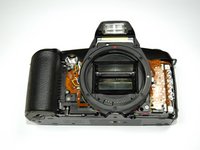
Using the flat end of a spudger, loosen the connection between the front panel and the device.
-
Remove the front panel using your hands.
-
-
-
Turn Camera over.
-
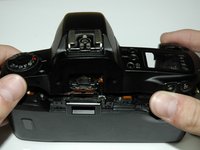
Using a #00 Phillips screw driver, unscrew the two 4.9 mm Phillips screws located on either side of the viewfinder.
-
-
-
-
Using a #00 Phillips screw driver, unscrew the one 5.7 mm Phillips screw located next to the LCD screen.
-
-
-
Lay the camera on its back.
-
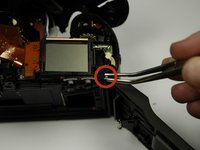
Unsolder the flash connection from the motherboard as noted by the blue circle.
-
-
-
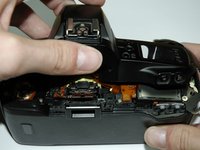
Remove the top panel by lifting it from the back, pushing it forward over the camera and letting it rotate down in front of the camera.
-
-
-
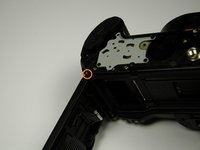
Using a #00 Philllips screw driver, unscrew the 6.8 mm Phillips screw that holds the strap anchor noted by the red circle.
-
Remove the strap anchor.
-
-
-
Unlatch the back panel.
-
Using a #00 Phillips screw driver, unscrew the six screws on the bottom of the camera.
-
One 7.4 mm Phillips screw
-
Two 6.0 mm Phillips screws
-
Two 4.4 mm Phillips screws
-
One 3.9 mm Phillips screw
-
-
이 단계에 사용된 도구:Tweezers$4.99
-
From the bottom of the camera push the hinge rod in with your finger.
-
Return the camera to its upright position.
-
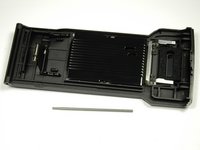
Use pliers (or tweezers) to pull the rod out from the top.
-


To reassemble your device, follow these instructions in reverse order.
팀

Cal Poly, Team 14-9, Forte Spring 2012 Cal Poly, Team 14-9, Forte Spring 2012 회원
CPSU-FORTE-S12S14G9
5 회원들
안내서 36개를 작성함