소개
This guide shows you how to install a new LCD screen.
필요한 것
-
-
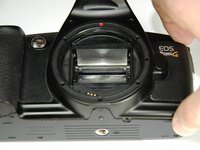
Using a #00 Phillips screw driver, remove three 4.4 mm Phillips screws as indicated by the red circles.
 FixBot에 문의하기
-
-
-
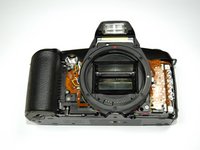
Using your finger, peel back the textured grip so the components are separated.
-
-
-
Using the flat end of a spudger, loosen the connection between the front panel and the device.
-
Remove the front panel using your hands.
-
-
-
-
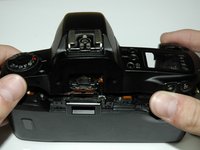
Turn Camera over.
-
Using a #00 Phillips screw driver, unscrew the two 4.9 mm Phillips screws located on either side of the viewfinder.
-
-
-
Using a #00 Phillips screw driver, unscrew the one 5.7 mm Phillips screw located next to the LCD screen.
-
-
-
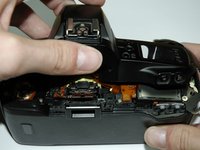
Lay the camera on its back.
-
Unsolder the flash connection from the motherboard as noted by the blue circle.
-
-
-
Remove the top panel by lifting it from the back, pushing it forward over the camera and letting it rotate down in front of the camera.
-
-
-
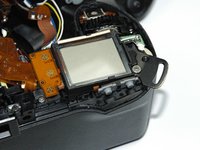
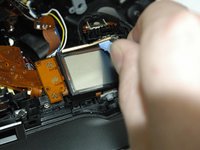
Pry off the small metal brace holding the LCD screen. (Push forward and slide toward the center)
-


To reassemble your device, follow these instructions in reverse order.
다른 한 분이 해당 안내서를 완성하였습니다.
팀

Cal Poly, Team 14-9, Forte Spring 2012 Cal Poly, Team 14-9, Forte Spring 2012 회원
CPSU-FORTE-S12S14G9
5 회원들
안내서 36개를 작성함
2가이드 댓글
Great guide thanks! I found my lcd screen was partially working, the top part of the display was showing incomplete numbers...Cleaning the lcd contacts and reassembling it fixed the issue! No need to replace the screen in my case!
Michelangelo - 답글 공유
What Kind of glue is suggested to replace the textured grip?
Mark Garcia - 답글 공유