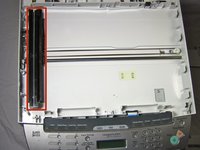
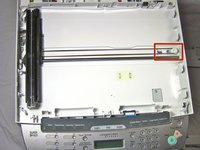
주요 콘텐츠로 건너뛰기

Canon ImageCLASS MF4350d Scanner Belt Replacement

필요한 것

  1. Canon ImageCLASS MF4350d Scanner Belt Replacement, Scanner Disassembly: 1 단계, 이미지 1/1
    • If at any point you see glass that seems cracked or broken, handle with care. Broken glass is sharp and can cause serious damage.

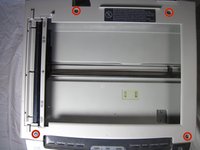
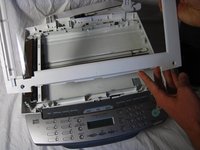
    • Lift up the lid. Then be sure to examine the glass. If there are any cracks or broken fragments handle with extreme care.

  2. Canon ImageCLASS MF4350d Scanner Belt Replacement: 2 단계, 이미지 1/3 Canon ImageCLASS MF4350d Scanner Belt Replacement: 2 단계, 이미지 2/3 Canon ImageCLASS MF4350d Scanner Belt Replacement: 2 단계, 이미지 3/3
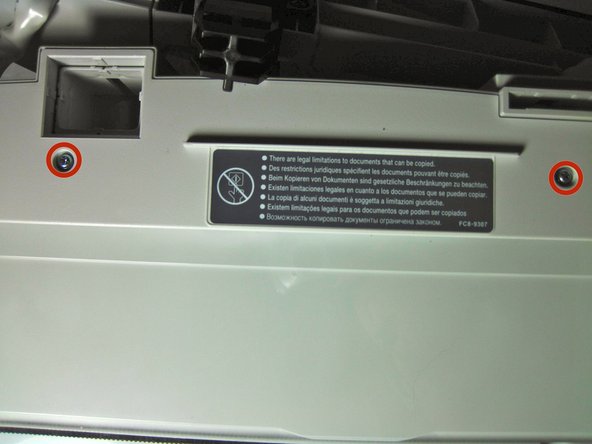
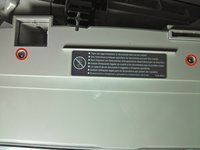
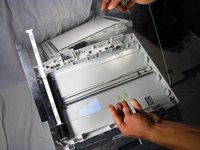
    • Locate the black and white hinges.

    • Gently lift out the black and white hinges.

  3. Canon ImageCLASS MF4350d Scanner Belt Replacement: 3 단계, 이미지 1/3 Canon ImageCLASS MF4350d Scanner Belt Replacement: 3 단계, 이미지 2/3 Canon ImageCLASS MF4350d Scanner Belt Replacement: 3 단계, 이미지 3/3
    • Next, locate and remove the four 10mm screws.

  4. Canon ImageCLASS MF4350d Scanner Belt Replacement: 4 단계, 이미지 1/1
    • Gently, pry off the top plate, starting from the back of the printer.

  5. Canon ImageCLASS MF4350d Scanner Belt Replacement: 5 단계, 이미지 1/2 Canon ImageCLASS MF4350d Scanner Belt Replacement: 5 단계, 이미지 2/2
    • After you have taken off the plate, check to make sure that there is no broken glass. If there is broken glass handle it with gloves. Broken glass, if handled improperly, can cause physical injury.

  6. Canon ImageCLASS MF4350d Scanner Belt Replacement, Scanner Belt: 6 단계, 이미지 1/2 Canon ImageCLASS MF4350d Scanner Belt Replacement, Scanner Belt: 6 단계, 이미지 2/2
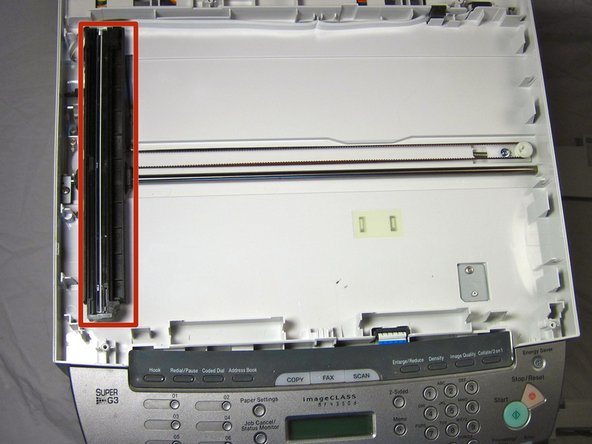
    • Remove the black component by gently pulling it up from the black scanner belt

  7. Canon ImageCLASS MF4350d Scanner Belt Replacement: 7 단계, 이미지 1/2 Canon ImageCLASS MF4350d Scanner Belt Replacement: 7 단계, 이미지 2/2
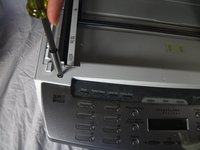
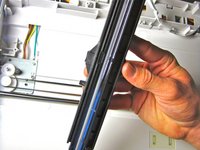
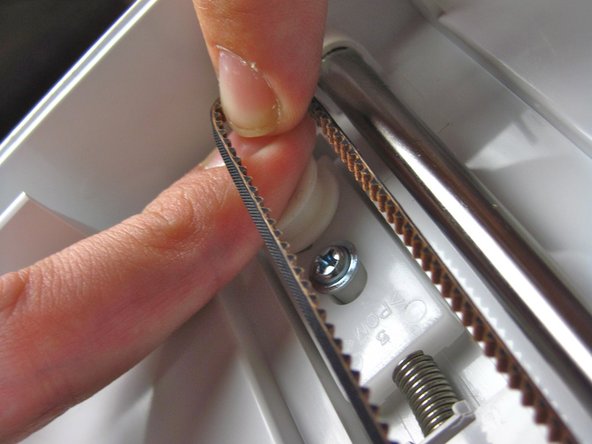
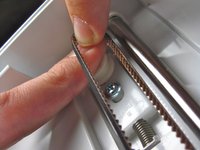
    • Press down on the white release and force it in toward the spring as shown. While you do this, pull the scanner belt out of the track.

    • Take a new belt and put it in the same way that you took it out.

결론

To reassemble your device, follow these instructions in reverse order.

Tanner Papenfuss

회원 가입일: 09/30/13

560 평판

안내서 4개 작성하였습니다

Cal Poly, Team 13-1, Forte Fall 2013 Cal Poly, Team 13-1, Forte Fall 2013 회원

CPSU-FORTE-F13S13G1

5 회원들

안내서 16개 작성하였습니다

댓글 0개

댓글 쓰기

조회 통계:

24 시간 전: 0

7일 전: 3

30일 전: 6

전체 시간: 2,855