주요 콘텐츠로 건너뛰기
수리 커뮤니티 가입 - 계정 만들기

Canon PowerShot A540 LCD Screen Replacement

필요한 것

  1. Canon PowerShot A540 LCD Screen Replacement, Back Cover: 1 단계, 이미지 2개 중 1개 Canon PowerShot A540 LCD Screen Replacement, Back Cover: 1 단계, 이미지 2개 중 2개
    • Turn off the camera.

    • Turn the camera upside-down and press the tab to release the battery cover. Remove the batteries.

    댓글 쓰기

  2. Canon PowerShot A540 LCD Screen Replacement: 2 단계, 이미지 1개 중 1개
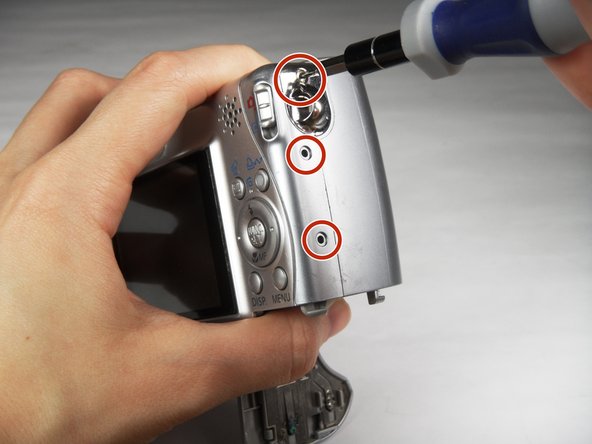
    • Turn the camera upside down to view the "Card/Batt. Open" Cover.

    • Use a Phillips head #000 screwdriver to remove the three (3) 4.0 mm screws.

    댓글 쓰기

  3. Canon PowerShot A540 LCD Screen Replacement: 3 단계, 이미지 1개 중 1개
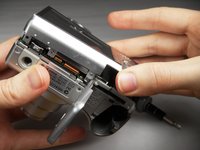
    • Open "Card/Batt. Open" Cover.

    • Remove the one (1) 5.0 mm screw with the Phillips head #000 screwdriver.

    댓글 쓰기

  4. Canon PowerShot A540 LCD Screen Replacement: 4 단계, 이미지 1개 중 1개
    • Turn the camera to the right side of the LCD screen.

    • Remove the three (3) 4.0 mm screws with the Phillips head #000 screwdriver.

    댓글 쓰기

  5. Canon PowerShot A540 LCD Screen Replacement: 5 단계, 이미지 3개 중 1개 Canon PowerShot A540 LCD Screen Replacement: 5 단계, 이미지 3개 중 2개 Canon PowerShot A540 LCD Screen Replacement: 5 단계, 이미지 3개 중 3개
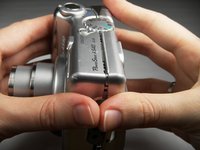
    • Gently remove the back cover.

    • Start at the bottom at the corner of the "Card/Batt. Open" Cover.

    • Then move onto the other edges and the top.

    • It may be tight at the top!

    댓글 쓰기

  6. Canon PowerShot A540 LCD Screen Replacement, LCD Screen: 6 단계, 이미지 2개 중 1개 Canon PowerShot A540 LCD Screen Replacement, LCD Screen: 6 단계, 이미지 2개 중 2개
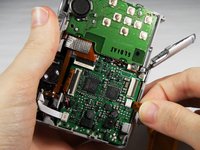
    • Turn the camera to view the back.

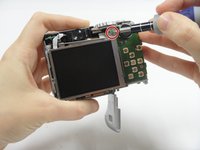
    • Remove the one (1) 3.0 mm screw on the top right corner of the screen.

    • There is a small metal bar that rests on this frame. Keep it with the screws that have been removed from the camera.

    댓글 쓰기

  7. Canon PowerShot A540 LCD Screen Replacement: 7 단계, 이미지 2개 중 1개 Canon PowerShot A540 LCD Screen Replacement: 7 단계, 이미지 2개 중 2개
    이 단계에 사용된 도구:
    Tweezers
    $4.99
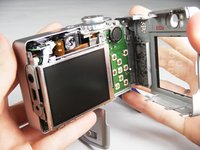
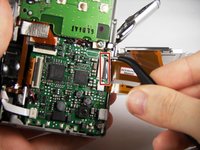
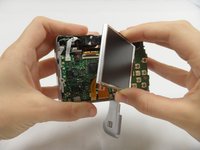
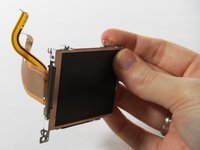
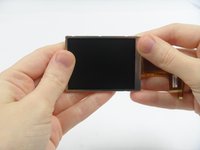
    • Lift the LCD Screen off of the back to view the attached ribbon cables.

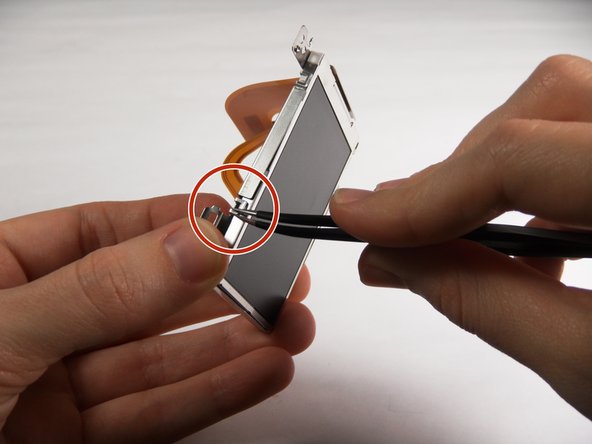
    • Use tweezers to flip the black bar up.

    댓글 쓰기

  8. Canon PowerShot A540 LCD Screen Replacement: 8 단계, 이미지 3개 중 1개 Canon PowerShot A540 LCD Screen Replacement: 8 단계, 이미지 3개 중 2개 Canon PowerShot A540 LCD Screen Replacement: 8 단계, 이미지 3개 중 3개
    • Gently pull the big ribbon out.

    • Gently pull the small ribbon out.

    • The small ribbon does not have a bar like the big ribbon.

    댓글 쓰기

  9. Canon PowerShot A540 LCD Screen Replacement: 9 단계, 이미지 2개 중 1개 Canon PowerShot A540 LCD Screen Replacement: 9 단계, 이미지 2개 중 2개
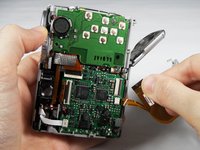
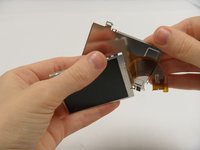
    • Use tweezers at the top left of the LCD Screen to wedge the top left of the Outer Frame loose.

    • Use your thumb to hold the Outer Frame open.

    • Use the tweezers at the top right of the LCD Screen to wedge the top right of the Outer Frame loose.

    댓글 쓰기

  10. Canon PowerShot A540 LCD Screen Replacement: 10 단계, 이미지 2개 중 1개 Canon PowerShot A540 LCD Screen Replacement: 10 단계, 이미지 2개 중 2개
    • Slide the LCD Screen out from the Outer Frame.

    댓글 쓰기

결론

To reassemble your device, follow these instructions in reverse order.

취소: 해당 안내서를 완성하지 않았습니다.

다른 2명이 해당 안내서를 완성하였습니다.

작성자

4다른 기여자 명과 함께

Carley Fuller

회원 가입일: 03/23/15

434 평판

안내서 3개를 작성함

Baylor, Team 7-12, Williams Spring 2015 Baylor, Team 7-12, Williams Spring 2015 회원

BU-WILLIAMS-S15S7G12

3 회원들

안내서 20개를 작성함

1가이드 댓글

I wish to purchase a new screen. Where? I feel capable of repair per these instructions and a u tube video.

Geo Schou - 답글 공유

댓글 쓰기

조회 통계:

지난 24시간: 2

지난 7일: 6

지난 30일: 44

전체 시간: 1,517