주요 콘텐츠로 건너뛰기
수리 커뮤니티 가입 - 계정 만들기

Canon PowerShot A630 Trigger Button Replacement

필요한 것

  1. Canon PowerShot A630 Trigger Button Replacement, Front Panel: 1 단계, 이미지 2개 중 1개 Canon PowerShot A630 Trigger Button Replacement, Front Panel: 1 단계, 이미지 2개 중 2개
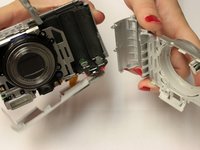
    • Open the battery door by sliding the tab on the battery door while pushing the battery door away from the camera.

    • Remove batteries.

  2. Canon PowerShot A630 Trigger Button Replacement: 2 단계, 이미지 2개 중 1개 Canon PowerShot A630 Trigger Button Replacement: 2 단계, 이미지 2개 중 2개
    • Remove the three indicated .2mm screws using a Phillips #00 screwdriver.

    • Gently pull off side-panel to remove it.

  3. Canon PowerShot A630 Trigger Button Replacement: 3 단계, 이미지 1개 중 1개
    • Remove the two indicated .2mm screws using a Phillips #00 screwdriver.

  4. Canon PowerShot A630 Trigger Button Replacement: 4 단계, 이미지 2개 중 1개 Canon PowerShot A630 Trigger Button Replacement: 4 단계, 이미지 2개 중 2개
    • Remove the indicated .2mm screw using a Phillips #00 screwdriver.

    • Remove the three .2mm screws located on the internal side of the top panel within the battery chamber using a Phillips #00 screwdriver.

  5. Canon PowerShot A630 Trigger Button Replacement: 5 단계, 이미지 2개 중 1개 Canon PowerShot A630 Trigger Button Replacement: 5 단계, 이미지 2개 중 2개
    • Open 'DIGITAL A/V OUT' door on camera.

    • Remove the two indicated .2mm screws using a Phillips #00 screwdriver.

  6. Canon PowerShot A630 Trigger Button Replacement: 6 단계, 이미지 1개 중 1개
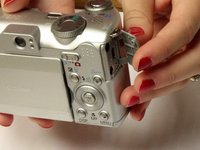
    • Grip the sides of the top panel and gently pull to separate the top panel from the camera body.

    • The top panel will not completely detach.

  7. Canon PowerShot A630 Trigger Button Replacement: 7 단계, 이미지 2개 중 1개 Canon PowerShot A630 Trigger Button Replacement: 7 단계, 이미지 2개 중 2개
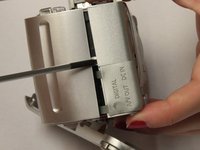
    • Gently pull the front and back panels apart, and use a Phillips #00 screwdriver to remove the screw connecting the panels.

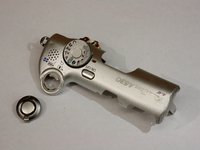
    • Gripping the top and bottom, gently pull the front panel away from the camera body to remove it.

  8. Canon PowerShot A630 Trigger Button Replacement, Trigger Button: 8 단계, 이미지 1개 중 1개
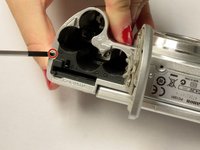
    • Use the spudger to gently pull back the retaining clip and pull the ribbon out

    • The top panel should now be completely detached from the camera

    • Applying to much force to the spudger may damage the retaining clip

  9. Canon PowerShot A630 Trigger Button Replacement: 9 단계, 이미지 1개 중 1개
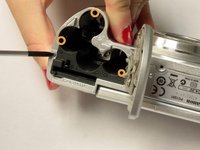
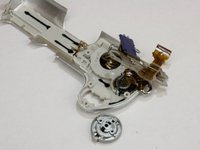
    • Remove the two screws holding down the metal frame using the Phillips #00 screwdriver

  10. Canon PowerShot A630 Trigger Button Replacement: 10 단계, 이미지 1개 중 1개
    • Lift up the metal frame to expose the two screws located under the trigger button.

    • Remove the two screws using Phillips #00 screwdriver

  11. Canon PowerShot A630 Trigger Button Replacement: 11 단계, 이미지 2개 중 1개 Canon PowerShot A630 Trigger Button Replacement: 11 단계, 이미지 2개 중 2개
    • Trigger button should fall out

결론

To reassemble your device, follow these instructions in reverse order.

다른 한 분이 해당 안내서를 완성하였습니다.

작성자

3다른 기여자 명과 함께

Kelly Duggan

회원 가입일: 10/13/14

460 평판

안내서 3개를 작성함

Clemson, Team 2-5, Benson Fall 2014 Clemson, Team 2-5, Benson Fall 2014 회원

CLEM-BENSON-F14S2G5

4 회원들

안내서 18개를 작성함

0가이드 댓글

댓글 쓰기

조회 통계:

지난 24시간: 3

지난 7일: 6

지난 30일: 32

전체 시간: 843