소개
If you need to to replace you the lens of your camera, we recommend that you use this guide.
필요한 것
-
-
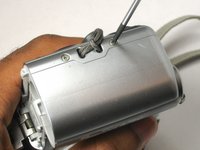
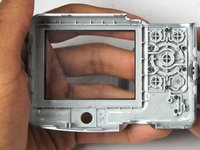
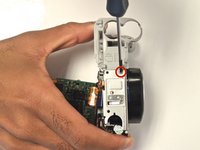
Place the camera down with the lens facing up.
-
Next, use the Phillips #00 Precision Screwdriver to unscrew the inner most 4 mm phillips head screw. This will remove the door from the camera.
-
-
-
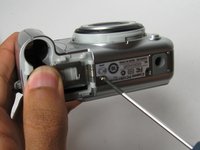
Use the Phillips #00 Precision Screwdriver to remove the six 4 mm Phillips head screws found on the sides and bottom of the camera.
-
-
-
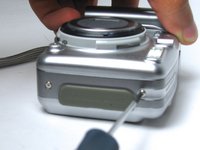
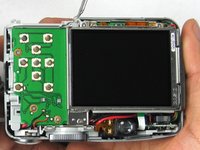
Unscrew the two 3 mm screws below the LCD Screen Mount using the Phillips #00 Precision Screwdriver.
-
Unscrew the top 4 mm screw using the Phillips #00 Precision Screwdriver.
-
-
-
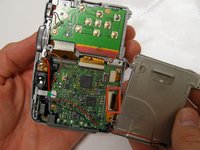
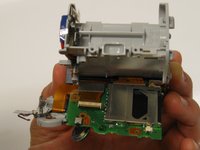
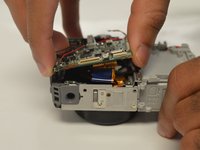
Carefully lift and turnover the LCD Screen so you are able to see the motherboard.
-
Without touching the motherboard, grab the LCD Screen's ribbon wire with your thumb and index finger and carefully disconnect it from the ZIF connector. Have your fingers close to the ZIF connector when pulling the ribbon wire out. The LCD Screen should be positioned in between your fingers.
-
Do not rip the ribbon wire or the red and black power wires when pulling the LCD screen out.
-
-
-
-
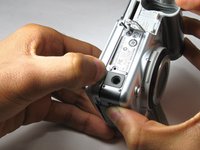
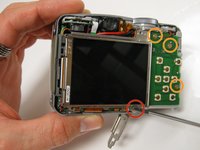
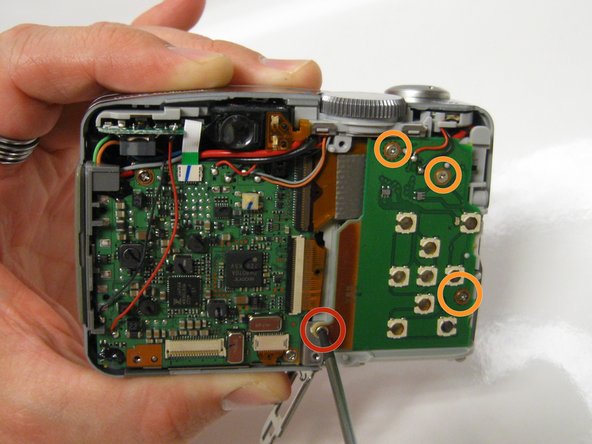
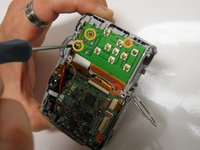
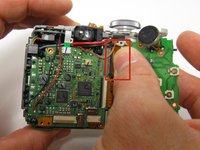
Remove the 3 mm Phillips head screw between the circuit boards using the Phillips #00 Precision Screwdriver.
-
Remove the next three 3.5 mm Phillips head screws at the button circuit board using the Phillips #00 Precision Screwdriver.
-
-
-
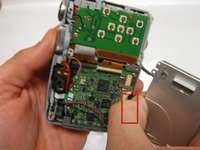
Use the spudger to unclip the red and black wires from underneath the shutter button and settings dial housing unit.
-
-
-
Turn the camera over and unscrew the 4.5 mm Phillips head screw to detach the shutter button and settings dial from the rest of the camera.
-
From the metal frame, unscrew the 3 mm Phillips screw head to begin to detachment of the battery housing unit.
-
-
-
Use the plastic opening tool to separate the button circuit board from the shutter button and settings dial housing unit.
-
Carefully disconnect the ribbon cable attached to the user buttons circuit board away from the ZIF connector on the motherboard.
-
Remove the user button circuit board.
-
-
-
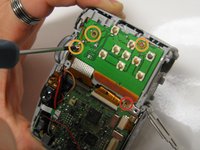
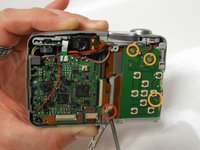
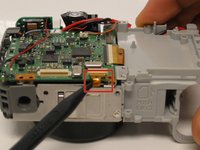
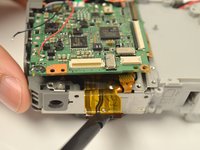
Use the spudger to carefully remove the attached ribbon cable from the ZIF connector located on the bottom right of the motherborad.
-
-
-
Use the spudger to carefully remove the attached ribbon cable from the ZIP connector on the right side of the motherboard.
-
Be careful not to rip the ribbon cable out of the ZIF connector while removing.
-
-
-
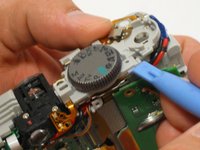
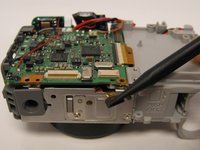
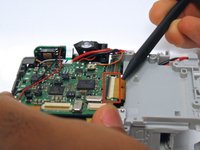
Next, use the spudger to remove the green ribbon from the attached ZIF connector.
-
Be careful not to rip the ribbon cable out of the ZIF connector while removing.
-
-
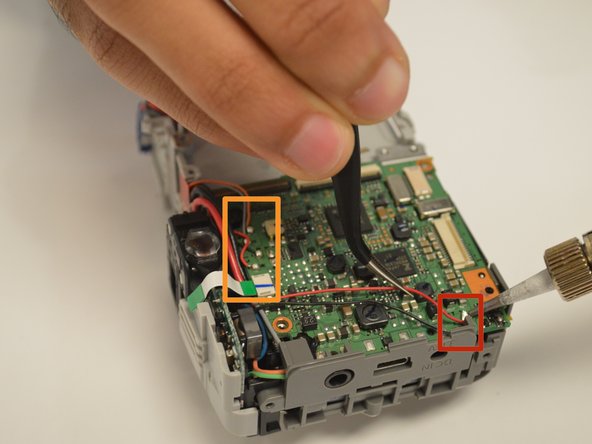
이 단계에 사용된 도구:Tweezers$4.99
-
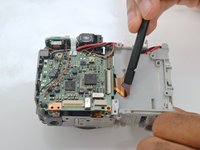
Unsolder all of the wires attached to the motherboard and move them aside with the tweezers.
-
-
-
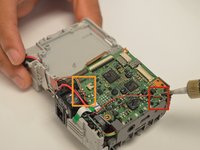
After all of ribbons have been disconnected, gently lift the motherboard to expose the ribbon cable that connects the motherboard to the lens.
-
Use the spudger to remove the the ribbon cable attached to the motherboard. Be sure to alternate both sides of ribbon cable to evenly remove.
-
Be careful not to rip the ribbon cable out from the ZIF connector the ribbon cable is attached to.
-
-
-
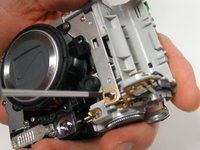
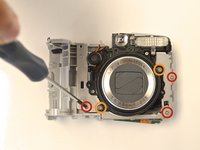
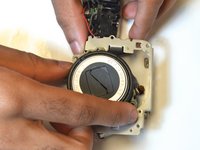
Use the screwdriver to remove the three 3 mm Phillips screws from the lens metal frame.
-
Use the screwdriver to remove the two 3.5 mm Phillips screws from the lens metal frame.
-
Pull out the AV DC IN port on the right side of the camera.
-
Turn the camera over so the bottom is exposed to remove the 3 mm Phillips head screw to disassemble the battery housing unit from the camera.
-
-
-
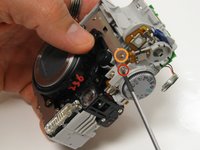
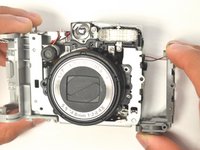
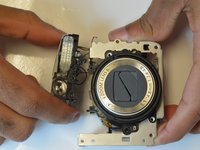
Unscrew the two 3 mm Phillips screws from the top of the lens housing unit that connects it to the flash assembly.
-
-
-
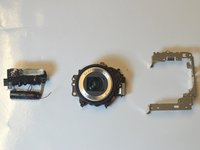
Now, the flash assembly and metal frame can be easily pulled away from the lens.
-


To reassemble your device, follow these instructions in reverse order.
다른 3명이 해당 안내서를 완성하였습니다.
팀

USF Tampa, Team 17-4, Watkins Winter 2015 USF Tampa, Team 17-4, Watkins Winter 2015 회원
USFT-WATKINS-W15S17G4
3 회원들
안내서 8개를 작성함