소개
If your cooking surface isn't turning on or is being pushed up you may need to replace a spring, a process which will be explained in this guide.
필요한 것
-
-
Remove cooking plates by pushing in the tabs on each side of the plate at the same time.
 FixBot에 문의하기
-
-
-
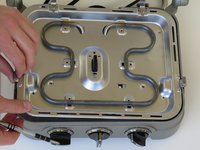
Remove the six 5.5mm Phillips #2 screws that secure the bottom heating coil to the device.
-
-
-
Remove the four 30 mm Phillips #2 screws that secure the bottom heating apparatus.
-
-
-
-
Remove the single 5.5 mm Phillips #2 screw next to center black button.
-
After removing the center screw the metal plate should be free to remove.
-
-
-
Lift the bottom heating apparatus up and remove large black center piece by pushing down on black button while sliding out.
-
Realign all surface and put device back together making sure all parts are lined up and heating surfaces are making contact.
-
The aligned parts will allow the cooking surfaces to work properly.
-
-
-
Pull out the spring, and insert the replacement spring making sure it is correctly aligned.
-


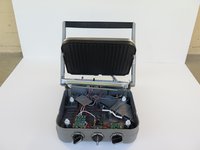


To reassemble your device, follow these instructions in reverse order.
다른 3명이 해당 안내서를 완성하였습니다.

팀

Cal Poly, Team 1-12, Maness Spring 2016 Cal Poly, Team 1-12, Maness Spring 2016 회원
CPSU-MANESS-S16S1G12
4 회원들
안내서 12개를 작성함
