소개
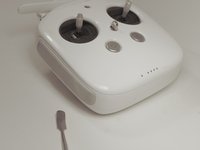
Use this guide to replace the back con board of a DJI Phantom 4 Advanced Remote Controller.
With step by step detailed instructions, you will be able to safely resolve issues that may arise with the back con board.
필요한 것
-
-
Remove the four screws with a Torx T8 screwdriver to access the back con board.
 FixBot에 문의하기
-
-
이 단계에 사용된 도구:Tweezers$4.99
-
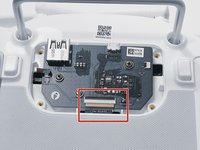
With tweezers, gently remove the large con board tab.
-
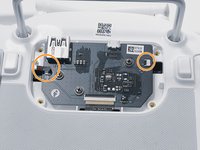
Use your hands to remove the two small clips. Pull out from the socket, in a horizontal direction.
-
-
-
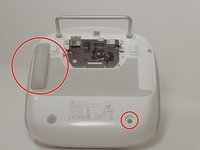
Peel off the rubber grips to access the screw holes.
-
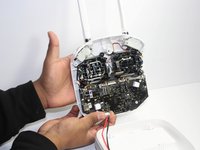
Remove the back board and set it aside.
-
-
-
Pull apart the back plastic panel.
-
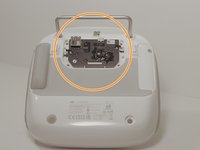
Once the back panel is off, you will have access to the motherboard.
-


To reassemble your device, follow these instructions in reverse order.
팀

Linn Benton Community College, Team S1-G4, Johnson Fall 2018 Linn Benton Community College, Team S1-G4, Johnson Fall 2018 회원
LBCC-JOHNSON-F18S1G4
3 회원들
안내서 12개를 작성함