주요 콘텐츠로 건너뛰기
수리 커뮤니티 가입 - 계정 만들기

Dell AC511 USB Cable Replacement

필요한 것

    1. Dell AC511 USB Cable Replacement, Front Panel: 1 단계, 이미지 3개 중 1개 Dell AC511 USB Cable Replacement, Front Panel: 1 단계, 이미지 3개 중 2개 Dell AC511 USB Cable Replacement, Front Panel: 1 단계, 이미지 3개 중 3개
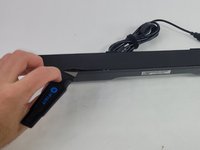
      • Use a Jimmy to peel off the screen stuck to the front of the speaker.

      • Start from any corner and use the Jimmy to get under the screen. Once one side lifts up, you can use your fingers to peel the rest off.

      • Be careful to avoid damage to the rest of the speaker and especially to yourself.

      • Don't worry if it tears; use the Jimmy again to peel off the rest.

      댓글 쓰기

    2. Dell AC511 USB Cable Replacement: 2 단계, 이미지 2개 중 1개 Dell AC511 USB Cable Replacement: 2 단계, 이미지 2개 중 2개
      • Remove ten 6 mm screws using a Phillips #1 screwdriver.

      댓글 쓰기

    3. Dell AC511 USB Cable Replacement: 3 단계, 이미지 2개 중 1개 Dell AC511 USB Cable Replacement: 3 단계, 이미지 2개 중 2개
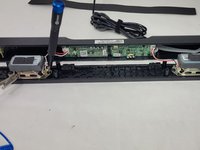
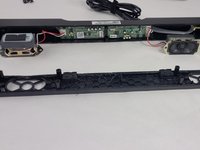
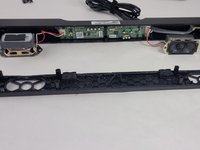
      • Lift the front panel off of the rest of the device.

      • The speakers will still be attached to the front panel. Being too rough could damage them.

      • Remove the 4 mm screws from the speakers using a JIS #1 screwdriver.

      • Remove the front panel from the device.

      댓글 쓰기

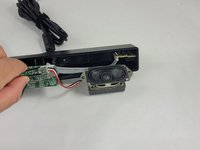
    1. Dell AC511 USB Cable Replacement, Speaker: 4 단계, 이미지 2개 중 1개 Dell AC511 USB Cable Replacement, Speaker: 4 단계, 이미지 2개 중 2개
      • Follow the three wires connected to the speaker to find where they connect to the circuit board.

      • Use tweezers to gently rock the end of the wires back and forth until they disconnect from the board.

      댓글 쓰기

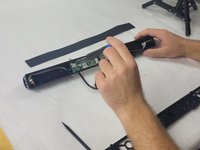
    1. Dell AC511 USB Cable Replacement, USB Cable: 5 단계, 이미지 2개 중 1개 Dell AC511 USB Cable Replacement, USB Cable: 5 단계, 이미지 2개 중 2개
      • Depending on where the soundbar is damaged, there are two different ways to remove the USB cable. This guide will cover both scenarios.

      • Remove the 6 mm screws connecting the circuit board to the rear panel using a Phillips #1 screwdriver.

      댓글 쓰기

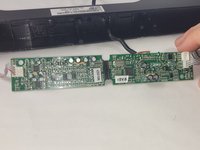
    2. Dell AC511 USB Cable Replacement: 6 단계, 이미지 2개 중 1개 Dell AC511 USB Cable Replacement: 6 단계, 이미지 2개 중 2개
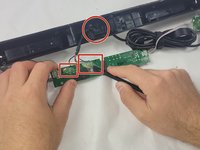
      • If the small wires coming from the USB cable are disconnected from the board, you'll have to solder them on. We recommend not letting that happen if you can help it.

      • The small wires may be glued to the circuit board. Pry off the glue with the Halberd Spudger.

      댓글 쓰기

    3. Dell AC511 USB Cable Replacement: 7 단계, 이미지 1개 중 1개
      • Follow this step if the wires are still connected. If they aren't, skip to the next step.

      • If the wiring to the circuit board seems fine, use a razor or wire strippers to clear the rubber insulation away from the USB.

      • Keep track of the colors! If you connect the wrong wires together, the speaker won't work, and you could ruin the board!

      • After removing the rubber insulation from the smaller wires, remove the access USB.

      • Splice in the new USB and wrap the connection with the colored wires in electrical tape.

      • If you end up with reduced sound quality, you may need to solder after all. Continue to the next step in that case.

      댓글 쓰기

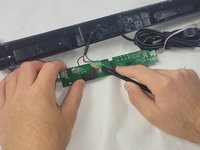
    4. Dell AC511 USB Cable Replacement: 8 단계, 이미지 1개 중 1개
      • Follow this step if the wires are not connected.

      • Remove the old USB wiring as best as possible from the circuit board.

      • Try to not be too rough. If needed, use wire strippers to remove the wires.

      • Remember the locations of the color coded USB wires and solder each into their respective places.

      • Take your time. Do not add too much solder; you could potentially fry the board if you do.

      댓글 쓰기

결론

To reassemble your device, follow these instructions in reverse order.

취소: 해당 안내서를 완성하지 않았습니다.

작성자

1다른 기여자 명과 함께

William Cook

회원 가입일: 03/19/24

653 평판

안내서 6개를 작성함

UMass Dartmouth, Team 4-6, Shaddix Spring 2024 UMass Dartmouth, Team 4-6, Shaddix Spring 2024 회원

UMASSD-SHADDIX-S24S4G6

4 회원들

안내서 18개를 작성함

0가이드 댓글

댓글 쓰기

조회 통계:

지난 24시간: 2

지난 7일: 16

지난 30일: 36

전체 시간: 534