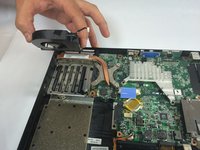
주요 콘텐츠로 건너뛰기
수리 커뮤니티 가입 - 계정 만들기

Dell Inspiron 6000 Fan Replacement

필요한 것

  1. Dell Inspiron 6000 Fan Replacement, Battery: 1 단계, 이미지 1개 중 1개
    • To prevent injury, make sure the laptop is unplugged before removing the battery.

    • Flip the laptop over, bottom-side up.

  2. Dell Inspiron 6000 Fan Replacement: 2 단계, 이미지 1개 중 1개
    • Push the switch next to the battery.

    • At the same time, lift the battery away from the laptop.

  3. Dell Inspiron 6000 Fan Replacement, Keyboard: 3 단계, 이미지 3개 중 1개 Dell Inspiron 6000 Fan Replacement, Keyboard: 3 단계, 이미지 3개 중 2개 Dell Inspiron 6000 Fan Replacement, Keyboard: 3 단계, 이미지 3개 중 3개
    • Place the laptop on flat surface.

    • Carefully open the laptop at far as it will go so that the back of screen is touching the flat surface.

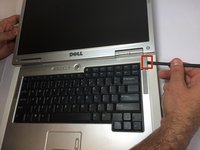
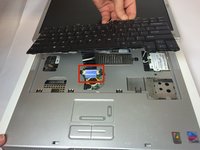
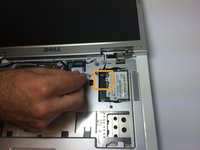
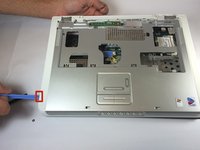
    • Carefully take a spudger and separate part of the cover at the red circle.

  4. Dell Inspiron 6000 Fan Replacement: 4 단계, 이미지 2개 중 1개 Dell Inspiron 6000 Fan Replacement: 4 단계, 이미지 2개 중 2개
    • Remove two 4 mm Philips #00 screws.

  5. Dell Inspiron 6000 Fan Replacement: 5 단계, 이미지 1개 중 1개
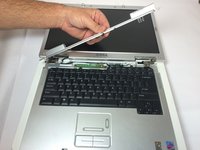
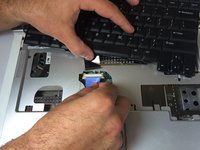
    • Gently lift the keyboard away from the laptop without harming the cord that is located at the bottom of the keyboard.

  6. Dell Inspiron 6000 Fan Replacement: 6 단계, 이미지 3개 중 1개 Dell Inspiron 6000 Fan Replacement: 6 단계, 이미지 3개 중 2개 Dell Inspiron 6000 Fan Replacement: 6 단계, 이미지 3개 중 3개
    • Gently pull the blue tab up until it comes away from computer.

  7. Dell Inspiron 6000 Fan Replacement, Fan: 7 단계, 이미지 1개 중 1개
    • Unscrew the 4 mm Phillips #00 screw.

    • The screw will remain attached to the cord when fully removed.

  8. Dell Inspiron 6000 Fan Replacement: 8 단계, 이미지 2개 중 1개 Dell Inspiron 6000 Fan Replacement: 8 단계, 이미지 2개 중 2개
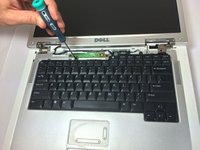
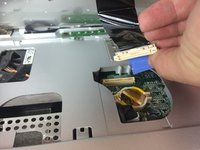
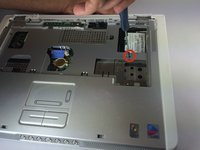
    • Gently pull the blue tab to separate the screen connection from the laptop.

    • Gently pull and disconnect the white and black cords from the power source.

  9. Dell Inspiron 6000 Fan Replacement: 9 단계, 이미지 2개 중 1개 Dell Inspiron 6000 Fan Replacement: 9 단계, 이미지 2개 중 2개
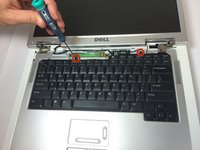
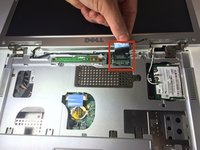
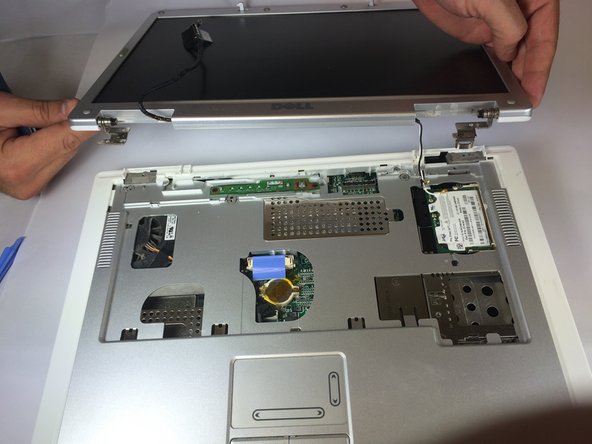
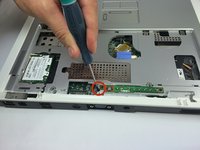
    • Remove four 4mm #00 Philips screws from the screen hinges.

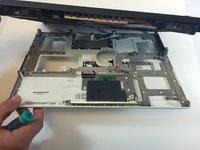
    • Lift the screen away from the laptop.

  10. Dell Inspiron 6000 Fan Replacement: 10 단계, 이미지 2개 중 1개 Dell Inspiron 6000 Fan Replacement: 10 단계, 이미지 2개 중 2개
    • Remove two 4 mm Philips #00 screws that connect top of laptop to base..

  11. Dell Inspiron 6000 Fan Replacement: 11 단계, 이미지 1개 중 1개
    • Flip laptop the over and remove thirteen 6mm Philips #00 screws.

  12. Dell Inspiron 6000 Fan Replacement: 12 단계, 이미지 2개 중 1개 Dell Inspiron 6000 Fan Replacement: 12 단계, 이미지 2개 중 2개
    • Insert the plastic opening tool in between the back and front plates of the laptop

  13. Dell Inspiron 6000 Fan Replacement: 13 단계, 이미지 1개 중 1개
    • Remove two 4 mm Philips #00 screws.

  14. Dell Inspiron 6000 Fan Replacement: 14 단계, 이미지 1개 중 1개
    • Remove the fan power cord

  15. Dell Inspiron 6000 Fan Replacement: 15 단계, 이미지 2개 중 1개 Dell Inspiron 6000 Fan Replacement: 15 단계, 이미지 2개 중 2개
    • Using your hand, lift the fan from the laptop.

결론

To reassemble your device, follow these instructions in reverse order.

다른 5명이 해당 안내서를 완성하였습니다.

작성자

4다른 기여자 명과 함께

Jacob DeWar

회원 가입일: 09/23/14

548 평판

안내서 3개를 작성함

USF Tampa, Team 11-1, Blackwell Fall 2014 USF Tampa, Team 11-1, Blackwell Fall 2014 회원

USFT-BLACKWELL-F14S11G1

5 회원들

안내서 7개를 작성함

0가이드 댓글

댓글 쓰기

조회 통계:

지난 24시간: 0

지난 7일: 9

지난 30일: 21

전체 시간: 2,524