소개
The purpose of this guide is to inform the reader on how to properly remove the RAM from their Dell Latitude 3310.
필요한 것
-
-
Remove seven 8.0 mm screws using a Phillips #1 screwdriver.
-
Remove three 5.0 mm screws using a Phillips #1 screwdriver.
 FixBot에 문의하기
-
-
-
Using the iFixit opening tool, gently pry between the body of the laptop and the bottom cover. Make your way around the laptop carefully releasing all plastic clips.
-
The screen hinges are an ideal spot to begin prying.
-
-
-
-
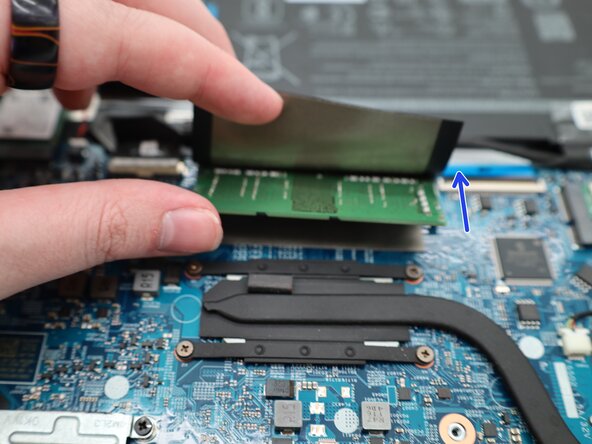
Lift the plastic cover up to expose the memory chipset.
-
Carefully pull the clips away from the chip to disengage them.
-




결론
To reassemble your device, follow these instructions in reverse order.

