소개
If your Dell Latitude 5580 requires a RAM replacement, follow this guide. It may be time to replace your RAM if your device is struggling with performance, such as loading slowly, freezing or crashing, or difficulty switching from one task to another.
While performing the replacement be careful removing the RAM because there are fragile components on the RAM that can be easily damaged.
The replacement is a fairly easy repair and even a beginner can do it!
Before you begin this repair, power off and unplug your laptop. As an added precaution, backup your data. Lastly, disconnect the battery connector from the motherboard before you replace the RAM.
필요한 것
-
-
-
Orient your laptop so you can access the bottom cover, with the fan vents facing upwards.
-
Use a Phillips #00 screwdriver to loosen the eight screws securing the bottom cover.
-
Insert the end of an iFixit opening tool or opening picks into the seam between the bottom and top case to release the clips holding them together.
-
Slide the opening tool or pick around the edge of the laptop until it is fully separated.
-
Remove the bottom cover.
 FixBot에 문의하기
-
-
-
-
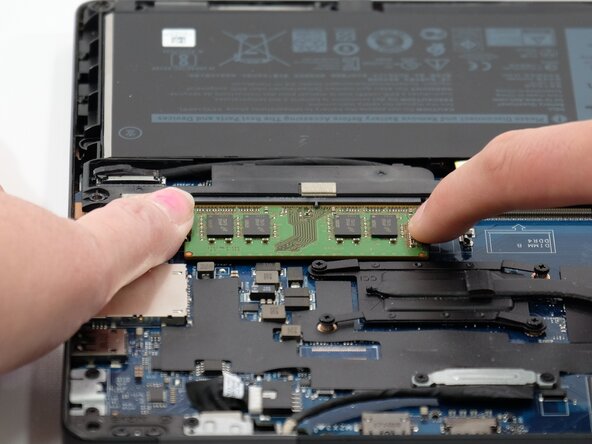
Push the clips on the side of the RAM out a few millimeters to release the RAM stick.
-
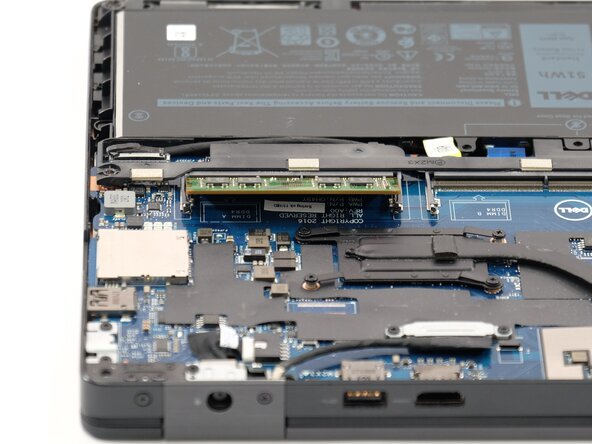
Hold the edges of the RAM stick and slide it out of the socket.
-
-


To reassemble your device, follow these instructions in reverse order. Take your e-waste to an R2 or e-Stewards certified recycler.
다른 한 분이 해당 안내서를 완성하였습니다.

팀

Linn Benton Community College, Team 1-5, Karnes Spring 2025 Linn Benton Community College, Team 1-5, Karnes Spring 2025 회원
LBCC-KARNES-S25S1G5
4 회원들
안내서 5개를 작성함