주요 콘텐츠로 건너뛰기
수리 커뮤니티 가입 - 계정 만들기

Dell Latitude D620 CD Drive Replacement

필요한 것

  1. Dell Latitude D620 CD Drive Replacement, Keyboard: 1 단계, 이미지 1개 중 1개
    • Power down the laptop and remove the battery.

    • Open the laptop cover all of the way.

    댓글 쓰기

  2. Dell Latitude D620 CD Drive Replacement: 2 단계, 이미지 3개 중 1개 Dell Latitude D620 CD Drive Replacement: 2 단계, 이미지 3개 중 2개 Dell Latitude D620 CD Drive Replacement: 2 단계, 이미지 3개 중 3개
    • Locate the notch under the cover at the top of the keyboard

    • Using the spudger as a lever, lift the plastic covering

    • Carefully remove the rest of the covering from right to left

    댓글 쓰기

  3. Dell Latitude D620 CD Drive Replacement: 3 단계, 이미지 1개 중 1개
    • Unscrew the top portion of the keyboard using a #00 screwdriver

    댓글 쓰기

  4. Dell Latitude D620 CD Drive Replacement: 4 단계, 이미지 1개 중 1개
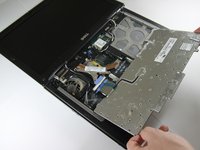
    • Hold keyboard from the top and gently pull towards the LCD screen to remove the keyboard from the case

    • Don't pull on the keyboard too forcefully because it is attached to the motherboard with a short, thin ribbon cable

    댓글 쓰기

  5. Dell Latitude D620 CD Drive Replacement: 5 단계, 이미지 2개 중 1개 Dell Latitude D620 CD Drive Replacement: 5 단계, 이미지 2개 중 2개
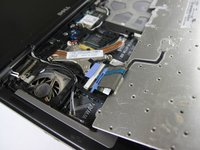
    • Once keyboard is out of the case, lay it face-down on the track pad

    댓글 쓰기

  6. Dell Latitude D620 CD Drive Replacement: 6 단계, 이미지 2개 중 1개 Dell Latitude D620 CD Drive Replacement: 6 단계, 이미지 2개 중 2개
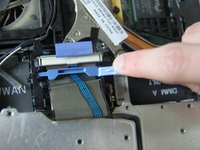
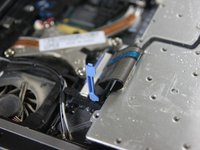
    • Using a small spudger, pull back on the black bar to release the blue lever

    댓글 쓰기

  7. Dell Latitude D620 CD Drive Replacement: 7 단계, 이미지 1개 중 1개
    • Pull up on the metal bar connected to the socket to detach the ribbon cable

    댓글 쓰기

  8. Dell Latitude D620 CD Drive Replacement, CD Drive: 8 단계, 이미지 2개 중 1개 Dell Latitude D620 CD Drive Replacement, CD Drive: 8 단계, 이미지 2개 중 2개
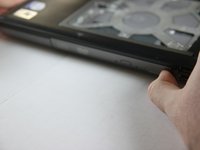
    • Press in the tab on the bottom right side of the CD drive

    • The tab comes out on its own; there is no need to pull it out manually.

    댓글 쓰기

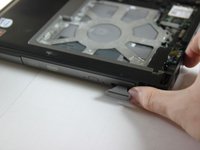
  9. Dell Latitude D620 CD Drive Replacement: 9 단계, 이미지 1개 중 1개
    • Gently pull the tab to remove the disk tray.

    댓글 쓰기

결론

To reassemble your device, follow these instructions in reverse order.

취소: 해당 안내서를 완성하지 않았습니다.

다른 10명이 해당 안내서를 완성하였습니다.

작성자

6다른 기여자 명과 함께

Ivan

회원 가입일: 04/15/10

203 평판

안내서 1개를 작성함

Cal Poly, Team 24-35, Regan Spring 2010 Cal Poly, Team 24-35, Regan Spring 2010 회원

CPSU-REGAN-S10S24G35

4 회원들

안내서 4개를 작성함

0가이드 댓글

댓글 쓰기

조회 통계:

지난 24시간: 3

지난 7일: 7

지난 30일: 68

전체 시간: 9,005