주요 콘텐츠로 건너뛰기

Dell Latitude D820 Screen Replacement

필요한 것

  1. Dell Latitude D820 Screen Replacement, Battery: 1 단계, 이미지 1/1
    • Remove the charger from the laptop.

    • Turn the laptop over and locate the battery slide lock. Slide the switch and gently lift up the battery.

    • If you are replacing other components, leave the battery out.

    • If you are only replacing the battery, reverse the steps to install a new battery.

  2. Dell Latitude D820 Screen Replacement, Keyboard: 2 단계, 이미지 1/3 Dell Latitude D820 Screen Replacement, Keyboard: 2 단계, 이미지 2/3 Dell Latitude D820 Screen Replacement, Keyboard: 2 단계, 이미지 3/3
    • Open laptop lid and extend screen until it is parallel with the keyboard.

    • Locate the notch in the upper right corner of the keyboard (just above the 'page up' button).

    • Insert the plastic spudger and very gently lift the faceplate. It will make a soft snapping sound.

    • Set aside.

  3. Dell Latitude D820 Screen Replacement: 3 단계, 이미지 1/1
    • Locate the three philips head screws above the keyboard. One is above the 'Pause/Break' key; one above the F7 key and one above the 'Esc' key. Remove all three.

  4. Dell Latitude D820 Screen Replacement: 4 단계, 이미지 1/1
    • Gently lift top of keyboard and lay forward on palm rest.

    • Locate blue pull tab and gently disconnect ribbon cable from motherboard.

  5. Dell Latitude D820 Screen Replacement, Screen: 5 단계, 이미지 1/3 Dell Latitude D820 Screen Replacement, Screen: 5 단계, 이미지 2/3 Dell Latitude D820 Screen Replacement, Screen: 5 단계, 이미지 3/3
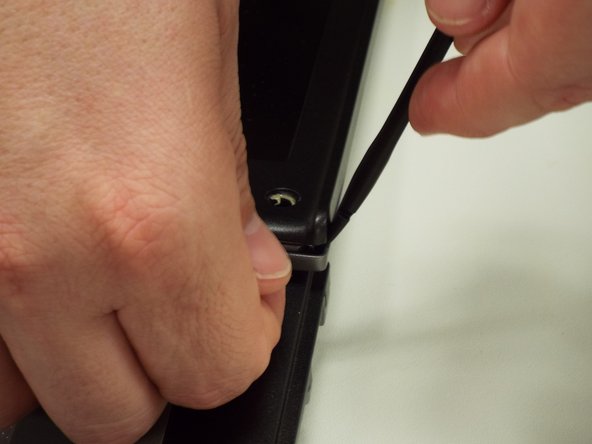
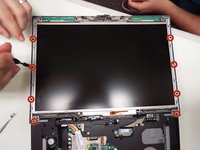
    • Locate and remove the rubber stoppers around the display to expose the screws; set aside.

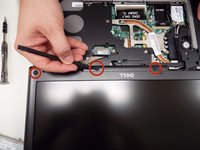
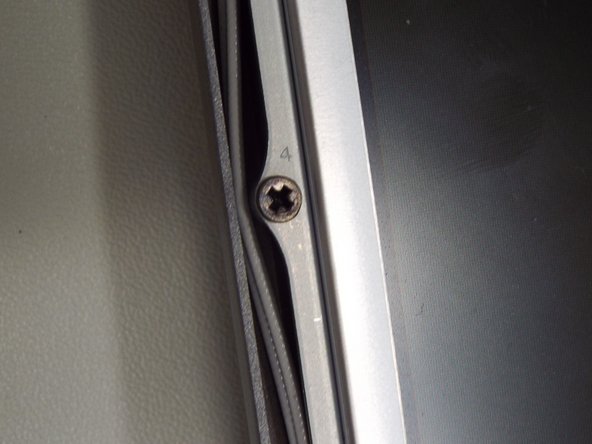
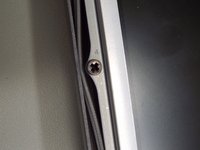
    • Remove the screws located under the rubber stoppers that were removed. These measure 5.88mm in length and 2.40 mm in width

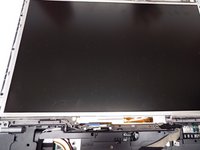
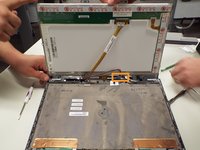
    • Then gently pull up and out on the display bezel (frame). It has plastic retaining clips all around it so you may want to use a plastic pry tool to assist at first. Try not to break them.

  6. Dell Latitude D820 Screen Replacement: 6 단계, 이미지 1/3 Dell Latitude D820 Screen Replacement: 6 단계, 이미지 2/3 Dell Latitude D820 Screen Replacement: 6 단계, 이미지 3/3
    • Locate the 8 numbered screws and remove in order. These philip head screws measure 5.70mm in length and 2.40mm in width

    • Gently lift screen being careful of the ribbon cables.

  7. Dell Latitude D820 Screen Replacement: 7 단계, 이미지 1/2 Dell Latitude D820 Screen Replacement: 7 단계, 이미지 2/2
    • The ribbon cable at the top of the screen uses a locking connector. Gently squeeze the levers on each side to release the lock and tug the ribbon cable down towards the bottom of the screen.

    • Set this connection aside.

  8. Dell Latitude D820 Screen Replacement: 8 단계, 이미지 1/3 Dell Latitude D820 Screen Replacement: 8 단계, 이미지 2/3 Dell Latitude D820 Screen Replacement: 8 단계, 이미지 3/3
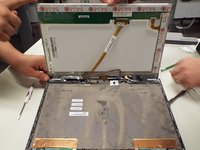
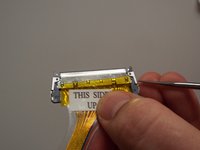
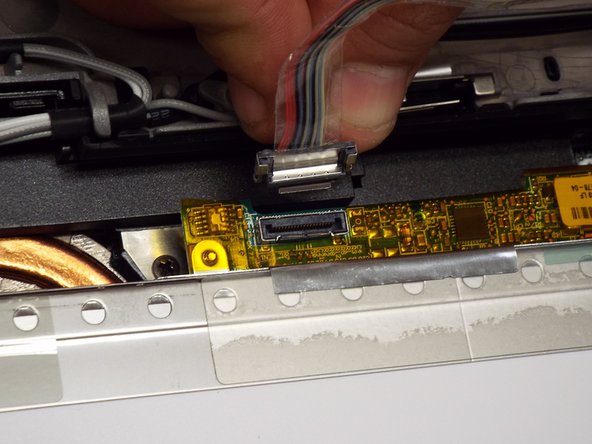
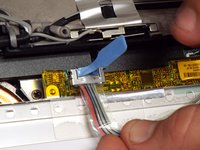
    • There is a small ribbon cable attached at the bottom of the screen also. Gently pull up on the blue tag to disconnect.

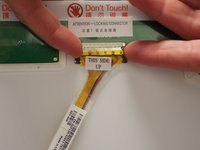
    • At this point remove the old display and connect the new one paying close attention to your finger placement to ensure you do not touch where the stickers say "DO NOT TOUCH".

결론

To reassemble your device, follow these instructions in reverse order.

다른 2명이 해당 안내서를 완성하였습니다.

Henry

회원 가입일: 09/02/14

1,431 평판

안내서 4개 작성하였습니다

Pasco Hernando, Team 1-2, Prince Fall 2014 Pasco Hernando, Team 1-2, Prince Fall 2014 회원

PHSC-PRINCE-F14S1G2

10 회원들

안내서 7개 작성하였습니다

댓글 0개

댓글 쓰기

조회 통계:

24 시간 전: 1

7일 전: 2

30일 전: 9

전체 시간: 2,885