주요 콘텐츠로 건너뛰기

Disassembling HTC One V Back Case

필요한 것

  1. Disassembling HTC One V Back Case, Disassembling HTC ONE V Bottom Assembly: 1 단계, 이미지 1/3 Disassembling HTC One V Back Case, Disassembling HTC ONE V Bottom Assembly: 1 단계, 이미지 2/3 Disassembling HTC One V Back Case, Disassembling HTC ONE V Bottom Assembly: 1 단계, 이미지 3/3
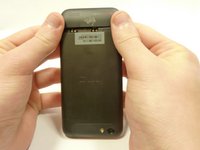
    • Power off your device.

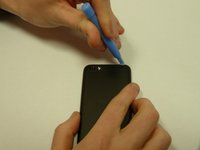
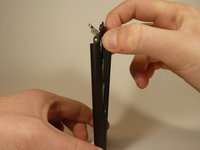
    • Remove the bottom cover by sliding it off.

  2. Disassembling HTC One V Back Case: 2 단계, 이미지 1/1
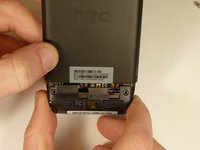
    • Remove the SIM card.

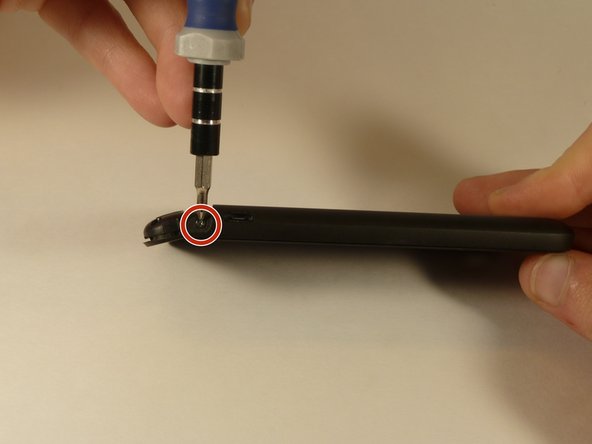
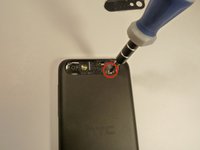
    • Remove the four screws securing the bottom casing.

    • Two 3.0 mm Phillips #0 screws in the top left and right corners.

    • Two 2.0 mm Phillips #0 screws in the bottom left and right corners.

  3. Disassembling HTC One V Back Case: 3 단계, 이미지 1/2 Disassembling HTC One V Back Case: 3 단계, 이미지 2/2
    • Remove the 2.0 mm Phillips #0 screws on either side of the phone.

  4. Disassembling HTC One V Back Case: 4 단계, 이미지 1/3 Disassembling HTC One V Back Case: 4 단계, 이미지 2/3 Disassembling HTC One V Back Case: 4 단계, 이미지 3/3
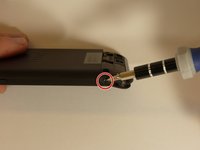
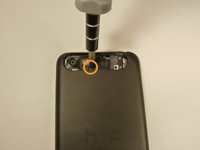
    • Use a plastic opening tool to pry open the bottom casing.

    • Remove the bottom casing by pulling it towards you.

  5. Disassembling HTC One V Back Case, Disassembling HTC One V Back Case: 5 단계, 이미지 1/3 Disassembling HTC One V Back Case, Disassembling HTC One V Back Case: 5 단계, 이미지 2/3 Disassembling HTC One V Back Case, Disassembling HTC One V Back Case: 5 단계, 이미지 3/3
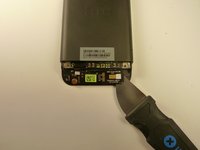
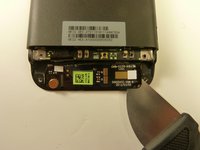
    • Use the plastic opening tool to pry open the rear camera panel.

    • Remove both screws that are securing the back case.

    • One 4.0 mm Phillips #0 screw.

    • One 3.0 mm Phillips #0 screw.

  6. Disassembling HTC One V Back Case: 6 단계, 이미지 1/3 Disassembling HTC One V Back Case: 6 단계, 이미지 2/3 Disassembling HTC One V Back Case: 6 단계, 이미지 3/3
    • Use a Jimmy to pry up the OEM SIM and SD card reader contact.

    • Pry from right to left to avoid potential damages to the ribbon.

  7. Disassembling HTC One V Back Case: 7 단계, 이미지 1/3 Disassembling HTC One V Back Case: 7 단계, 이미지 2/3 Disassembling HTC One V Back Case: 7 단계, 이미지 3/3
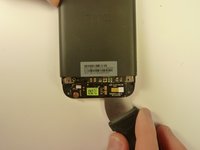
    • Using both thumbs, gently push on the two bottom rear corners of the motherboard.

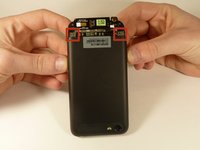
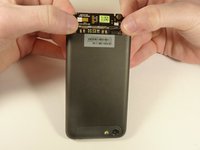
    • Gently and slowly pull the screen out from the front of the phone, while feeding the OEM reader contact through the opening.

결론

To reassemble your device, follow these instructions in reverse order.

다른 3명이 해당 안내서를 완성하였습니다.

Michael Lucido

회원 가입일: 01/20/15

852 평판

안내서 6개 작성하였습니다

USF Tampa, Team 1-3, Blackwell Winter 2015 USF Tampa, Team 1-3, Blackwell Winter 2015 회원

USFT-BLACKWELL-W15S1G3

4 회원들

안내서 16개 작성하였습니다

댓글 0개

댓글 쓰기

조회 통계:

24 시간 전: 0

7일 전: 0

30일 전: 16

전체 시간: 3,008