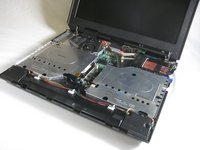
주요 콘텐츠로 건너뛰기

Disassembling IBM ThinkPad A30 Upper Case

필요한 것

  1. Disassembling IBM ThinkPad A30 Upper Case, Battery: 1 단계, 이미지 2개 중 1개 Disassembling IBM ThinkPad A30 Upper Case, Battery: 1 단계, 이미지 2개 중 2개
    • Flip the ThinkPad over so that it is upside down.

    • Slide the highlighted tab to the left.

    • With your finger on the tab, remove the battery by lifting it upwards away from the laptop.

  2. Disassembling IBM ThinkPad A30 Upper Case, Hard Drive: 2 단계, 이미지 3개 중 1개 Disassembling IBM ThinkPad A30 Upper Case, Hard Drive: 2 단계, 이미지 3개 중 2개 Disassembling IBM ThinkPad A30 Upper Case, Hard Drive: 2 단계, 이미지 3개 중 3개
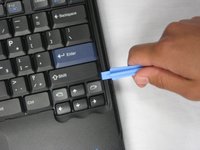
    • Remove the highlighted screw with a Phillips #1 screwdriver.

    • Pull the hard drive out.

  3. Disassembling IBM ThinkPad A30 Upper Case, Upper Case: 3 단계, 이미지 1개 중 1개
    • Make sure the laptop is upside down and oriented in the direction shown.

    • Remove the six 16.7mm screws inside the circled holes.

  4. Disassembling IBM ThinkPad A30 Upper Case: 4 단계, 이미지 1개 중 1개
    • Rotate the ThinkPad so that the hard drive bay is facing you.

    • Remove the black cover to reveal a 14.8mm screw.

    • Remove the uncovered screw with a Phillips #0 screwdriver.

  5. Disassembling IBM ThinkPad A30 Upper Case: 5 단계, 이미지 2개 중 1개 Disassembling IBM ThinkPad A30 Upper Case: 5 단계, 이미지 2개 중 2개
    • Flip the ThinkPad over and open the LCD panel.

    • Pry apart the keyboard with a plastic opening tool or with your fingers.

  6. Disassembling IBM ThinkPad A30 Upper Case: 6 단계, 이미지 3개 중 1개 Disassembling IBM ThinkPad A30 Upper Case: 6 단계, 이미지 3개 중 2개 Disassembling IBM ThinkPad A30 Upper Case: 6 단계, 이미지 3개 중 3개
    • Be careful not to pull out the keyboard carelessly; there is a connector underneath it!

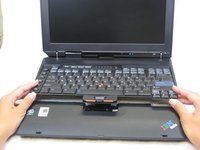
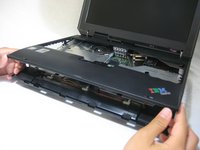
    • Lift the front end of the keyboard as shown.

    • Using your fingers, remove the black film cover.

  7. Disassembling IBM ThinkPad A30 Upper Case: 7 단계, 이미지 3개 중 1개 Disassembling IBM ThinkPad A30 Upper Case: 7 단계, 이미지 3개 중 2개 Disassembling IBM ThinkPad A30 Upper Case: 7 단계, 이미지 3개 중 3개
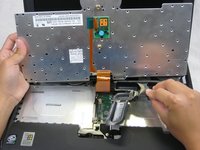
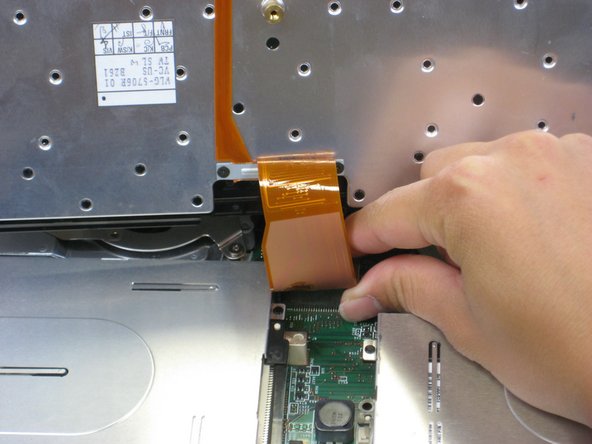
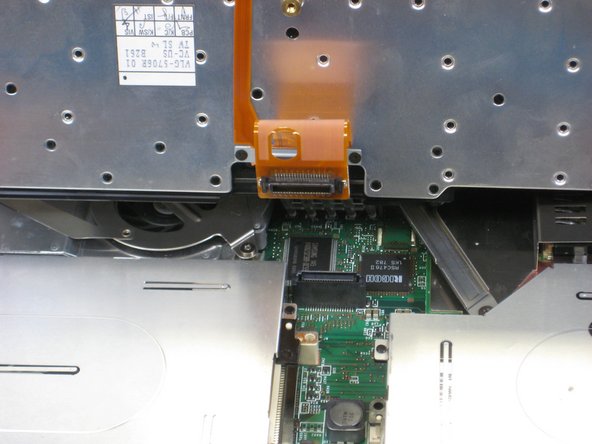
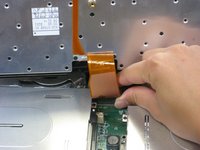
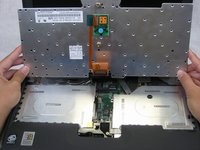
    • Locate the connector attached to the motherboard.

    • Disconnect the ribbon cable by removing the connector.

  8. Disassembling IBM ThinkPad A30 Upper Case: 8 단계, 이미지 2개 중 1개 Disassembling IBM ThinkPad A30 Upper Case: 8 단계, 이미지 2개 중 2개
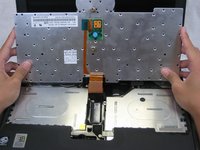
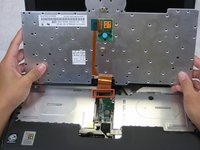
    • Lift and remove the keyboard.

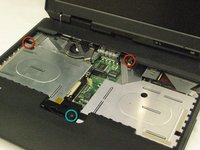
    • Remove the two 5.6mm screws.

    • Remove the 16.7mm screw.

  9. Disassembling IBM ThinkPad A30 Upper Case: 9 단계, 이미지 3개 중 1개 Disassembling IBM ThinkPad A30 Upper Case: 9 단계, 이미지 3개 중 2개 Disassembling IBM ThinkPad A30 Upper Case: 9 단계, 이미지 3개 중 3개
    • You will need to use a little force. Be wary of the tabs.

    • Pry off the upper case with your hands.

결론

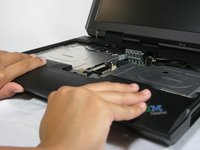
To reassemble your device, follow these instructions in reverse order.

다른 한 분이 해당 안내서를 완성하였습니다.

작성자

8다른 기여자 명과 함께

Alan

회원 가입일: 10/07/10

380 평판

안내서 6개를 작성함

Cal Poly, Team 4-44, Amido Fall 2010 Cal Poly, Team 4-44, Amido Fall 2010 회원

CPSU-AMIDO-F10S4G44

4 회원들

안내서 26개를 작성함

0가이드 댓글

댓글 쓰기

조회 통계:

지난 24시간: 0

지난 7일: 2

지난 30일: 9

전체 시간: 2,308