소개
Follow this guide to replace worn out or broken analog stick covers in your DualShock 4 model CUH-ZCT1U controller.
Note that analog stick covers aren't responsible for stick drift. If your analog sticks aren't working as expected, you may need to clean or replace the analog stick module.
필요한 것
-
-
Check the model number on the back of your controller. This guide was written using model CUH-ZCT1U. If you have another model, the guide procedure and replacement parts may differ slightly.
-
-
이 단계에 사용된 도구:Microfiber Cleaning Cloths$3.99
-
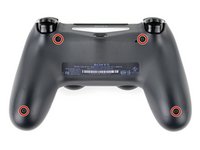
Use a Phillips screwdriver to remove the four 6.4 mm-long screws securing the rear case.
to re-torque these PH00 screw... i found 19Ncm to be about the max. (since 27Ncm was too much)
Dreamcat 4 - 답글
-
-
-
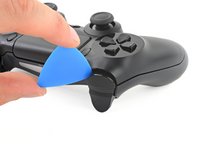
Use an opening pick to pry each corner of the L1 button from the front case.
-
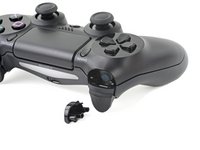
Remove the button.
-
-
-
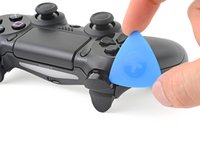
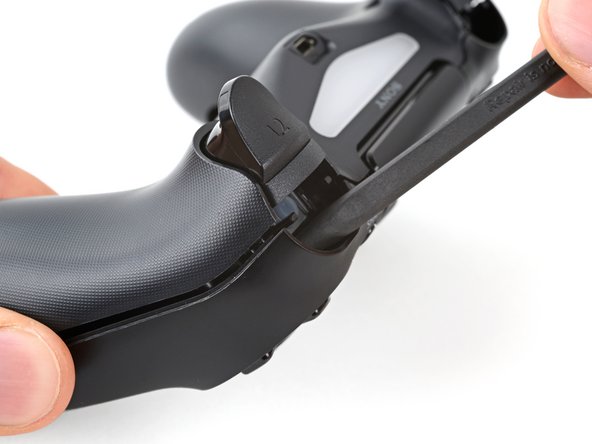
Use your opening pick to pry and remove the R1 button, just as you did for the L1 button.
-
-
-
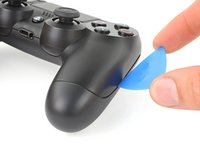
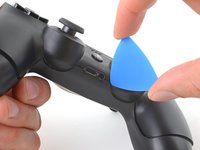
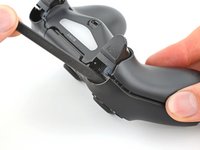
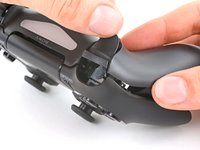
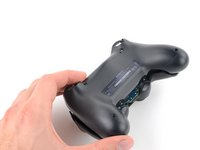
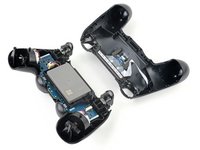
Insert your opening pick at a downward angle between the front case and rear case, halfway between the handle and the action buttons.
-
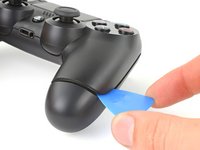
Slide your pick toward the handle and pry up to release the first clip.
-
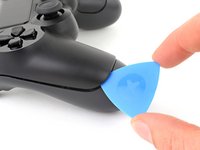
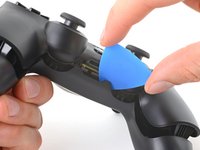
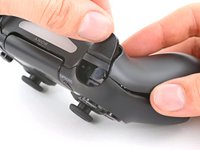
Repeat this procedure on the other side of the controller to release the second clip.
-
-
-
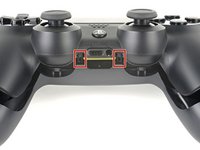
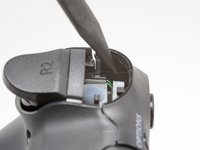
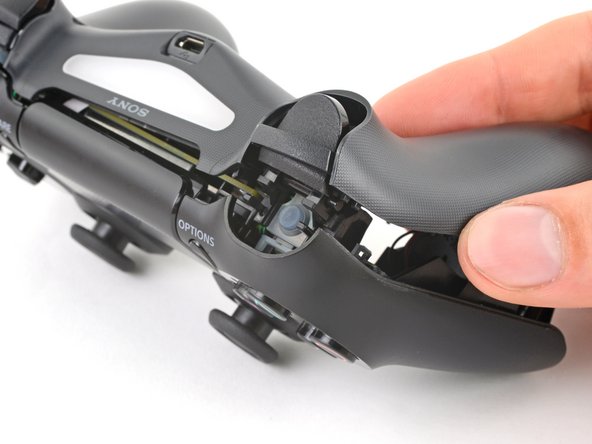
Locate the clips by looking through the gap above the R2 or L2 buttons.
Ah, well perhaps I may have broken a tab by not removing the buttons but if be more worried about breaking the buttons
-
-
-
이 단계에 사용된 도구:Tweezers$4.99
-
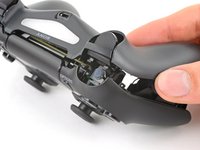
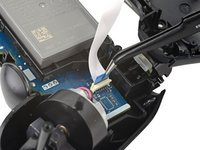
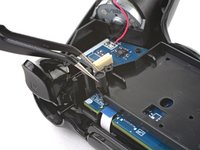
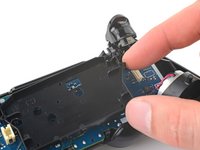
Use tweezers or your fingers to remove the interconnect cable by pulling its blue pull tab straight out of the socket.
On the model CUH-ZCT2E the circuit board is mirrored so that the connection is on the left side. When reassembling the blue tab should be facing inwards.
I just left the interconnect cable attached and held things out of the way when I put in the new battery
-
-
이 단계에 사용된 도구:Tweezers$4.99
-
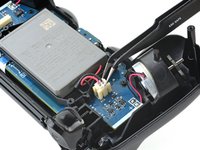
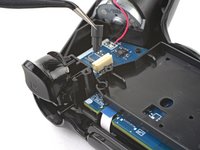
Use tweezers or your fingers to grab and disconnect the head of the battery cable from the motherboard.
-
-
-
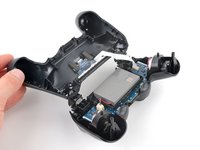
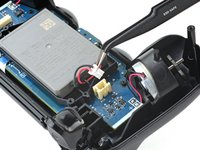
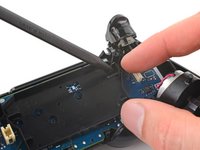
Grab and remove the reset button extension from its recess in the battery bracket.
On the model CUH-ZCT2E this is part of the battery bracket and not removable. Just skip this step.
-
-
-
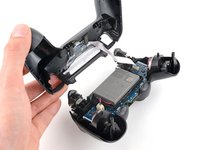
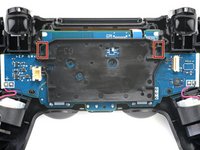
Locate the two clips securing the battery bracket to the motherboard.
-
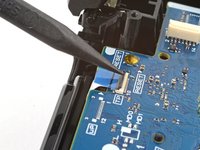
Insert the point of your spudger into the opening behind the right bracket clip.
-
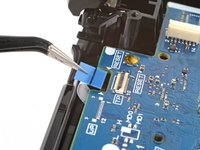
Depress the clip to disengage it from the motherboard.
-
Lift up the right edge of the battery bracket.
On the model CUH-ZCT2E the battery bracket is not secured by clips but by a PH #00 screw mid height on the right half of the battery bracket. Just remove the screw and for the next step lift the battery bracket straight up.
-
-
이 단계에 사용된 도구:Tweezers$4.99
-
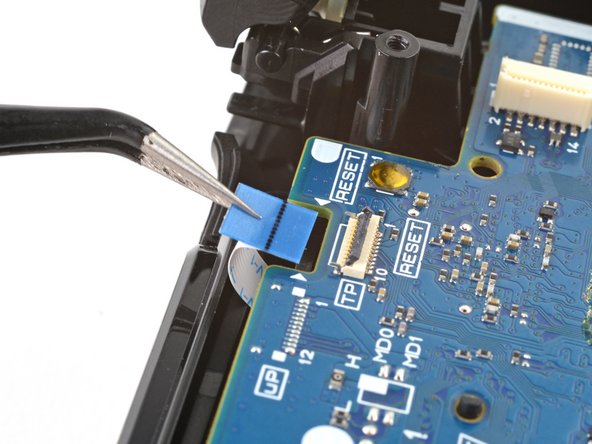
Use the point of your spudger to flip up the locking flap securing the touch pad cable ZIF connector.
-
Use tweezers or your fingers to disconnect the cable using its blue pull tab.
-
-
-
Use your Phillips screwdriver to remove the 6.4 mm screw securing the motherboard.
-
-
-
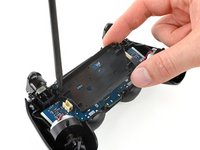
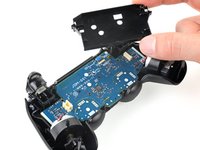
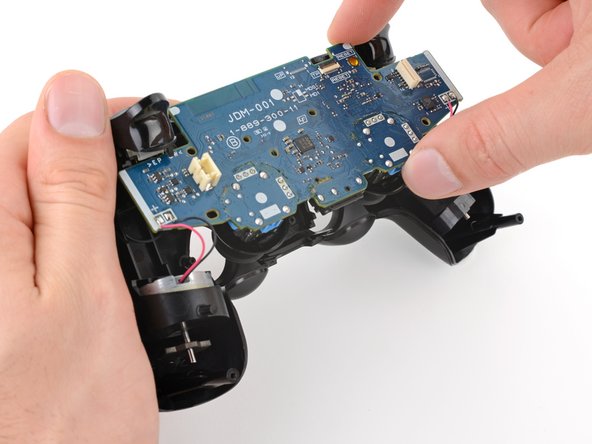
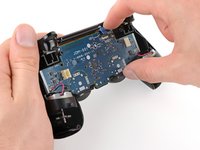
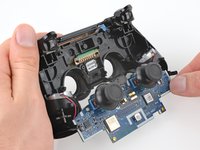
Lift the motherboard from the midframe.
-
Guide the analog stick covers through their cutouts in the front case.
-
Flip the motherboard over the bottom of the controller, leaving the vibration motor cables attached.
-
-
-
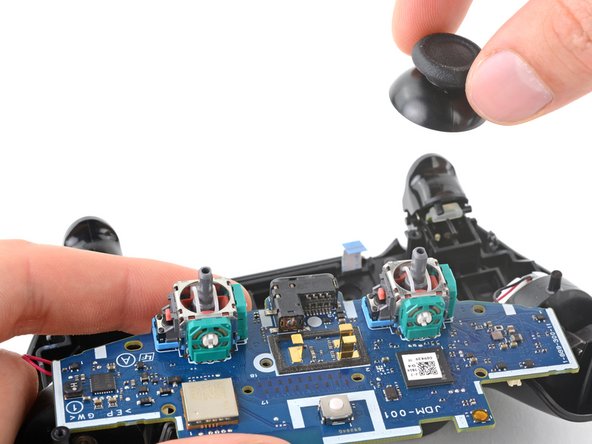
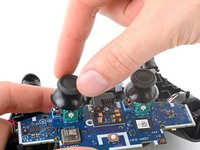
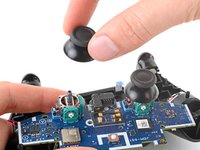
Grab and pull the analog stick covers straight off their modules.
-


To reassemble your device, follow these instructions in reverse order.
Take your e-waste to an R2 or e-Stewards certified recycler.
Repair didn’t go as planned? Try some basic troubleshooting, or ask our Answers community for help.
To reassemble your device, follow these instructions in reverse order.
Take your e-waste to an R2 or e-Stewards certified recycler.
Repair didn’t go as planned? Try some basic troubleshooting, or ask our Answers community for help.
다른 137명이 해당 안내서를 완성하였습니다.

팀

댓글 14개
So I followed all the steps, got the sticks in. But when I put the controller back together it Wouldent turn on. Do you guys have any clue as to what it could be?
Same exact thing happened to me, just wouldn't turn back on
Me too and all the reconnected cables are connected correctly, but it just won’t work.
Andy Hui -
Hope you guys still keep the parts, since the problem can be resolved by following the post below successfully. :)
Andy Hui -
i think you didn't put a wire in
Does this fix the issue with worn out sticks? Mine currently at idle will get stuck slightly pressing to the left, (in game, I'll be cruising left at a snail's pace) and pressing up/forward or sometimes pressing to the right doesn't fully work (in game this causes me to either not move at all, or move at about 2/3rds speed).
I've had them for about two years now, and they have seen some rigorous use, I tell you what. It is beginning to affect gameplay pretty badly, though.
Thank you for the guide - it helped me fix a beaten up DS4 controller I found on the flea market. However, it would be nice to explain a bit more in detail how to crack the case pieces open. Some detailed pictures with the different inside clips and hinges would be nice. Also, there is no explanation as to how to assemble the L2/R2 triggers back together. Last, but not least, there is no explanation as to how to remove the battery tray, in order to connect the touchpad to the motherboard.
It actually opens quite easily. I'm female with shaky fingers and didn't have a plastic pry tool. Broke the last one opening iPhones. I took a very small flat too screw driver from my electronic tool set, stuck it in at the same spot he showed and just gently pried all around. It opened fairly easily with nothing breaking. When it was almost all the way open I did go to the opposite side and gently loosened up thevither end, just so it would open straight. It's easy as long as you are gentle with it
If parts to the controller should be replaced how would you know? Is there a circuit test proceedure for the mother board? How would you know to replace other items when you are disassembling the controller? Thank you for the assistance with my controller and your time you have taken to help. Have a great one!
Thank you for the guide !
This doesn't look easy and there are opportunities to mess things up. Also, it might be hard to find an unused analog stick cover. I would try silicone joystick caps from eBay before attempting this guide.
Sometimes plastic or rubber items I handle become extremely sticky and can't be cleaned. This is a very annoying problem for me. I remember my stepdad yelling at me because I'd made swimming goggles sticky, and he also thought I'd covered bicycle handlebars with glue to make my hands stick better. Really I think it's just resins and plasticizers leeching out because of my sweat. I had the same problem with my PS4 controller's joysticks. No matter how carefully I wash my hands or clean the controller they're sticky. If I were to sell it for parts I wouldn't want someone to buy my sticky joystick covers.
I bought some silicone joystick caps from eBay and they were easy to install, I just stretched them over my existing joysticks. They've even got some little bumps that help with grip.
As of March 14, 2023, this guide has been updated! Comments regarding step procedures may no longer be relevant.
model:cuh-zct2e
كيف يمكن ان افكها
Mhmod - 답글