주요 콘텐츠로 건너뛰기
수리 커뮤니티 가입 - 계정 만들기

Ecovacs Deebot 900 Wheel Replacement

필요한 것

  1. Ecovacs Deebot 900 Wheel Replacement, Battery: 1 단계, 이미지 1개 중 1개
    • Remove all the brushes from the Deebot.

  2. Ecovacs Deebot 900 Wheel Replacement: 2 단계, 이미지 1개 중 1개
    • Using a Phillips #0 screwdriver, remove the two 12.25 mm screws holding the battery cover in place.​

  3. Ecovacs Deebot 900 Wheel Replacement: 3 단계, 이미지 1개 중 1개
    • Remove the battery cover.

  4. Ecovacs Deebot 900 Wheel Replacement: 4 단계, 이미지 1개 중 1개
    • Using the two white straps on the sides of the battery, gently remove the battery. ​

    • Be careful not to rip out the battery cable.

  5. Ecovacs Deebot 900 Wheel Replacement: 5 단계, 이미지 1개 중 1개
    • Carefully disconnect the battery cable by pulling near the connector at the bottom of the battery compartment.

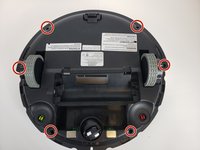
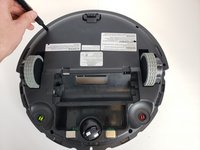
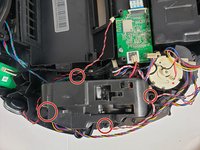
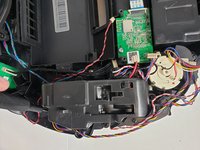
  6. Ecovacs Deebot 900 Wheel Replacement, Front Bumper: 6 단계, 이미지 2개 중 1개 Ecovacs Deebot 900 Wheel Replacement, Front Bumper: 6 단계, 이미지 2개 중 2개
    • Using a Phillips #00 screwdriver, remove the eight screws on the bottom edge of the bumper. ​

  7. Ecovacs Deebot 900 Wheel Replacement: 7 단계, 이미지 1개 중 1개
    • Remove the black strip on the bottom of the bumper.

  8. Ecovacs Deebot 900 Wheel Replacement: 8 단계, 이미지 2개 중 1개 Ecovacs Deebot 900 Wheel Replacement: 8 단계, 이미지 2개 중 2개
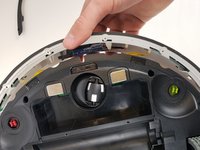
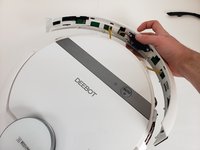
    • Carefully lift up the bumper untill it pops out of place.​

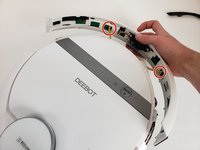
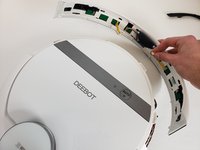
  9. Ecovacs Deebot 900 Wheel Replacement: 9 단계, 이미지 2개 중 1개 Ecovacs Deebot 900 Wheel Replacement: 9 단계, 이미지 2개 중 2개
    • Disconnect the two cables connecting the bumper to the body of the Deebot.

    • Remove the front bumper from the device.

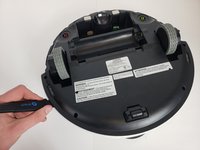
  10. Ecovacs Deebot 900 Wheel Replacement, Bottom Case: 10 단계, 이미지 2개 중 1개 Ecovacs Deebot 900 Wheel Replacement, Bottom Case: 10 단계, 이미지 2개 중 2개
    • Using a Phillips #00 screwdriver, take out the six screws around the perimeter of the bottom case.

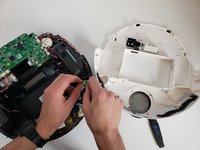
  11. Ecovacs Deebot 900 Wheel Replacement: 11 단계, 이미지 2개 중 1개 Ecovacs Deebot 900 Wheel Replacement: 11 단계, 이미지 2개 중 2개
    • Insert a Jimmy into the seam and work all the way around the robot.

    • Disconnect the two cables and remove the bottom case from the device.

  12. Ecovacs Deebot 900 Wheel Replacement, Motherboard: 12 단계, 이미지 1개 중 1개
    • Using a Phillips #00 screwdriver, remove the two black screws holding the motherboard in place.​

  13. Ecovacs Deebot 900 Wheel Replacement: 13 단계, 이미지 1개 중 1개
    • Carefully remove the ribbon cables connected to the top of motherboard.

    • Keep track of where the cables connect to the motherboard.

  14. Ecovacs Deebot 900 Wheel Replacement: 14 단계, 이미지 1개 중 1개
    • Remove the last three ribbon cables on the underside of the motherboard.​

  15. Ecovacs Deebot 900 Wheel Replacement: 15 단계, 이미지 1개 중 1개
    • Lift the motherboard out of the Deebot and remove it from the device.

  16. Ecovacs Deebot 900 Wheel Replacement, Wheel: 16 단계, 이미지 1개 중 1개
    이 단계에 사용된 도구:
    Tweezers
    $4.99
    • Using a screwdriver or tweezers, Gently lift the spring upward, ensuring not to apply excessive force that could damage surrounding components. Once the spring is loosened, grip it securely and pull it off from one side, allowing the tension to release naturally. Take care to note the spring’s orientation and placement for reassembly later.

  17. Ecovacs Deebot 900 Wheel Replacement: 17 단계, 이미지 2개 중 1개 Ecovacs Deebot 900 Wheel Replacement: 17 단계, 이미지 2개 중 2개
    • Using a Phillips #00 screwdriver, remove the four screws securing the wheel assembly in place. Begin by loosening each screw slightly to evenly distribute pressure, then fully unscrew them one at a time. Be sure to set the screws aside in a safe location for reassembly later. Gently lift the wheel assembly out of its housing.

  18. Ecovacs Deebot 900 Wheel Replacement: 18 단계, 이미지 1개 중 1개
    • Gently pry off the wheel cover using your fingers or a plastic tool, applying light pressure to release it. Set the cover aside for reassembly.

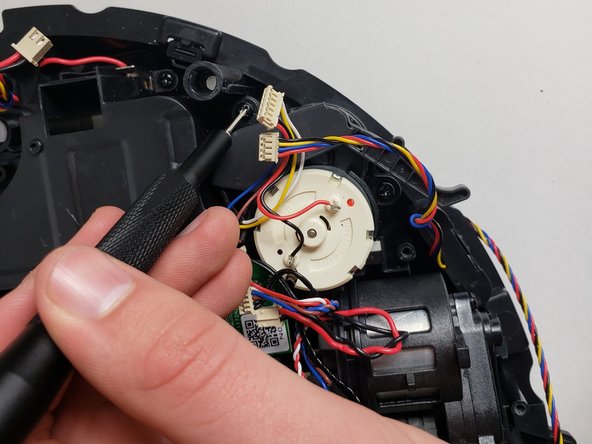
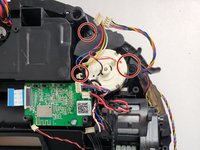
  19. Ecovacs Deebot 900 Wheel Replacement: 19 단계, 이미지 3개 중 1개 Ecovacs Deebot 900 Wheel Replacement: 19 단계, 이미지 3개 중 2개 Ecovacs Deebot 900 Wheel Replacement: 19 단계, 이미지 3개 중 3개
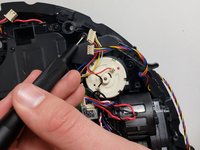
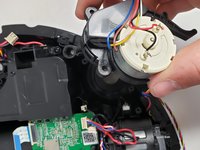
    • Using the Phillips #00 screwdriver, remove the three screws holding the side brush motor in place and lift the brush motor up.

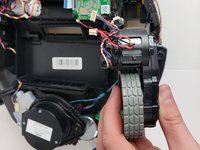
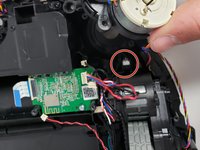
  20. Ecovacs Deebot 900 Wheel Replacement: 20 단계, 이미지 2개 중 1개 Ecovacs Deebot 900 Wheel Replacement: 20 단계, 이미지 2개 중 2개
    • Lift the wheel assembly carefully, ensuring the attached sensor (black cable) comes out with it. Handle the sensor gently to avoid damage

결론

To reassemble your device, follow these instructions in reverse order.

다른 8명이 해당 안내서를 완성하였습니다.

6가이드 댓글

Thanks, it helps a lot

Agoston David - 답글 공유

I have an OZMO 930 that the left driver wheel is stuck. I tried to follow the above instruction, but I can’t go beyond step 10, I can’t take out the cover. Any help will be greatly appreciated,

OldManInChicago - 답글 공유

do you have place to buy ecovac_deebot_900_54_gear ?? I thinking on printing it but after my printed gear to papper shreder I have no hopes it will last.

Plewu Gracz - 답글 공유

Thanks for the guide on the Deebot 900 wheel replacement. Though it has partially helps to resolve the problems, but unable to find a wheel replacement. Hope you can help too.

wong CS - 답글 공유

The rubber tires on my Deebot have worn through. Does anybody have a source for rubber tire replacement? The company wants to sell me two entire wheel assemblies. I find that unreasonable.

akobelan - 답글 공유

댓글 쓰기

조회 통계:

지난 24시간: 8

지난 7일: 40

지난 30일: 221

전체 시간: 50,962