소개
If your Evercade EXP (model FG-HHEX-HHC-USA) screen is cracked, unresponsive, displaying visual glitches, or not turning on at all, the display assembly may need to be replaced. This guide will walk you through the process of safely removing and replacing the screen.
Before starting, power off the device completely and disconnect it from any charging cables. You will need to work carefully, as the screen and its connecting cables are fragile and can be easily damaged if handled improperly. It is recommended to use proper tools and avoid excessive force when opening the device.
Take caution when separating the screen from the body, as adhesive may be present and delicate ribbon cables connect the display to the motherboard. Damaging these components can make the device unusable.
If you are unsure whether the screen is the issue, try troubleshooting first—such as restarting the device or checking for external damage—before proceeding with replacement.
필요한 것
-
-
Lay the device on a flat surface, with the screen facing the sufrace.
-
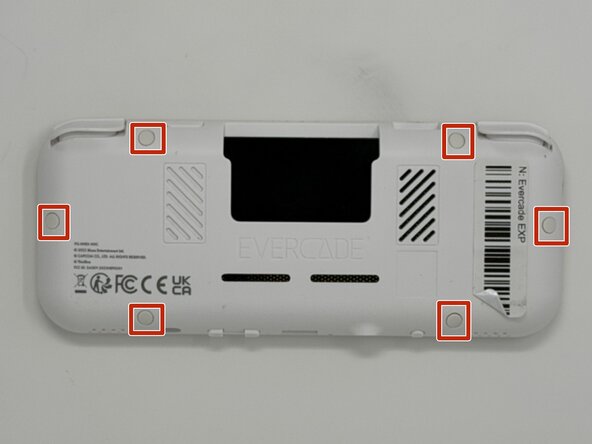
Using angled tweezers, remove the six rubber screw covers from the sockets.
 FixBot에 문의하기
-
-
-
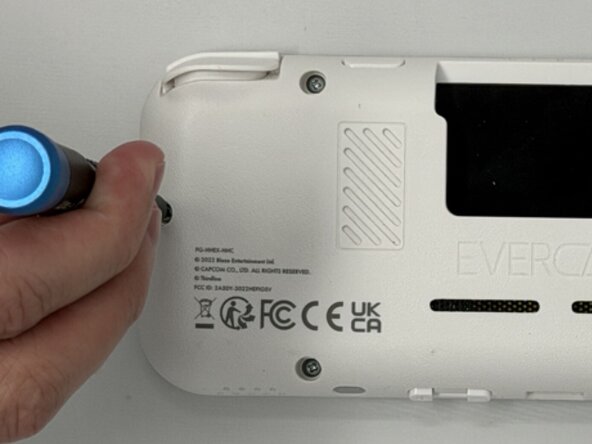
Using a Phillips #00 screwdriver, remove the six 8 mm screws on the lower case.
-
-
-
-
Flip the device so the screen is facing you.
-
Four hidden retaining clips hold the pieces together even near each corner of the screen.
-
Insert a Jimmy into the seam located between the faceplate and the shell.
-
Move the a Jimmy toward the screen until you find the first clasp. Move the handle of the jimmy tool up to pop the faceplate free from the clasp.
-
Repeat until for each of the four clasps to fully release the faceplate from the shell.
-
-
-
Flip the faceplate away from the shell carefully. The faceplate is still connected to the motherboard via a ribbon cable.
-
Flip up the locking flap securing the display ribbon cable, then use tweezers to disconnect the ribbon cable.
-
-
-
To remove the display from the screen, insert a spudger into the gap between the screen and display at the corner.
-
Slowly move the spudger along the seam until you reach the opposite corner.
-
Use your hand to gently pull the screen away from the display which will break the adhesive seal.
-




To reassemble your device, follow the above steps in reverse order.
Take your e-waste to an R2 or e-Stewards certified recycler.
Repair didn’t go as planned? Try some basic troubleshooting or ask our Answers community for help.

팀

Utah Tech University, Team 1-6, McMurrin Spring 2026 Utah Tech University, Team 1-6, McMurrin Spring 2026 회원
UTAHTECH-MCMURRIN-S26S1G6
3 회원들
안내서 7개를 작성함
