소개
One of the most common issues that plagues tablets and other mobile devices is that their battery degrades overtime. This results in the device being unable to hold a charge. In this case, replacing the battery is the best option.
필요한 것
-
-
Turn the PC on its back with the screen facing down and pull on the piece of plastic shown in the image. Use your fingernails to prod into the depression where the two plastic covers meet.
 FixBot에 문의하기
-
-
-
Using the 00 Phillips screwdriver remove the two screws in the corners.
-
Using your left hand pull at the exposed section of the PC while simultaneously pushing the right with the thumb of your other hand. This will release the plastic clips allowing back cover to slide off, as shown from the picture
-
-
-
-
Remove the tape covering the metal shield as shown in the image.
-
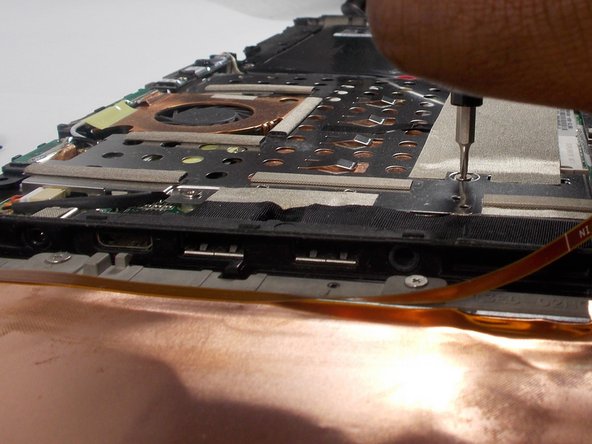
Remove the 12 screws using the Phillips #00 screwdriver.
-
Dislodge the shield by pulling the prongs away from underneath the battery. The shield should come completely off.
-
-
-
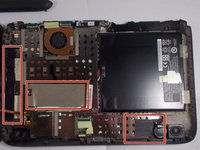
Remove tape from the side of the battery.
-
Disconnect the battery from the motherboard.
-
Gently remove the battery.
-


To reassemble your device, follow these instructions in reverse order.
팀

UMass Dartmouth, Team S2-G1, Peak Fall 2018 UMass Dartmouth, Team S2-G1, Peak Fall 2018 회원
UMASSD-PEAK-F18S2G1
3 회원들
안내서 5개를 작성함