소개
If your Flydigi Apex 5 controller's back paddles do not respond to inputs, the cause may be from the controller's back paddle daughterboard. Taking the back paddle daughterboard out of the controller assembly and replacing it, or ensuring that everything is connected during a disassembly, may fix any issues with paddle response.
Follow this guide to learn how to access the Flydigi Apex 5's Back Paddle Daughterboard.
필요한 것
-
-
Orient the controller so that its back is facing you.
-
Apply firm downward pressure to remove both the M3 and M4 back paddles.
 FixBot에 문의하기
-
-
-
Turn the controller over so its front faces you.
-
Remove the D-pad by firmly pulling it away from the body of the controller.
-
-
-
Remove the clear, magnetically-adhered faceplate of the controller by firmly pulling it away from the body of the controller starting from the edge of the faceplate.
-
-
-
-
Remove the small cover from the rear of the controller by pushing it upward.
-
Unscrew the two 5.8mm screws behind the battery cover using a Phillips #0 screwdriver.
-
-
-
Turn the controller over so its front faces you.
-
Unscrew the six 10mm long screws from the front of the controller using a Torx T6 screwdriver.
-
-
-
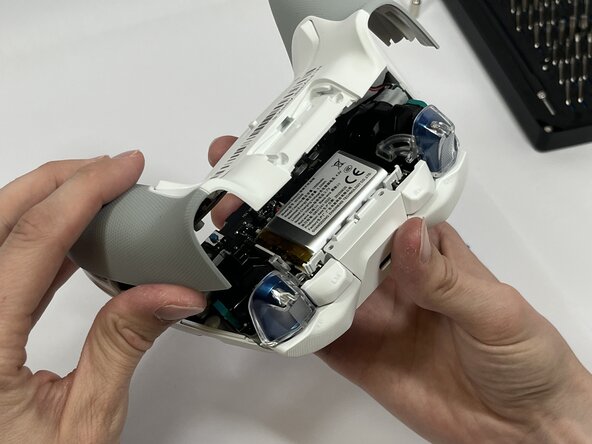
Insert the plastic opening tool between the top and bottom plastic controller molds, then pry until the two pieces separate.
-
-
-
Carefully remove the back paddle ribbon cable with the angled tweezers or spudger.
-
-
-
Remove the four 5mm screws from the back paddle daughterboard with a Phillips #00 screwdriver.
-
Carefully lift the board to remove.
-




To reassemble your device, follow these instructions in reverse order.

팀

Idaho State University, Team 1-3, Watkins Spring 2026 Idaho State University, Team 1-3, Watkins Spring 2026 회원
ISU-WATKINS-S26S1G3
4 회원들
안내서 5개를 작성함
