소개
This is a top speaker replacement guide for the Fusion5 5.5 Gen II.
If the top speaker’s audio of your device has decreased or does not work at all, you may need to replace it with a new one.
If you would like more information about symptoms, please refer to this page: troubleshooting page.
This replacement guide contains a few steps that require delicate handling, such as flipping a small locking mechanism that secures the cable of a component.
Before you take anything apart, make sure to power off your device and ground yourself.
For any electronic waste, please refer to the EPA website for proper device disposal.
필요한 것
-
-
Hold the device with the screen facing away from you and the back of the device facing you.
-
Locate the groove at the bottom corner of the device.
-
Begin prying the back cover of the device off from the groove and working your way around the outside edges of the device.
-
-
-
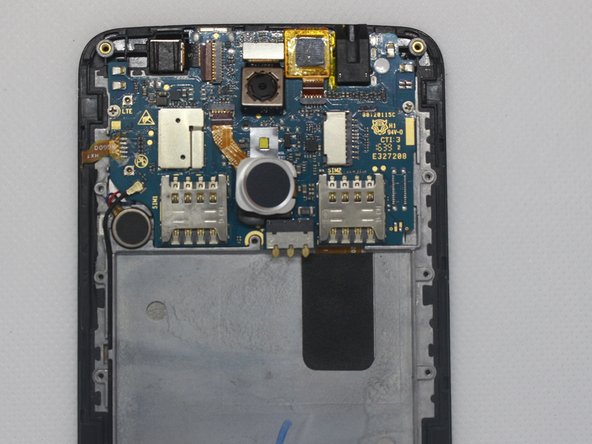
Remove thirteen 3mm Phillips #00 screws from the midframe.
-
Remove the single 5mm Phillips #0 screw below the camera.
-
-
-
-
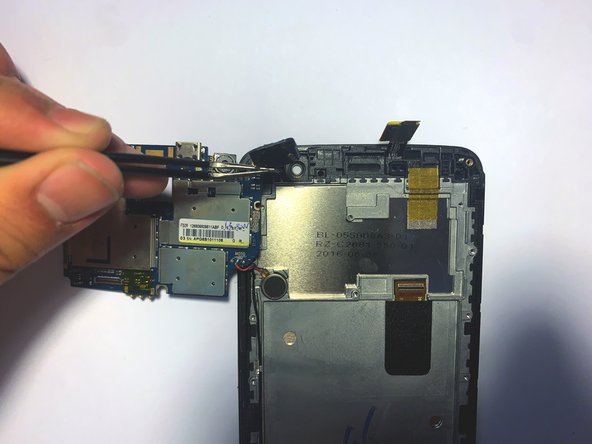
Using tweezers, flip the brown tab securing the ribbon cable.
-
Grab the ribbon cable with the tweezers and pull it from its socket on the motherboard.
-
-
-
Using tweezers, grasp the speaker at the top of the phone and gently pull it out of the device.
-


To reassemble your device, follow these instructions in reverse order.
To reassemble your device, follow these instructions in reverse order.

팀

Embry-Riddle Aeronautical University, Team S8-G1, Salas Fall 2019 Embry-Riddle Aeronautical University, Team S8-G1, Salas Fall 2019 회원
ERAU-SALAS-F19S8G1
4 회원들
안내서 14개 작성하였습니다