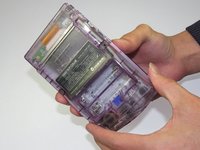
주요 콘텐츠로 건너뛰기

Game Boy Color LCD Display Replacement

필요한 것

  1. Game Boy Color LCD Display Replacement, Battery: 1 단계, 이미지 2개 중 1개 Game Boy Color LCD Display Replacement, Battery: 1 단계, 이미지 2개 중 2개
    • Locate the battery compartment on the back of the Game Boy Color.

    • Push down on the tab and hinge the cover downwards and outwards to remove the battery cover.

  2. Game Boy Color LCD Display Replacement: 2 단계, 이미지 1개 중 1개
    • Remove the batteries from the battery compartment.

  3. Game Boy Color LCD Display Replacement, Back Housing: 3 단계, 이미지 1개 중 1개
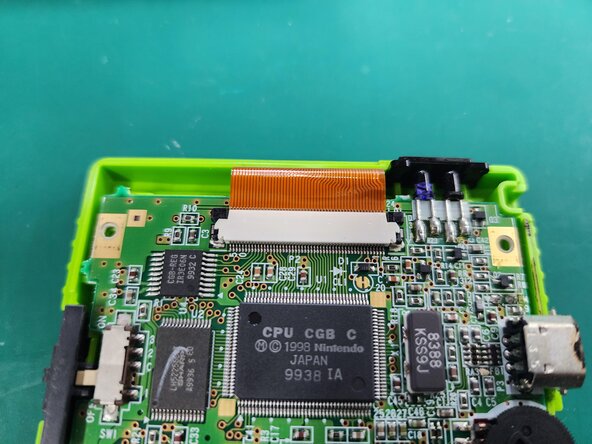
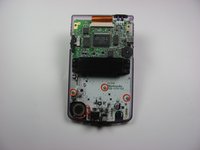
    • Using a Y1 screwdriver, remove the six screws on the back of the device as pictured. The bottom two screws are located inside of the battery compartment.

  4. Game Boy Color LCD Display Replacement: 4 단계, 이미지 2개 중 1개 Game Boy Color LCD Display Replacement: 4 단계, 이미지 2개 중 2개
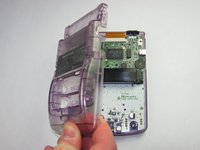
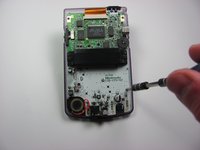
    • Gently lift and separate the back housing from the rest of the device. Now you've got the back housing out!

  5. Game Boy Color LCD Display Replacement, LCD Ribbon Cable: 5 단계, 이미지 3개 중 1개 Game Boy Color LCD Display Replacement, LCD Ribbon Cable: 5 단계, 이미지 3개 중 2개 Game Boy Color LCD Display Replacement, LCD Ribbon Cable: 5 단계, 이미지 3개 중 3개
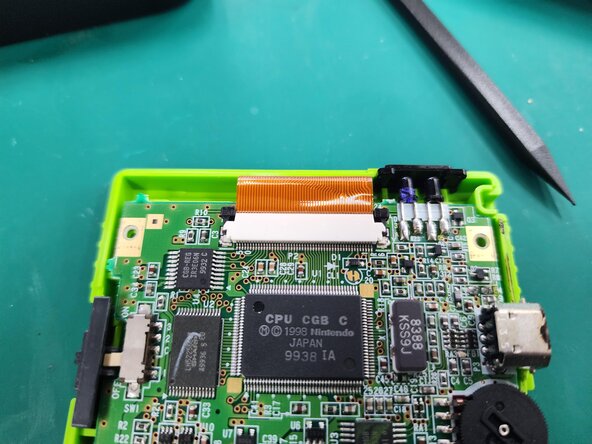
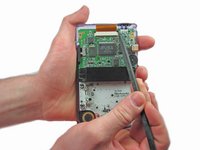
    • Push up on the tabs on either side of the ribbon with a spudger.

  6. Game Boy Color LCD Display Replacement: 6 단계, 이미지 2개 중 1개 Game Boy Color LCD Display Replacement: 6 단계, 이미지 2개 중 2개
    • Gently remove the ribbon cable from the port

  7. Game Boy Color LCD Display Replacement, Motherboard: 7 단계, 이미지 2개 중 1개 Game Boy Color LCD Display Replacement, Motherboard: 7 단계, 이미지 2개 중 2개
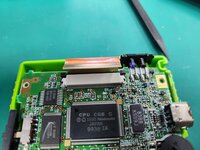
    • Using the Phillips #1 screwdriver, remove the 3 screws shown in the picture.

  8. Game Boy Color LCD Display Replacement: 8 단계, 이미지 1개 중 1개
    • Gently lift the motherboard from the front housing.

  9. Game Boy Color LCD Display Replacement, LCD Display: 9 단계, 이미지 2개 중 1개 Game Boy Color LCD Display Replacement, LCD Display: 9 단계, 이미지 2개 중 2개
    • Gently pry and lift the LCD Display from the front panel.

    • Twisting the front casing may help gain more leverage.

결론

To reassemble your device, follow these instructions in reverse order.

다른 41명이 해당 안내서를 완성하였습니다.

작성자

8다른 기여자 명과 함께

Ajmal Puyehgar

회원 가입일: 01/18/13

556 평판

안내서 1개를 작성함

Cal Poly, Team 19-47, Regan Winter 2013 Cal Poly, Team 19-47, Regan Winter 2013 회원

CPSU-REGAN-W13S19G47

4 회원들

안내서 61개를 작성함

8가이드 댓글

I broke my screen doing this. Be really gentle!

Andrew - 답글

Broke my screen just like the last commenter. These instructions are retarded. DON’T pry the screen from the back. Take the front cover off and PUSH it from the front. The circuity for the display is encased in the thin piece of glass all around the LCD. Prying WILL break it!

VoopTech - 답글

Hi, how to remove the front safe screen? Do i need a sucker?

Thanks

SteR -

Horrible instructions, TBH.

Michelle Fernandez - 답글

Broke the plastic around the screen and doesn't turn on anymore -_- . Guess now I can put a backlit in but not how I wanted it to go

Daniel Guerrero - 답글

댓글 쓰기

조회 통계:

지난 24시간: 20

지난 7일: 107

지난 30일: 402

전체 시간: 62,312